
Since we just started our kitchen renovation and have been tearing apart our whole first floor (our flooring is getting replaced and refinished along with the kitchen) I took liberties with the word “BUILD” in this challenge!! However, I DIYed something I have been meaning to do FOREVER, that is truly an easy and DO-able DIY that anyone can tackle, even if you don’t have a lot of tools. You can find the supply list at the end of this post. Affiliate links are included in this post for your convenience. Read more about affiliate links here.
DIY Necklace Hanger
![]()
Recently I found two mirrored wall mounted jewelry boxes at Marshalls and LOVE them – I hung them next to my little vanity table, one with my gold necklaces and the other with silver based necklaces.


The only problem is that they are only about 12″ in length so my long necklaces didn’t fit in them. That’s were the tangled mess in my drawer came into play. So what’s a DIYer to do? Make a necklace hanger to suit my needs, that’s what.
Look how simple this DIY necklace hanger is!

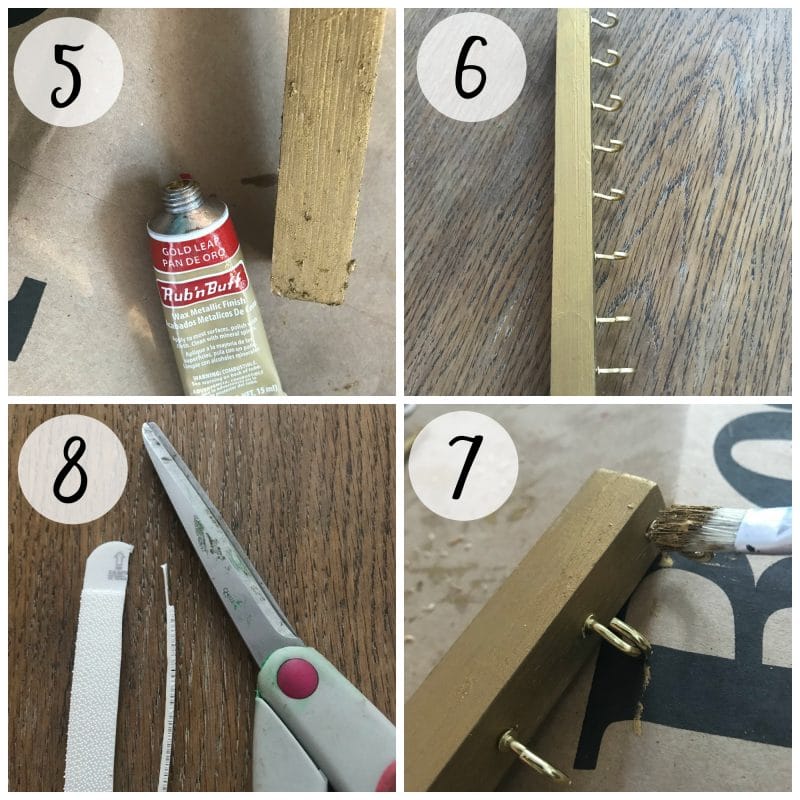
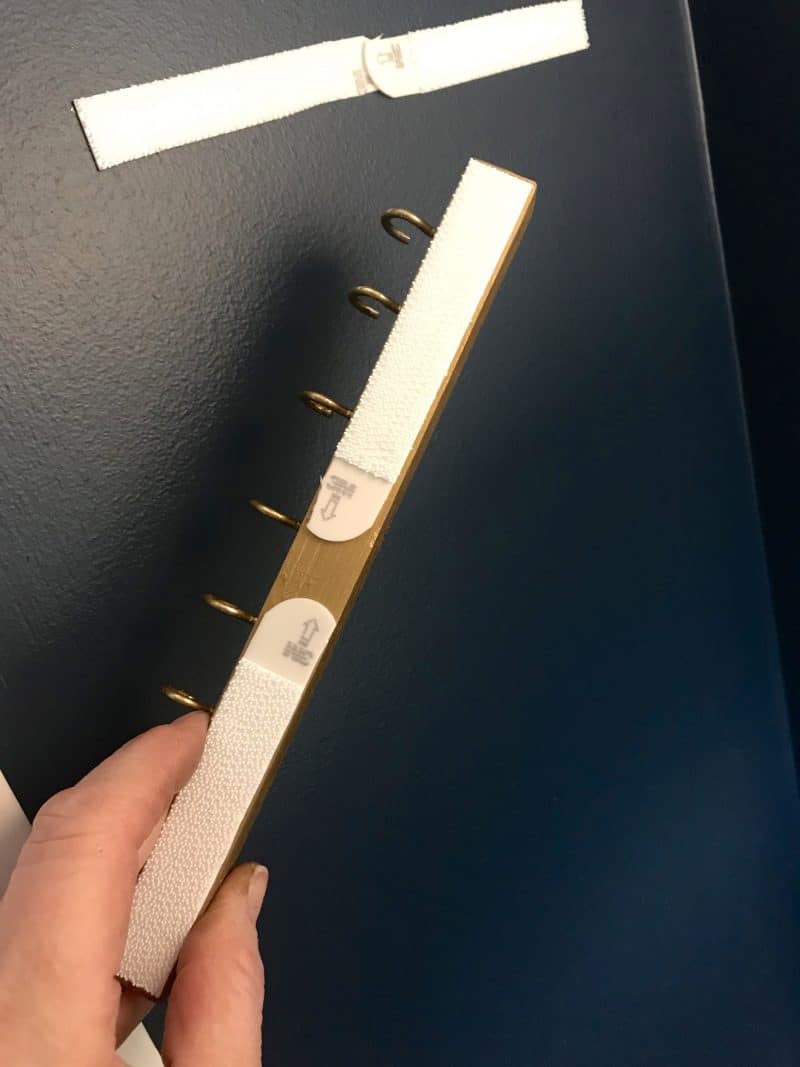
I initially cut the 3M strips to the exact width of the trim like this…..

SUPPLIES
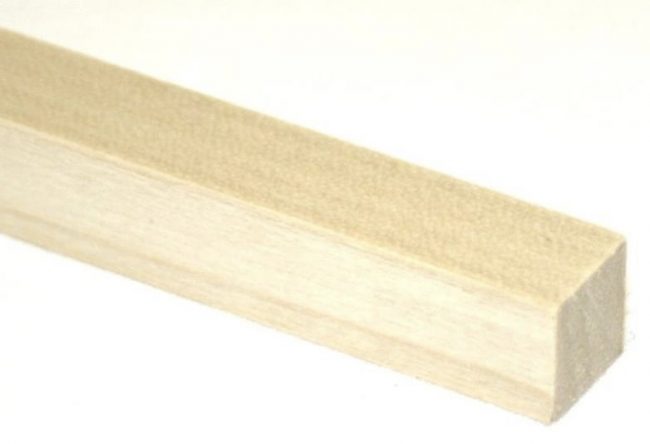
Square poplar dowel
5/8″ brass cup hooks
Gold Leaf Rub n’Buff
3M Hanging Strips
Saw of some sort – I have an older model of this saw and love it; this saw and box is fine for beginner DIYs
Drill/driver
Drill Bits
Cheap Paint Brush – I like these sets for throw-away brushes (Rub n’Buff hardens on the brush)
This square poplar dowel can also be found in the trim aisle of Lowes under the long pieces – they usually stock “craft” wood in 36″ lengths. Super inexpensive and I like the shape for this project – it looks like a metal bar when Rub n’Buffed.
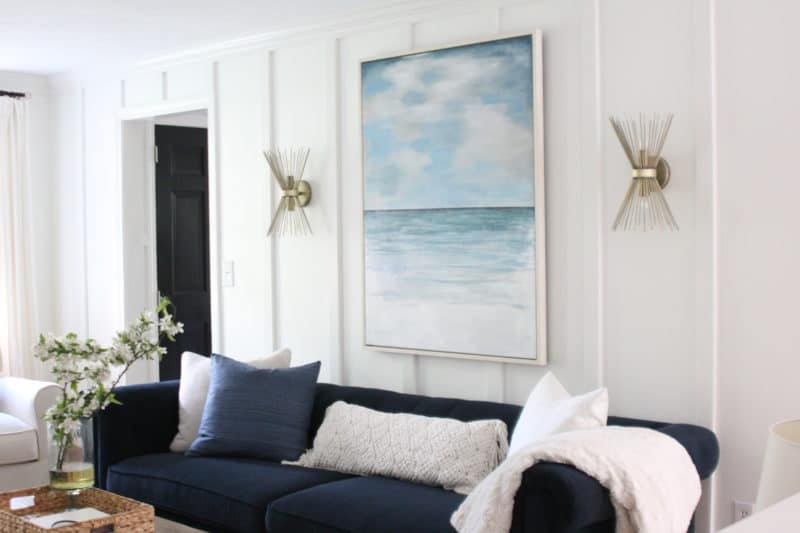
Don’t you love how jewelry can double as art? Hanging it on your wall is pretty and functional!
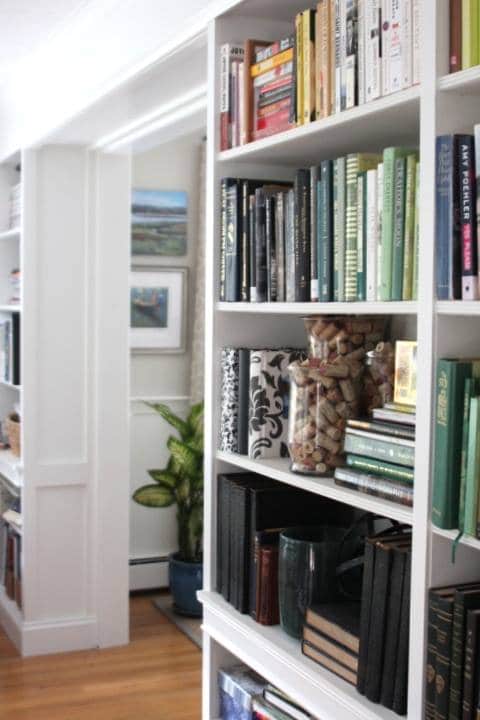
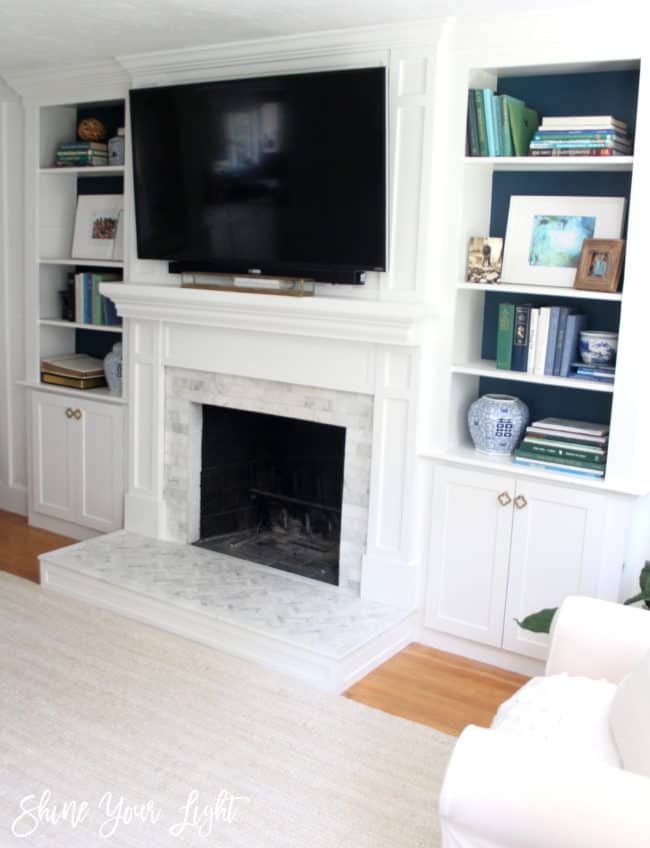
check out the wall of bookcases
My DIY comrades have some great projects to deliver today – be sure to take a peek around at all these great blogs and see their smart ideas to organize your home!
1905 Farmhouse, Abbots at Home, Bitterroot DIY, By Brittany Goldwyn, Creative Ramblings, Cribbs Style, Delicious & DIY, DIY Beautify, DIY Danielle, Dukes and Duchesses, Girl, Just DIY, Happily Ever After, Etc, Health, Home & Heart, House by the Bay Design, House on Longwood Lane, Just Measuring Up, Kenya Rae, Little Bits of Home, Living Letter Home, My Kitchen My Craft, Pinspired to DIY, Red Cottage Chronicles, Refashionably Late, Renovating Mapleson Manor, Savvy Apron, Shine Your Light, Shrimp Salad Circus, Songbird Blog, Southern Revivals, T.Moore Home, The DIY Dreamer, The DIY Village, The Frugal Homemaker, The Handyman’s Daughter, Two Feet First, What Meegan Makes, Zucchini Sisters
Weekender | Vol. 5
A roundup of loveliness, tips and tricks, and good things seen, heard and found this week.
Affiliate links may be included in this post for your convenience. Read more about affiliate links here.
“When there’s no one left on earth to love you quite so unconditionally.” – A touching tribute that will make you smile.
This trick to prevent leftover guacamole from browning is wacky but I tried it and it actually works!
I’m trying to combat dry winter skin by drinking more water – supposedly about half your body weight in ounces is best. Read about how the Mayo Clinic weighs in on this topic.
Even with drinking a lot of water, eating a lot of whole foods, getting a decent amount of sleep every night and staying out of the sun, I’ve really noticed a change in my skin these last few years of my mid-forties. Genes play a huge part in how your skin ages and despite doing everything right, some unwelcome lines are taking up permanent residence on my face. I’ve tried a few different skincare lines through the years, but few months ago I bought this retinol oil by Colleen Rothschild and LOVE it. This line is pricey but I want to add some more products to my arsenal over time. I just ordered the “Discovery Collection” to try out a few products before committing to them. The Face Oil No. 9 and the Extreme Recovery Cream are huge CR fan favorites.

Do you have a favorite skincare line you use?
I’ve been enjoying seeing snippets of Rhoda’s kitchen renovation on Instagram – how pretty is that green paint color???
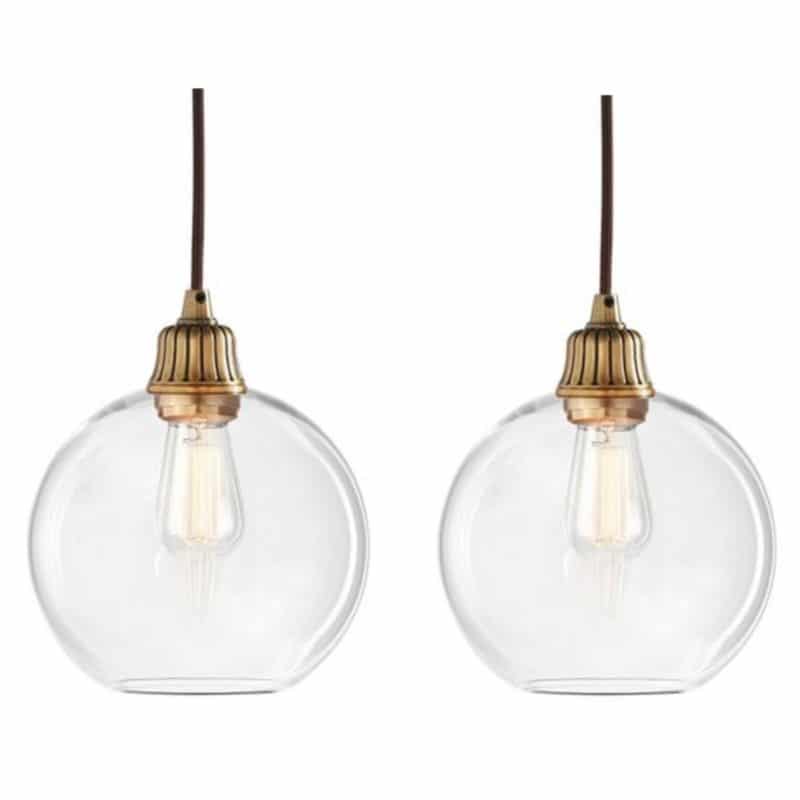
On our kitchen front, I’ve been agonizing over the subject of pendant lights for over the peninsula. One of the options on my short list is from Pottery Barn and with their 20% sitewide friends & family sale going on until tomorrow, it’s now or never! I’m aiming for something with glass, plus a touch of black AND antique brass but I’m not sure I want to go with the globe shape. What do you think?
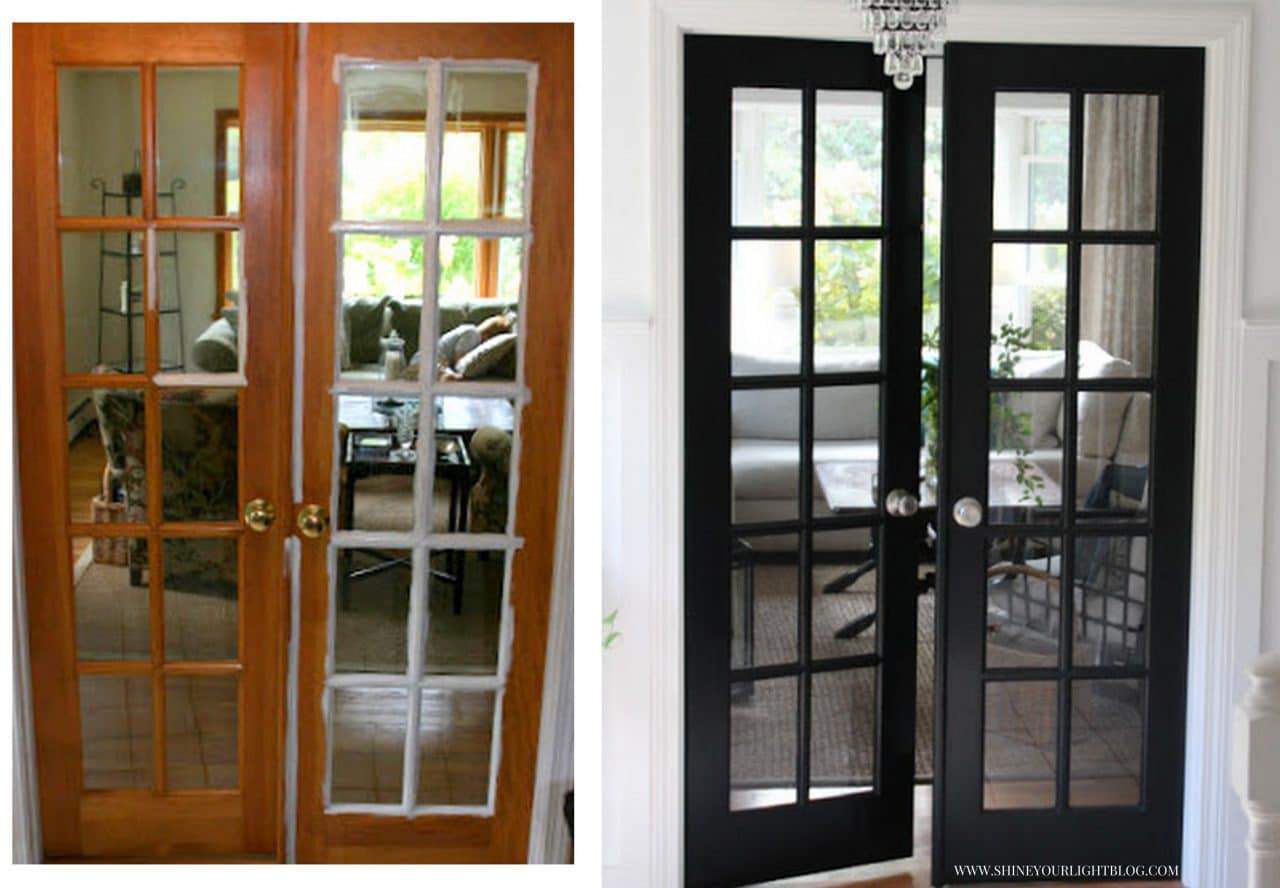
Our quest to find two old doors for our pantry has come up short – we’ve seen tons of pretty doors at salvage shops and on Craigslist and Facebook Marketplace, but none have been quite the right size or style we were looking for. Instead I’m opting to use pretty new doors and old hardware, and when I saw these beauties on Etsy it was meant to be – that brass plate design is exactly the same as the moulding I’m adding to our dining room ceiling, and that genuine patina will help to bring a little soul to our new kitchen. I bought them from this shop – there are lots of vendors on Etsy selling beautiful one-of-a-kind old treasures. I can’t wait for them to arrive!


Shining the light on an important issue – the real impact of buying counterfeit goods. As an influencer who routinely shares products here on Shine Your Light, I think it’s my duty to pass on the facts about this practice.| While I’m on the topic of Etsy, I’ve been learning more about how sales of counterfeit goods on here as well as Ebay, Amazon and thousands of websites are incredibly dangerous and support human trafficking, child labor and even terrorism. Listen to this relatively short (12 minute) eye opening TED Talk on the subject or watch The True Cost on Netflix (see the trailer here).
I am guilty of buying knock-off goods (everyone I know had a Kate Spade knockoff bag or two 15 or 20 years ago). Even the DIY and interior design world is not immune to this industry: tools are commonly counterfeited (the Forearm Forklift – a strap for moving large pieces of furniture – was duped and sold on Amazon for example) and there are tons of knock-off designer fabrics sold as pillow covers on Etsy. There’s nothing lovely about this subject but the fact that we can we can combat this evil by educating ourselves and sharing with others is a good thing.
To end on a lighthearted note, this totally made me laugh out loud!
Hope you have a great week ahead friends!

A Few Projects On The Horizon For 2019
How is your new year going so far? I hope it’s off to a great start!
This year is going to be a messy one over here – but hopefully some beauty will emerge through the dust and demolition! I have a lot to share with you this year that I hope will serve to encourage, inspire, or light a fire for you! I would not be a DIY and design blogger today, doing things like remodeling our half wall and column, tiling our bathroom floor and helping others to design and improve their homes, if a decade ago I hadn’t stumbled across blogs that truly empowered me and gave me the courage to go after some these pursuits. My very favorite part about blogging is sharing projects that resonate with many of you and that you’ve used for the betterment of your own homes! I hope you will enjoy the fun things coming this year!
Here are a few things you can expect to see…..
The Kitchen Renovation!

After oh so many starts and stops, YES!! OUR KITCHEN RENOVATION IS FINALLY AND TRULY HAPPENING! I’ll tell you all about it in a post this week, because there is so much to dive into there, but obviously it didn’t get done by the end of the year as I was gunning for in the fall (was I insane?) Today part of a wall is coming down, the cabinets are ordered, appliances are en route, contractors are lined up and there is so much to come about that long awaited project, I can’t wait to share it all with you!
The days are numbered for these baloney countertops, hallelujah!!!!!

The Floor Renovation!

This might be even bigger than the kitchen renovation! The 80s tile floor is going along with two layers of vinyl flooring in our kitchen and hallway, and will be replaced with white oak hardwoods to match our living room, dining room and family room. The hardwoods in those rooms are extremely worn out (and have yellowed through the years), so they’ll be sanded – then all the floors will be stained and sealed!
To make this all happen, we have to move ALL the furniture from our entire first floor OUT, take down all the curtains, art and mirrors and seal off the bookcases (because there is no way I’m packing up all those books!). Updating our floors is going to be HUGE and really change the feel of our whole house, and I cannot wait!!
The Stairs
Talk about a domino effect!! We waited to do our floors until the kitchen renovation was happening so we wouldn’t have to live through that kind of upheaval twice (or have to patch the kitchen floors if the layout changed), and I knew I’d have to address the stairs when this time came also.
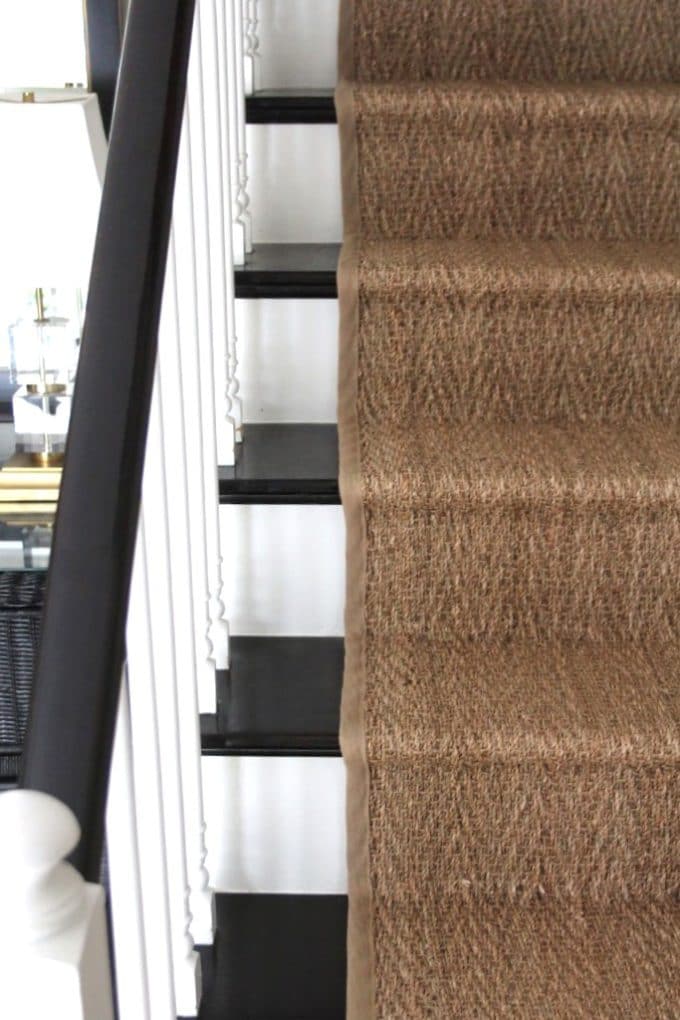
I stained these stairs ebony because after ripping off the carpet from the previous owners and then stripping and sanding the treads, it was evident that pets had peed on the steps many times. They were horribly stained and I gave up trying to sand the discoloration out. I love the look of the dark treads with the white risers and spindles and the seagrass runner, but have found the ebony shows everything – literally every speck of dust. Since we’re doing the floors I figured it is time for me to re-sand the steps and staining them to match. PHEW! I’m tired just thinking about doing that again!
Since I’m doing the treads over, I’m thinking this might be time to tackle another carpentry project I’ve been mulling over – changing out our newel post!
One More Big Project – The Deck Makeover!
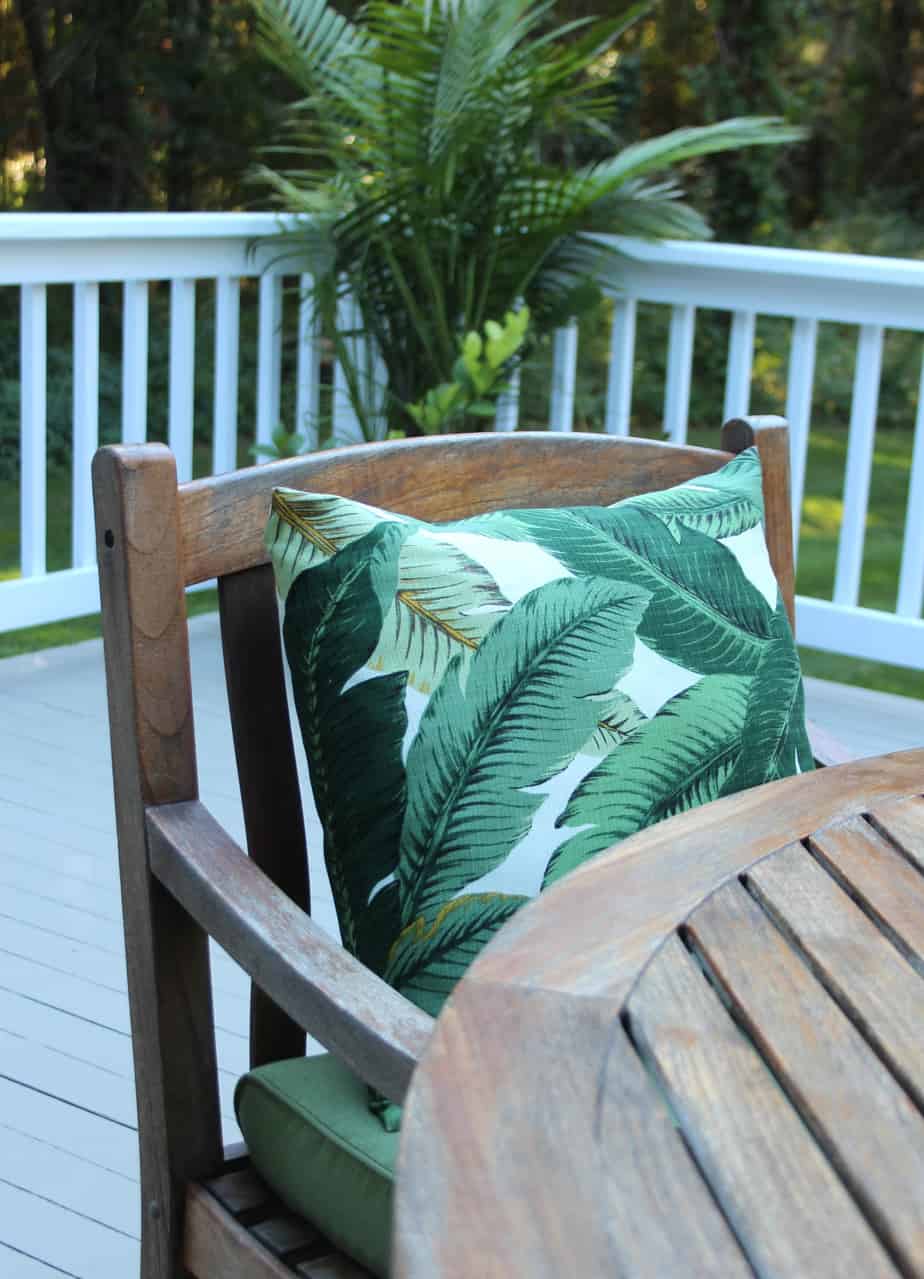 In the warmer weather we will definitely be taking on our deck this year because it’s currently a complete hazard and unusable. The grey stained decking is mahogany, so a few years ago we took a contractor’s advice and had it restored, along with replacing a ton of rot on the railings and having the steps rebuilt, but we probably should have just torn it down then. The deck is original to this 34 year old house and is literally falling apart – there are currently three huge holes like this —
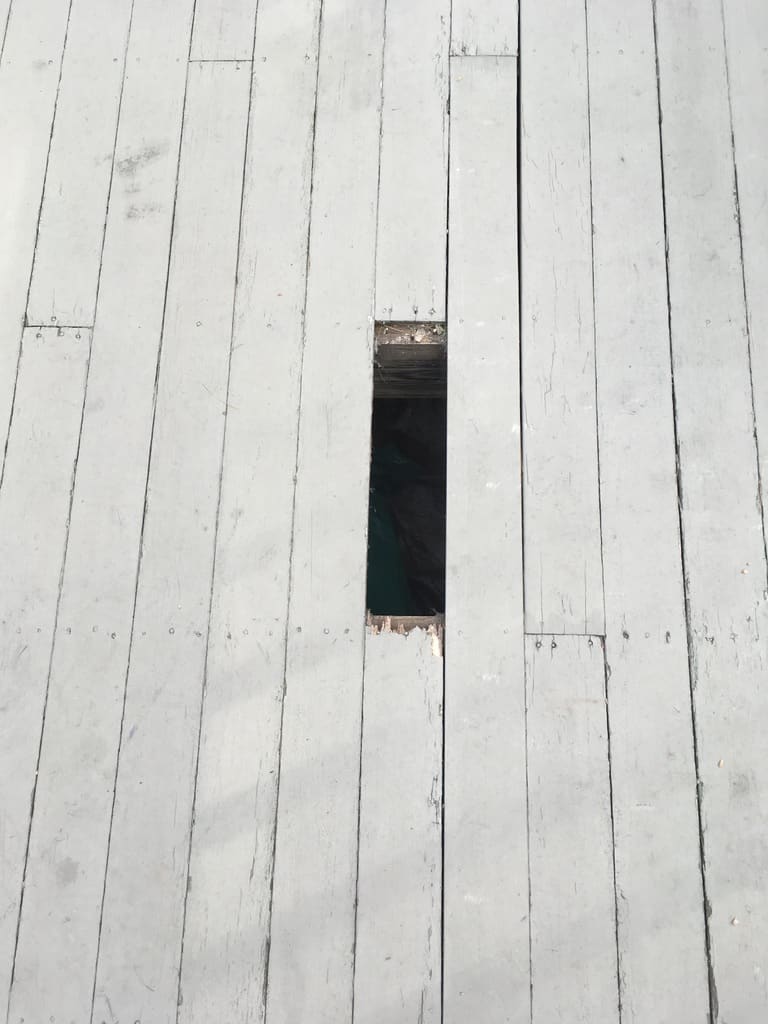
…and we’re worried someone is going to get seriously hurt walking across the deck if a rotted piece gives way. After the kitchen and floors, there isn’t going to be a lot left in the home improvement budget this year, so this will most likely be a DIY demo and rebuild!
Along with these projects I’ll be following up on some rooms I’ve been working on over the last year…
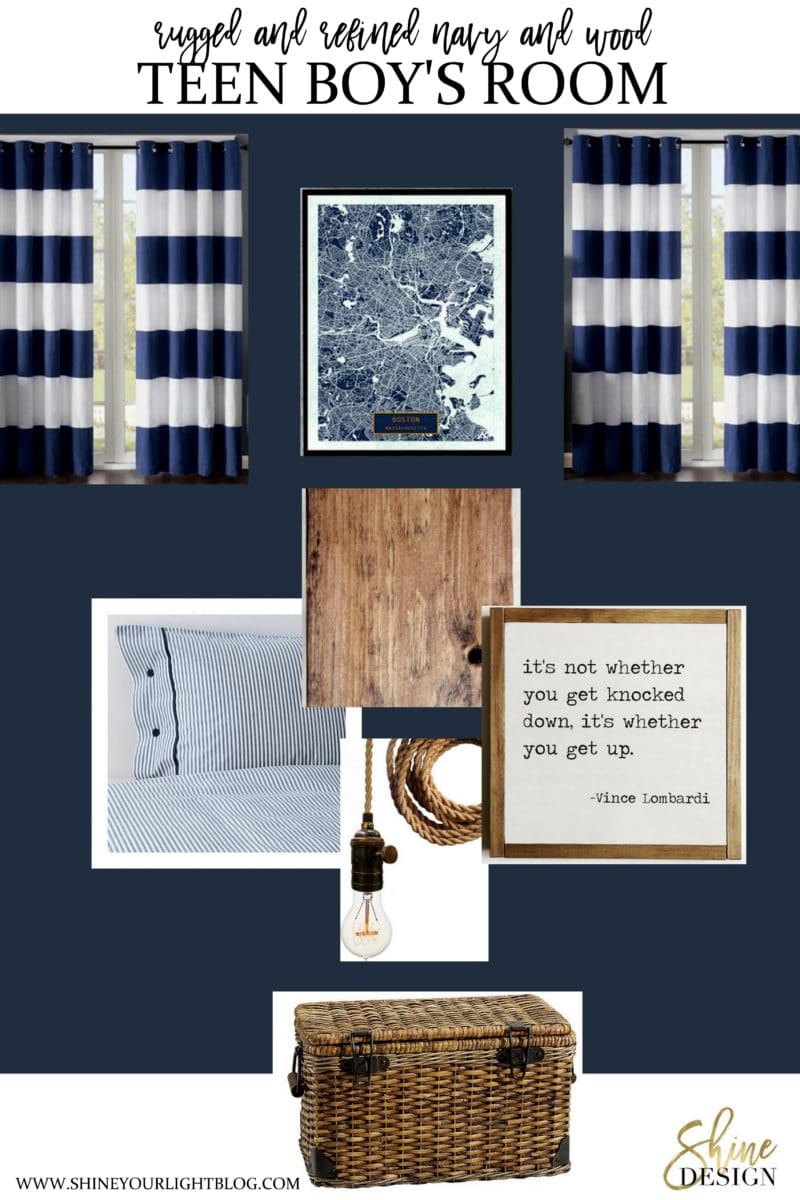
My son’s bedroom (that I started one year ago!)
…and the crazy project I raced to do before the holidays, adding moulding to my dining room walls and ceiling (because when you’re having family come to stay over Christmas and hosting both Christmas Eve and Christmas Day, it’s always good to add to the craziness! PS it wasn’t finished in time – no one cared and we still had a happy Christmas!)
ALSO, THREE NEW SERIES!
Better Way Friday is a collaborative organization, tips and tricks series inspired entirely by a question I asked readers on the Shine Your Light Facebook page. So many of you had clever ideas to share that I thought it was high time you have a voice on this blog!! On Fridays I’ll ask you all how you tackle a specific part of your home and the next week I’ll share some of your responses along with what I did. My aim is to do this week to week for the entire year, so together we can all tackle areas of our home one small project at a time. Are you in?? Be sure to follow the SYL FB Page to chime into the discussion and share your best ideas.
Design, DIY, Splurge & Save is a take off of the Paint Color Crush design board series I did here for a while. In my 2018 survey I heard from a bunch of readers that you enjoyed those posts for ideas on refreshing or updating a space with highs and lows. With that in mind I’ll be focusing on recommendations on where to spend your $$$ as well as budget friendly options and projects you can tackle yourself, and of course I’ll still be throwing my favorite paint colors out there too because you know I love me some paint!
Finally, this year I’ll be joining other bloggers for a monthly DIY challenge. Often these challenges will be directly related to the above projects and series – the first one is coming mid-February and the topic is Build To Organize. Stay tuned for a do-able DIY to help you control the chaos in your own home!
As always, thank you for following Shine Your Light and being a part of this community dedicated to the love of all things home! I’m happy you’re here and hope we can tackle some great things together this year!
Hearty Beef & Barley Soup + 4 More Delicious Soups To Make This Winter
What is better on a cold winter’s night that a steaming bowl of soup? Along with crusty bread, a glass of red wine and a roaring fire I can’t think of a better way to end a chilly day! There is just something so intrinsically cozy and homey about soup; this time of year I make a batch at least once a week, and today I’m excited to be joining my home-loving friends Mary Ann of Classic Casual Home, Annie of Most Lovely Things, Cindy of Rough Luxe, and Celia of After Orange County to share a few of our all time favorite soup recipes with you. 
For a substantial dinner that even my teenagers enjoy and find satisfying, this hearty beef and barley soup is a winner!

Barley is an excellent source of fiber and can help lower cholesterol, aid in weight loss and keep blood sugar in check, but it’s the STEAK in this recipe that my family really loves. It’s flavorful and tender even after reheating! Best of all, this recipe makes a ton so there’s enough for lunch the next day or two. Mark and I both work from home most days and get pretty fired up about leftovers!!
Good leftovers call for a quick lunch date!

This rich and hearty beef and barley soup is simple to make and definitely a crowd pleaser, plus your house will smell so good! Affiliate links are included in this post for your convenience. Read more about affiliate links here.
Hearty Beef & Barley Soup
Ingredients
- 1 tablespoon or so of olive oil (I just swirl in the pan and estimate)
- 2 lbs. petite sirloin steak
- salt and pepper to taste
- 1 medium onion, diced
- 2 ribs celery, diced
- 2 carrots or 1 cup baby carrots, diced
- 4 medium cloves of garlic, pressed or finely minced
- 64 oz. beef stock (or beef bone broth)
- 2 springs fresh thyme (or 1/2 teaspoon dried)
- 1 bay leaf
- 1 cup pearl barley, rinsed
- 8 oz. (1 cup) beef stock if reheating
Directions
- Cut the steak into 2″ chunks with the fatty rind on. Season generously with pepper and lightly with the salt (stock or broth is usually on the salty side so go sparingly on it here).
- Heat a dutch oven (see note below) or stockpot over medium-high heat and add olive oil. When the olive oil shimmers a bit, add the steak in an even layer and sear for 1-2 minutes until browned, then turn over and sear the other side for 1-2 minutes until browned. Transfer to bowl.
- Add the onion, celery and carrots to the pot and saute 4-5 minutes, scraping up browned bits, until the onion starts to become translucent, then add the minced garlic and stir. Add a bit of olive oil to the pan if the veggies are sticking to the bottom.
- While the veggies are cooking, transfer the steak to a cutting board, reserving juices, and slice into bite sized pieces (1″ or less), trimming off the fat as you go.
- Add the beef stock, thyme, bay leaf, barley, chopped steak and reserved juices to the pot and bring to a boil, then reduce heat to medium low and simmer for about 45 minutes or until the barley is tender.
- Taste and add salt and pepper as needed.
- Serve with a really good bread to soak up all that goodness (we cannot resist the White Mountain bread at our market when it is still warm upon our shopping trip!!)
Notes
- Searing the steak creates so much flavor, and keeping the pieces rather large then chopping them after makes turning them over in the pan quicker and easier!
- I have used leftover beef tenderloin and pot roast to make this recipe. A lot of beef and barley soup recipes call for stew beef or other cuts of beef that require a lot of simmering to make the meat tender. By all means if you have this in your fridge or it’s on sale, give it a try. Depending on the cut of meet it might require a longer simmer time to tenderize the meet. However, the petite sirloin that this recipe calls for was recommended to me by my market’s butcher (Erlande!! He’s the best!) for it’s flavor and tenderness in stews and soups. It’s more expensive than stew beef but is a tastier cut of beef and makes the cooking time shorter. The steak definitely elevates this soup to a tender, flavorful level of deliciousness that will have you making it again and again!

- If you have finicky eaters, chop the vegetables very finely. After rough cutting veggies I often mince them finely with a food chopper or food processor and they are not as distinguishable in a soup. I am unashamed to say I hide vegetables in food I cook to get some wholesome goodness into the picky eaters in my house!
- The barley absorbs a lot of the liquid if it sits for a while before being served or is refrigerated. Add more beef stock as need when reheating, bringing to a boil and then turning down to a simmer before serving.
Dutch Ovens and Why You Need One
Do you have and use a dutch oven? Dutch ovens are hailed by many chefs as one of the most essential and versatile kitchen tools because you can do everything in them from braising meat to simmering stew and even baking bread. They can go from stovetop to oven and a good dutch oven will last for years. I typically use my 6 quart enameled dutch oven for soups and everyday cooking. The light colored enameled interior gives me the ability to really keep an eye on how brown veggies or meat are getting while they cook, and I often sear meat on the stovetop then throw it in the oven to roast while I finish up the rest of dinner.
The Le Creuset line of dutch ovens is probably the most well known and coveted brand, and they are excellent quality, but don’t fret if it’s not in your budget. Both Epicurious and Bon Appetit highly recommend the Lodge dutch oven that I have and love – it’s is a fraction of the cost of the Le Creuset version, has fantastic heat distribution, is extremely durable and comes in all sorts of pretty colors (I have the blue one – be careful if you order, some of the colors are more expensive than others!) Check them out Amazon if you’re a Prime member, or try Target if you like to take advantage of your Red Card 5% off like I do (Target only has red or blue though). This is definitely one of the most used items in our kitchen!

Don’t Miss These Soup Favorites Too!
I am so looking forward to reading the other soup posts today, don’t they sound amazing?
After Orange County • Bread and Cabbage Soup with Sage Butter
Classic Casual Home • Healthy Roasted Red Pepper Soup With Parmesan Crostini
Most Lovely Things • Homemade Tomato Soup – Two Ways
Rough Luxe • Mexican Street Corn Chowder
Many thanks to Mary Ann, Annie and Cindy for inviting me to join their monthly series along with Celia!
I hope these recipes warm your heart and home this winter my friends!
xo
You can find some items from this post here.

Pin this soup recipe to save!

Half Wall & Column Remodel
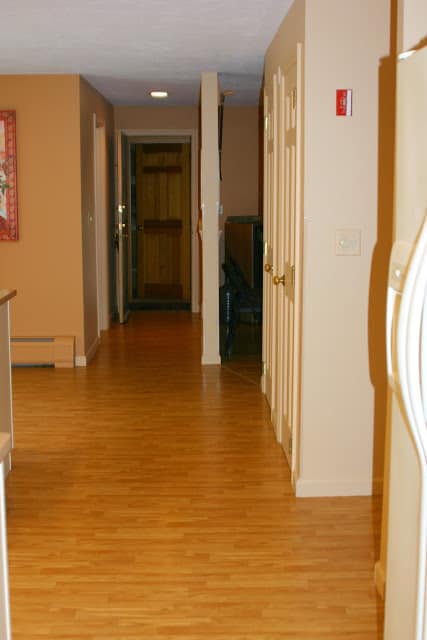
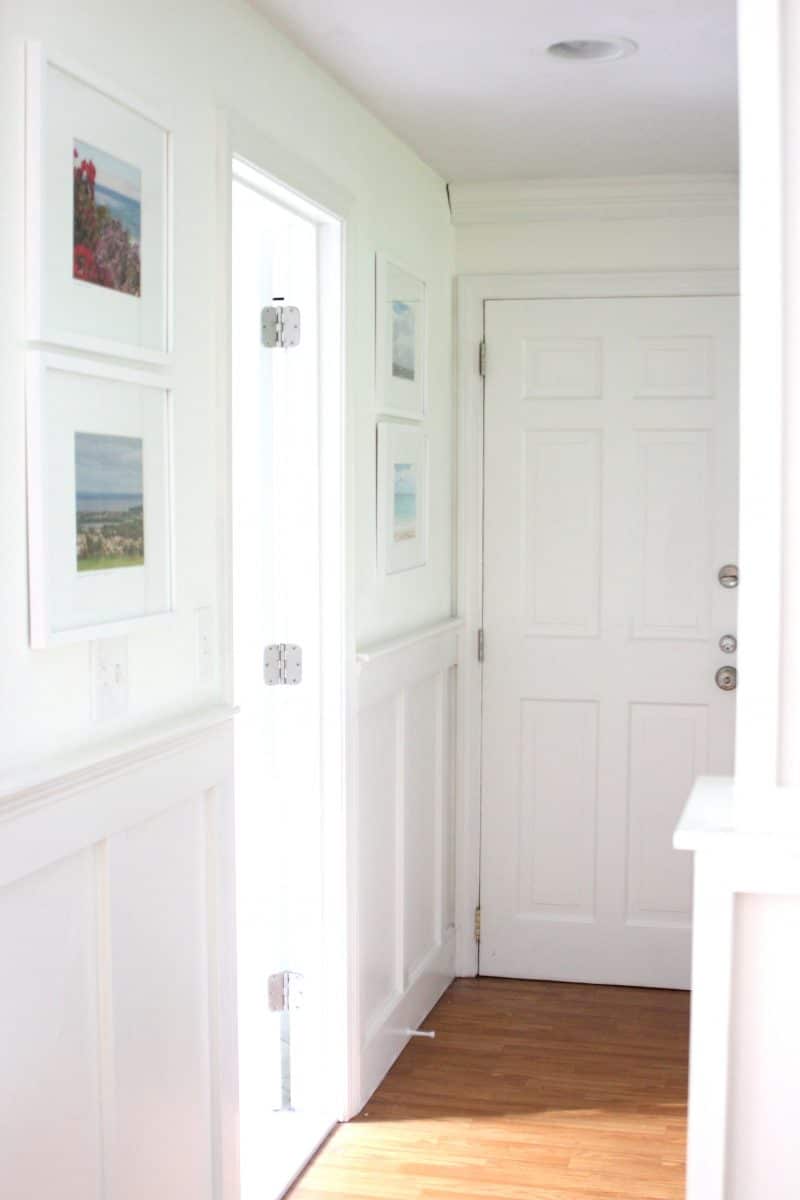
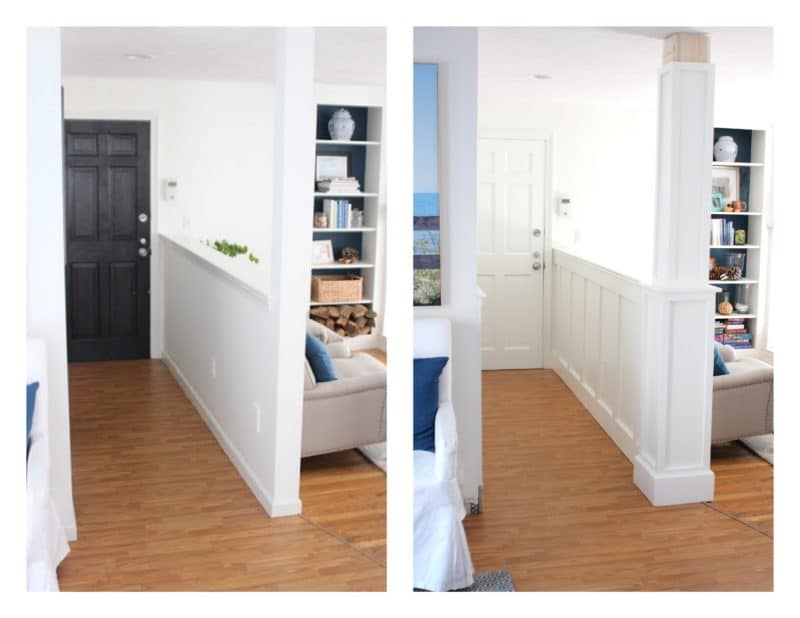
One of the projects I tackled over the past year that I am long overdue in updating you on is our half wall in our family room. We live in a standard colonial with an identical layout to many other houses in the area, but most others that I’ve seen don’t have this wall. We considered removing it to make the room feel more spacious, but we’ve grown to appreciate it because 1) it blocks the view of the toilet from the family room thankyouverymuch and 2) it creates a little entrance hallway when coming in from the garage (the black door on the right).

I always thought the post could use some moulding to make it a little more substantial column, and mulled over what I was going to do with it for years until I saw this photo from Tiek Built Homes (who coincidentally inspired our fireplace makeover too!)
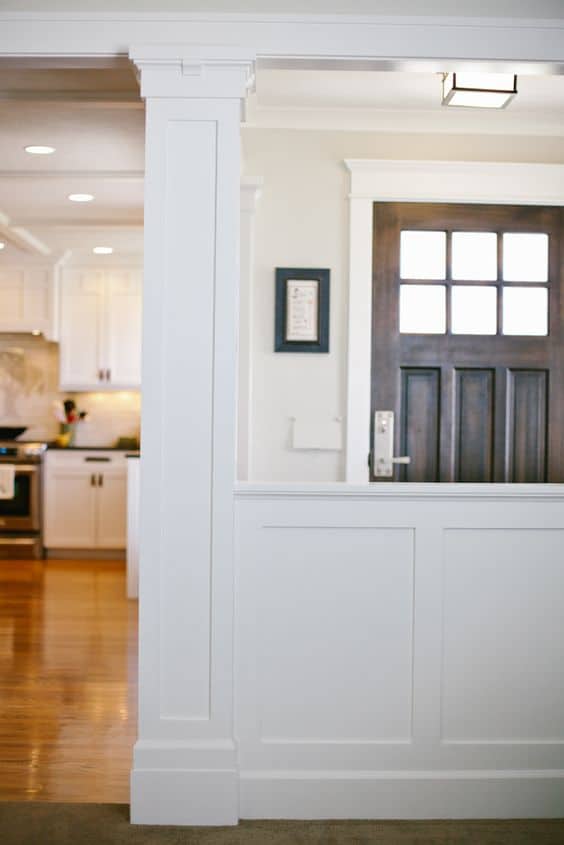
Though in the end I decided on a different style for my column, this photo above was the little troublemaker that got me all fired up to tackle the project when Mark went away one weekend.
I thought I’d surprise him with it all done when he came back – HA! 14 months later, surprise honey!! It’s done! UGH – that last 10% of a project is always such a bugger!
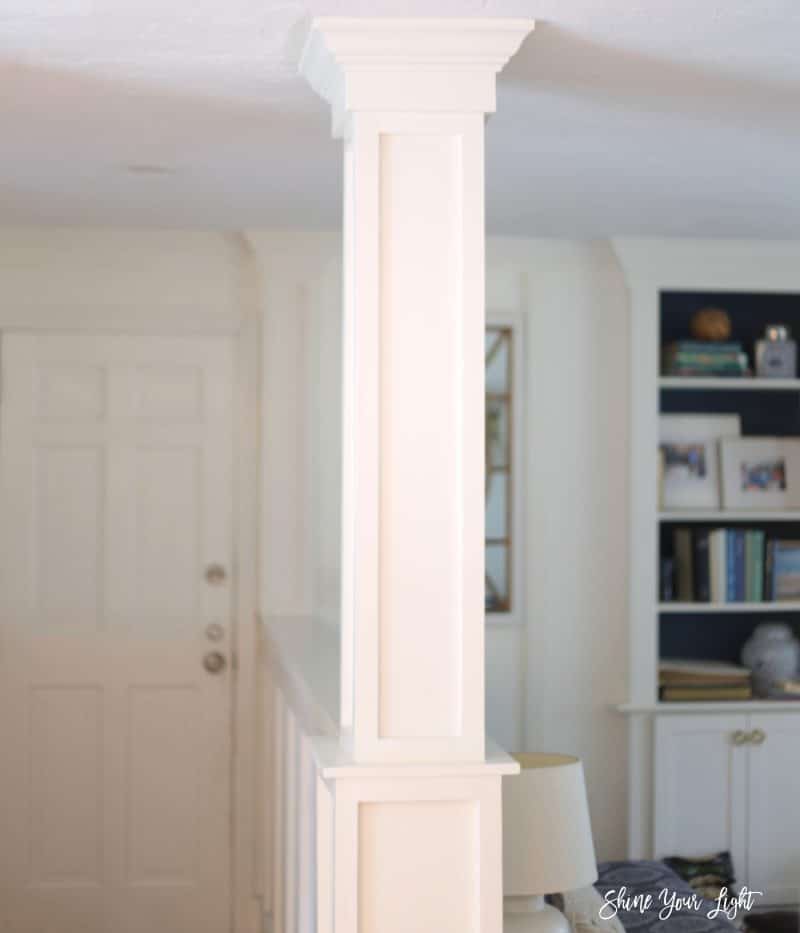
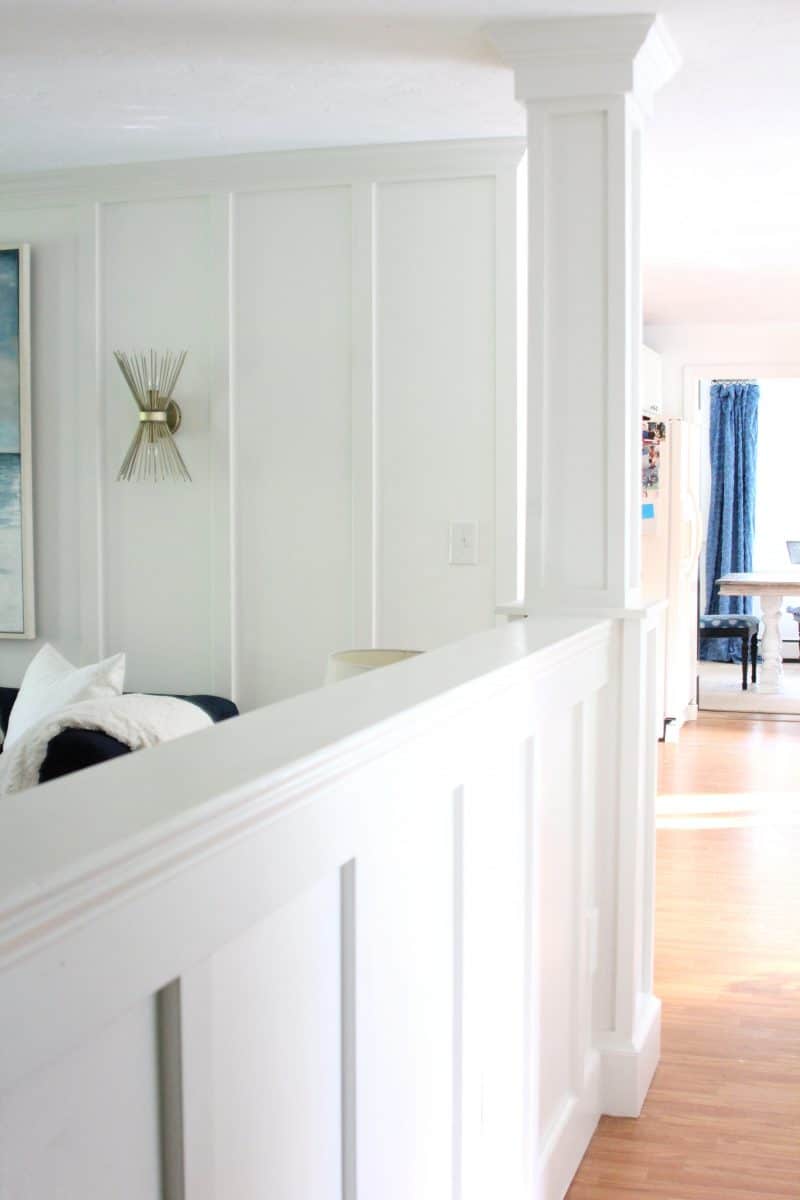
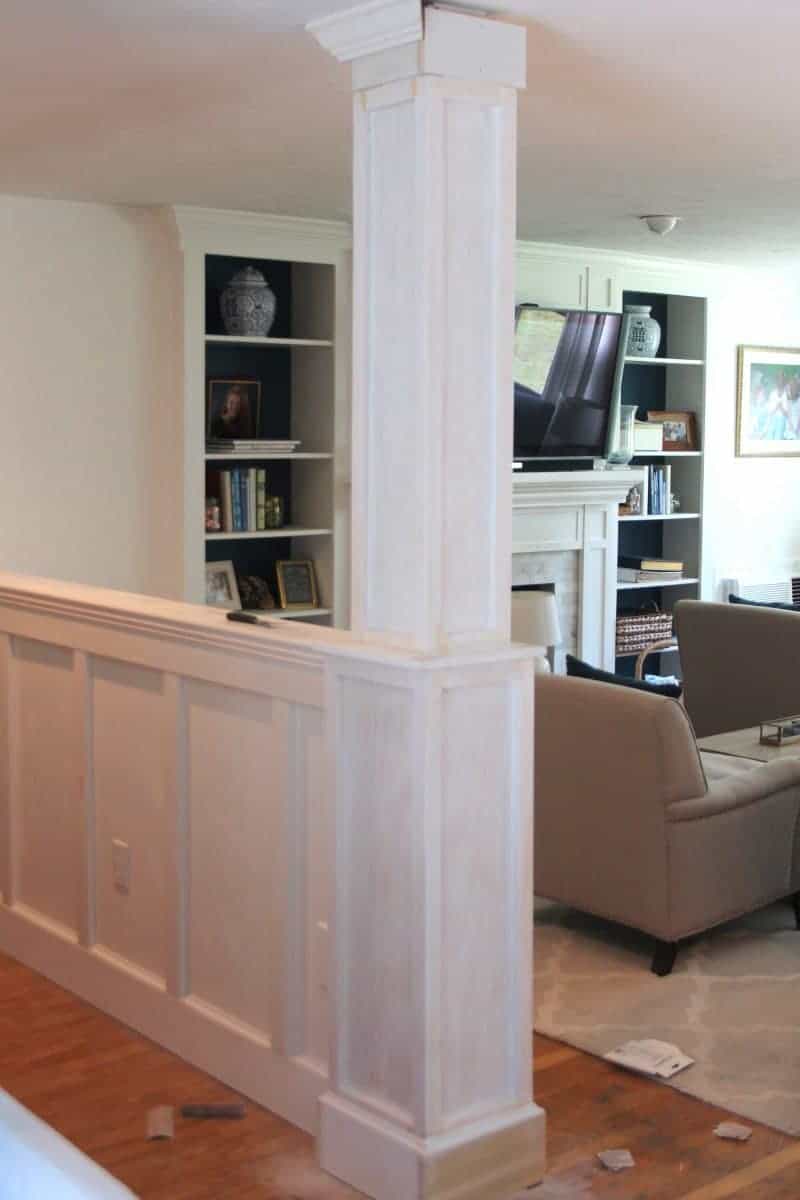
The initial part went rather quickly – adding a new, taller baseboard, installing battens to the walls, and boxing in the bottom and top of the column.It took me a year to finish the column off with crown moulding and add a pilaster on the opposite wall next to the garage door, and here it is today.
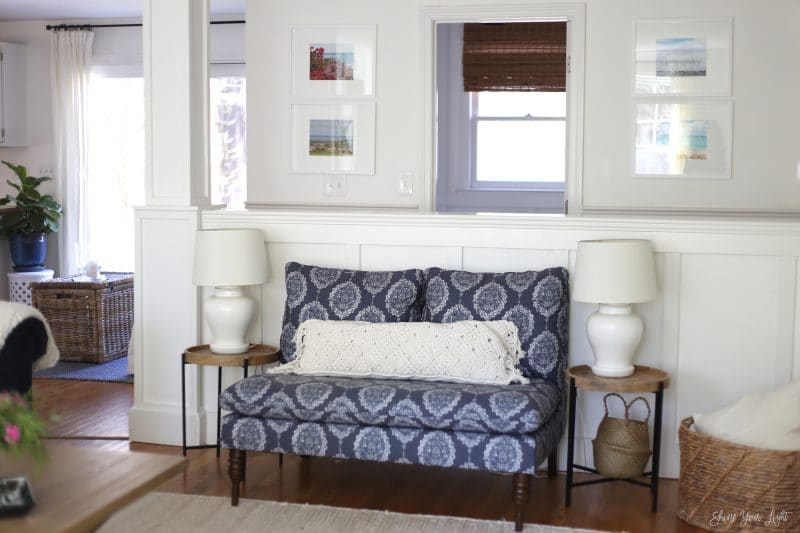
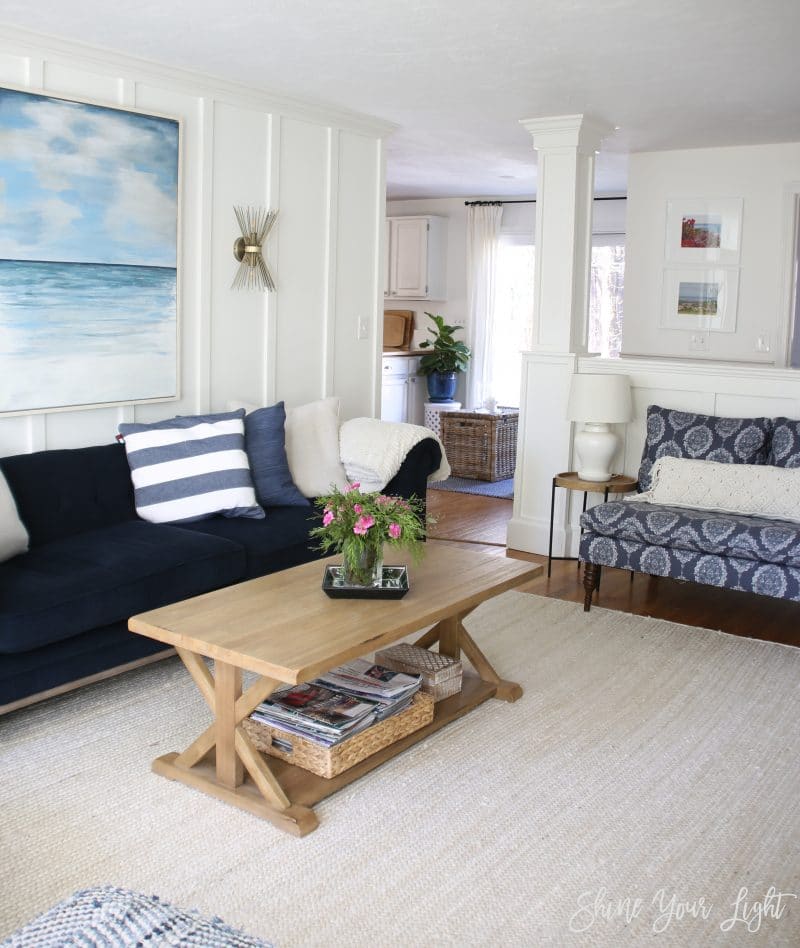
The half wall remodel parlayed into giving the family room an entire makeover for last spring’s One Room Challenge, and now this is the view when you walk into the house from the garage.
To the right is our bathroom/laundry that I added wall trim and crown to for the Spring 2017 One Room Challenge (you can see the reveal for that room here).

Adding moulding to the half wall and column makes this little space feel so much more custom and polished. It’s always amazing to me the difference moulding makes! Here’s how it went from basic and boring to all blinged out 🙂
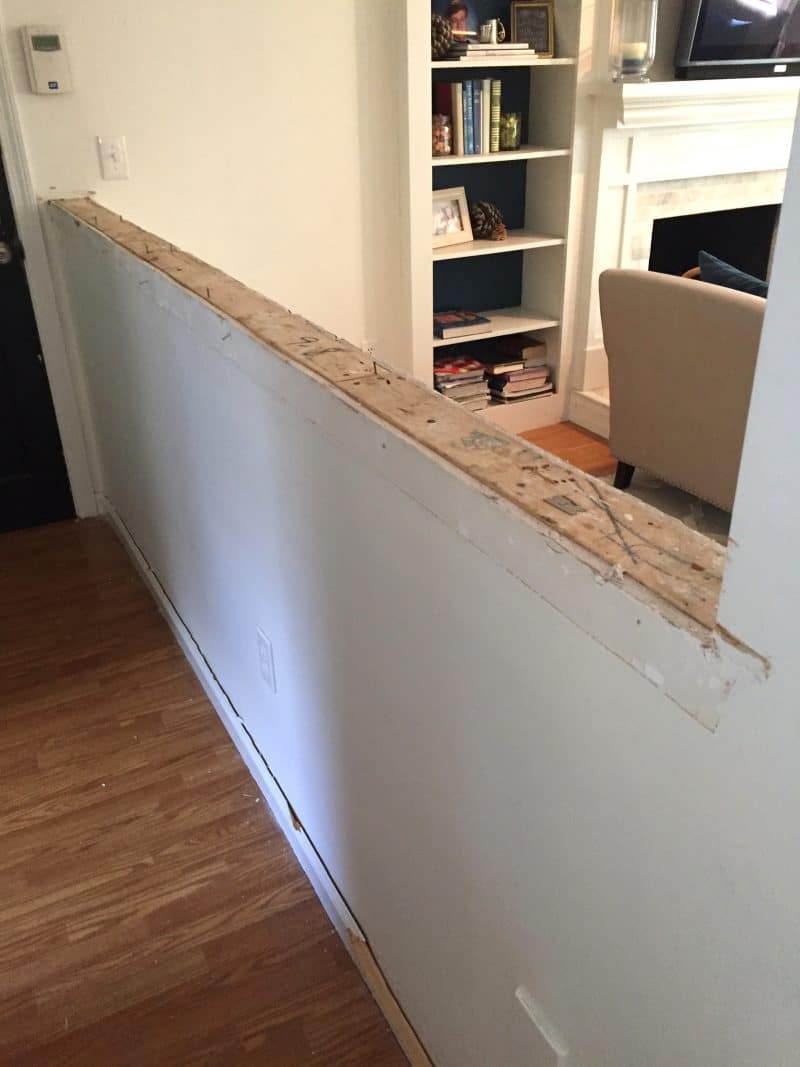
Removing Existing Trim
The wall had a substantial oak top with a little piece of trim underneath. I used a utility knife to separate the paint from the trim and then loosened it with a chisel and hammer until I could pry it off.

The top came up easily by gently tapping it from the bottom with the hammer. I wanted to reuse it so I took care to remove it without damage.
The old baseboard was installed before the flooring and as a result, embedded between the floor and the wall. I learned a new trick to remove them that worked great! First up, cut the seal of paint or caulking between the baseboard and wall with a utility blade, then install screws on an angle into the baseboard about every foot, and use a pry bar leveraged against the floor to pull it up.
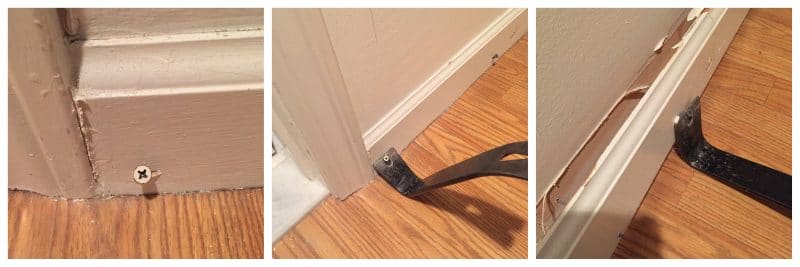
You can use a scrap piece of wood under the pry bar to protect the floor, but in this case I was not too worried about our lovely vinyl flooring since it’s days are numbered!!
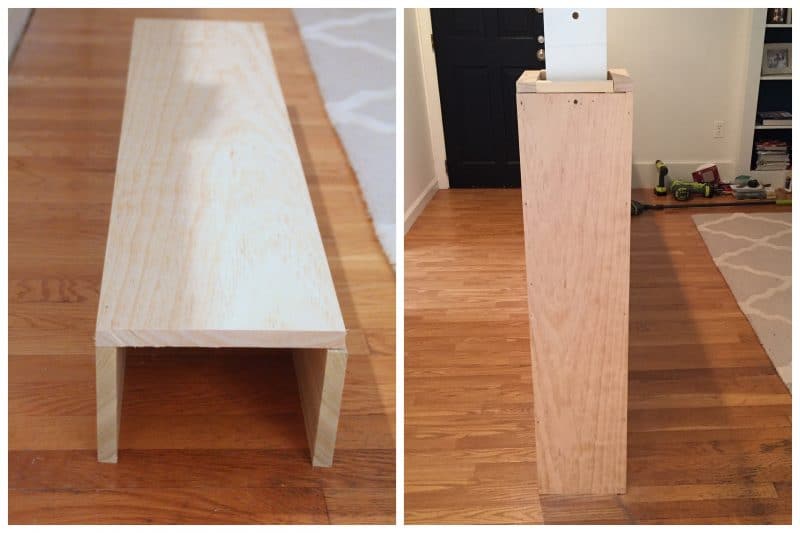
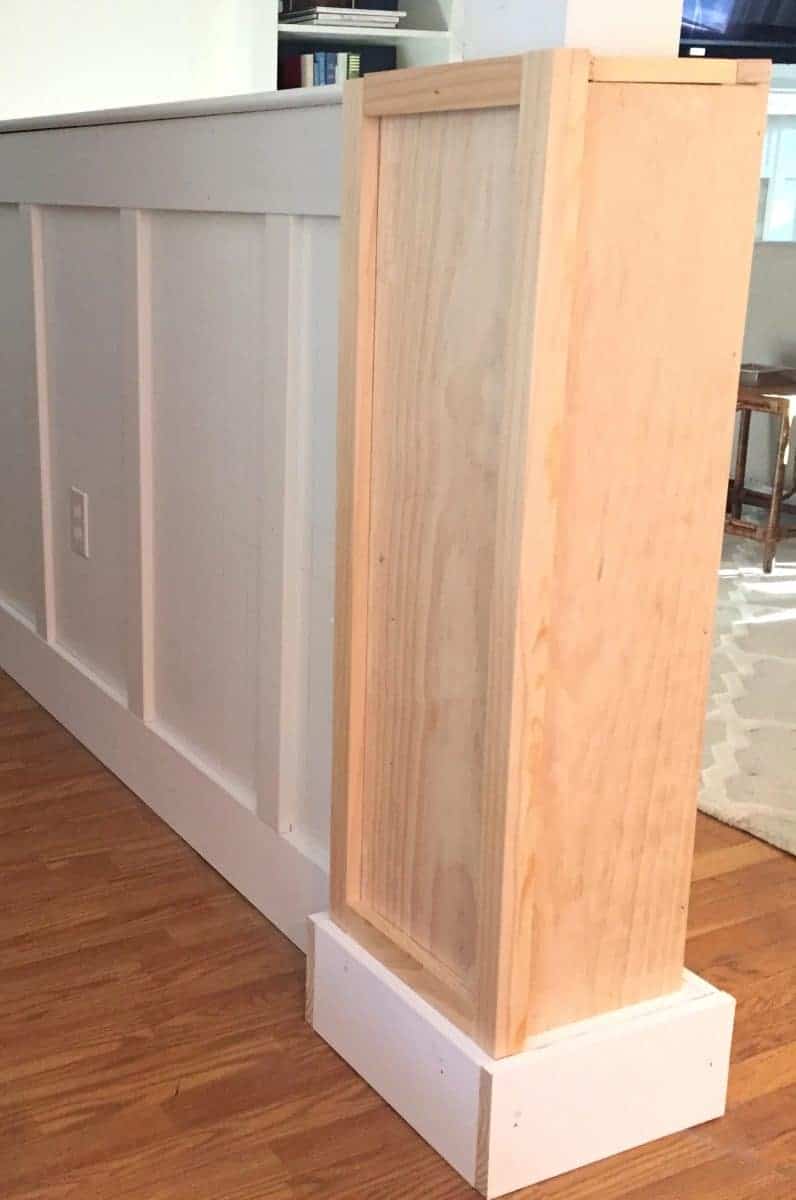
Boxing In The Column
Once all the old trim was removed I boxed in the column to create a wider base and narrower top, trimmed out with moulding that mimics our fireplace surround.
To build the base box around the existing column, I used Liquid Nails and nails to attach 2x4s to the lower part as nailer boards (I bought this brad nailer this year and really like it – it’s lightweight and great for most of my building projects.) Next I pieced together three boards and screwed them into the 2x4s so that the bottom of the column would be chunkier than the top, making sure it was square.
Then I installed the new baseboard and trim to the base. I should have mitered those baseboard corners but I didn’t. Okay? Okay. #cuttingcorners #punintended
After establishing the base, I took a break from the column to do the moulding on the half wall and then came back to finish the upper portion of the column.
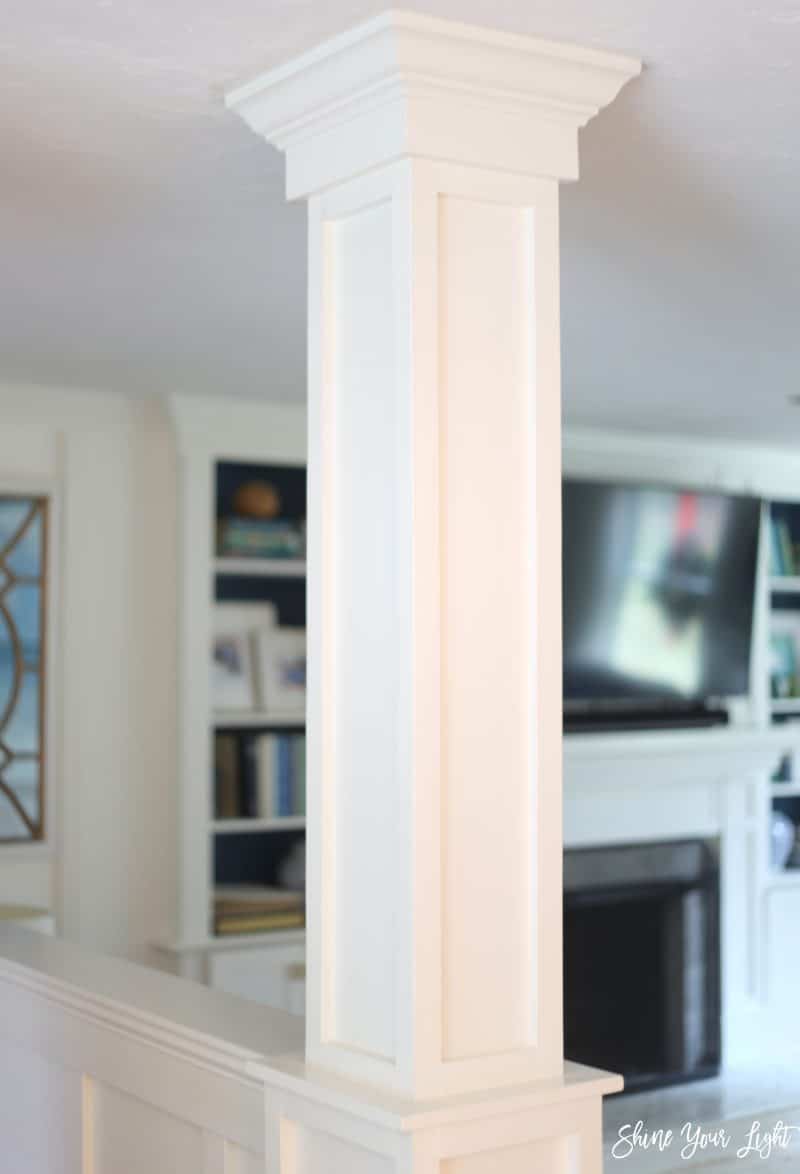
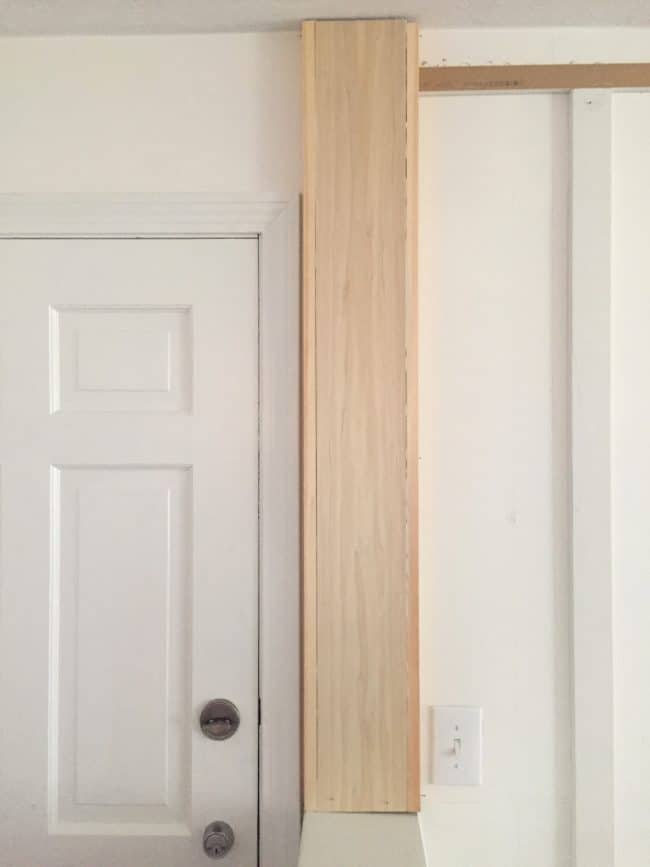
For the top of the column, I first miter cut MDF (similar in width to the top of the half wall) to overhang the top of the base.
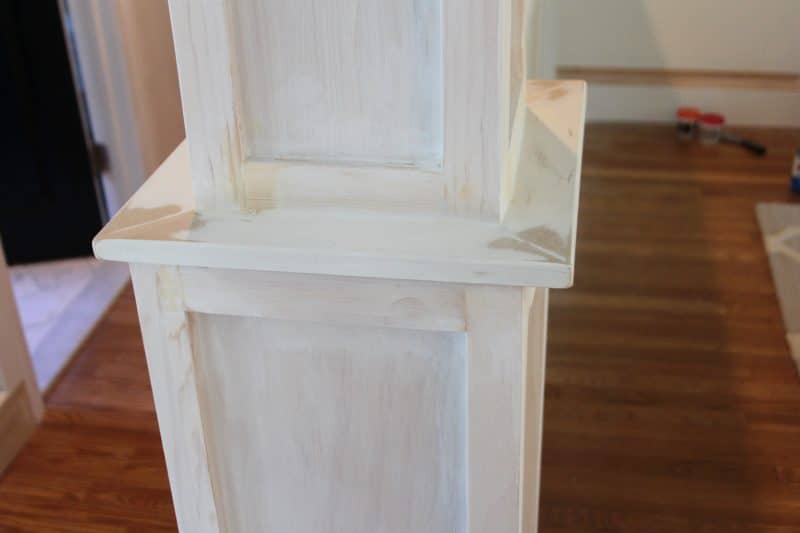
To create the upper box, I glued and nailed poplar boards directly to the existing drywalled column and then trimmed each side out to match the bottom.
Sorry for these grainy photos taken with my phone but I hope it gives you a good sense of how this all came together.

Adding moulding to the half wall
This was the easiest part of the whole project. These are straight cuts all the way so once you have your spacing and measurements figured out you can fly through this installation.

To trim out the half wall, I cut down and reinstalled the original cap of the half wall which overhangs about an inch or so on each side.
Next I installed 6″ board along the wall under the cap, and used this same lumber for the baseboard. To the top board I added a decorative moulding.

The battens were installed about every 16″ between the baseboard and top board with glue and nails, spaced to accommodate the outlet and central vacuum receptacle.
A NOTE ON BOARD & BATTEN SPACING: every “board and batten” style moulding I have in this house is spaced differently – I always adjust the spacing to accommodate obstacles like light switches and outlets. In the bathroom the spacing was specifically to accommodate the toilet. There is no right or wrong spacing! I like to use a scrap board to draw the spacing on the wall with a pencil first and see if I like the overall affect before actually installing the boards. Within the same room keep roughly the same spacing (it can be off a 1/2″ or so and you’ll never notice.) Once I established the 16″ spacing for this half wall I did carry it through the family room when I installed moulding in there later on, so it all looked cohesive.
After installing the battens, I topped off the baseboards with cove moulding.
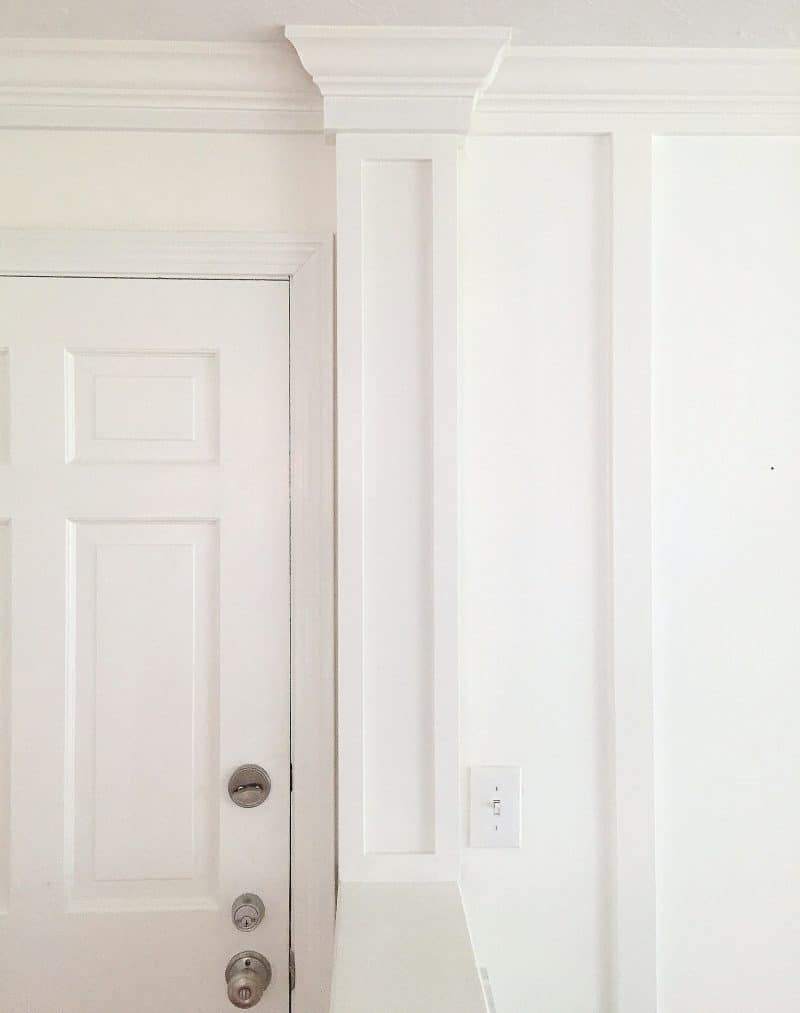
Once the nail holes were filled and sanded, everything was caulked and painted, and the end result is this:
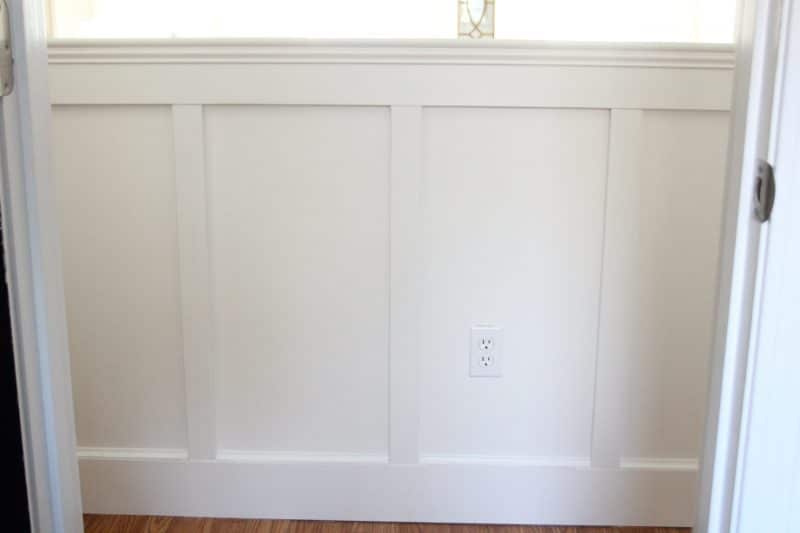
I installed the same trim on the facing wall, topped off with a moulding with the same rounded edge as the top of the half wall.
Building The Pilaster
The other side of the half wall from the column bothered me for a long time. It felt unfinished but I wasn’t sure what to do with the defunct alarm box on this wall.

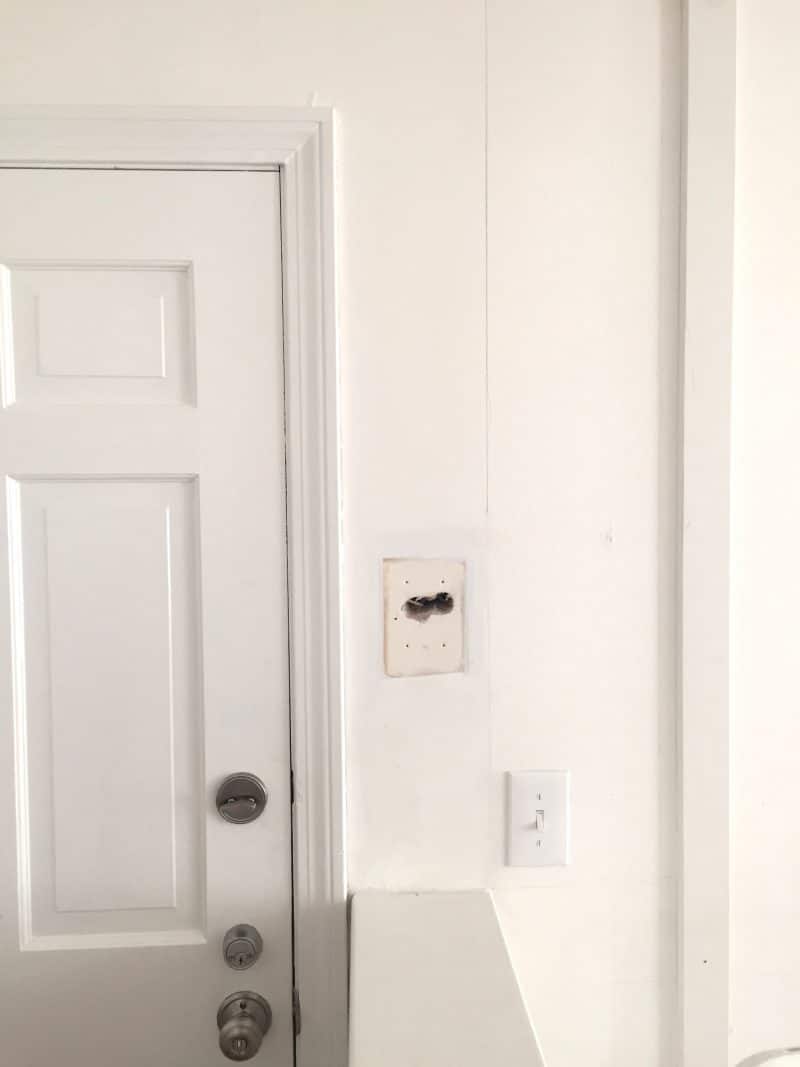
Eventually I consulted my awesome electrician Roy and discovered this alarm box is low voltage and easy to take out. To remove it I pried off the face plate, unscrewed the wall plate, wrapped the wires with electrical tape and pushed them into the wall.
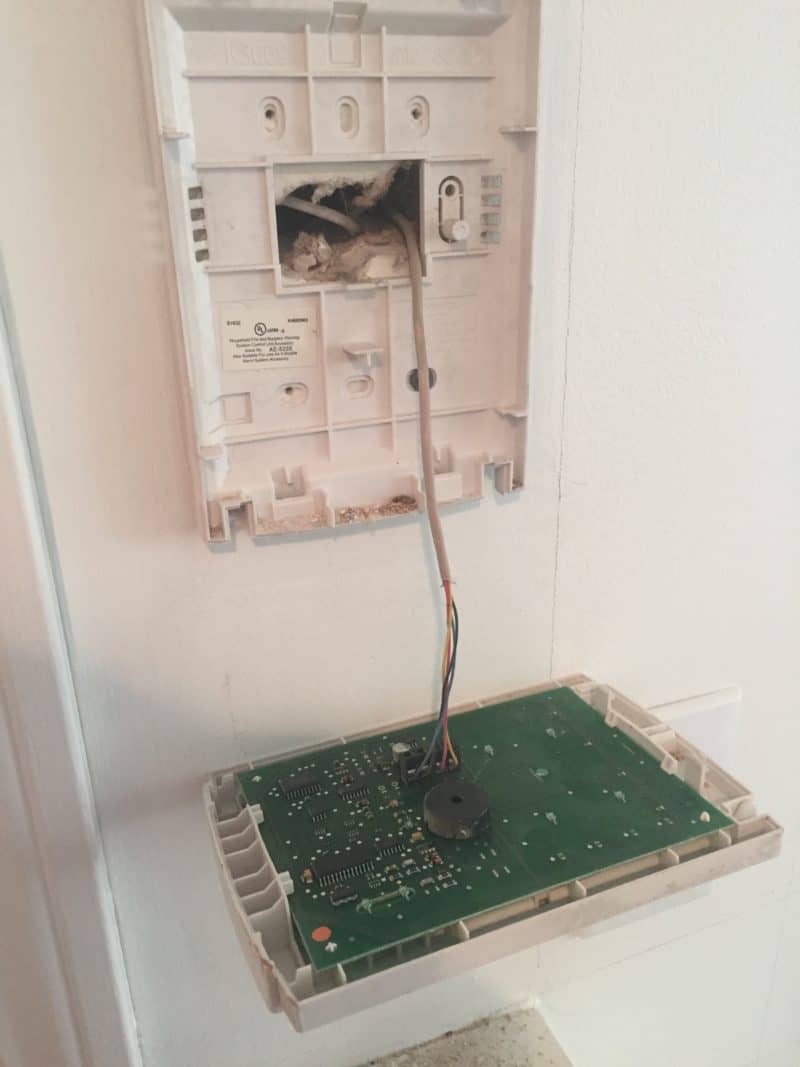
If you are removing an alarm box be sure to consult an electrician if you are unsure of the type of voltage you’re working with.
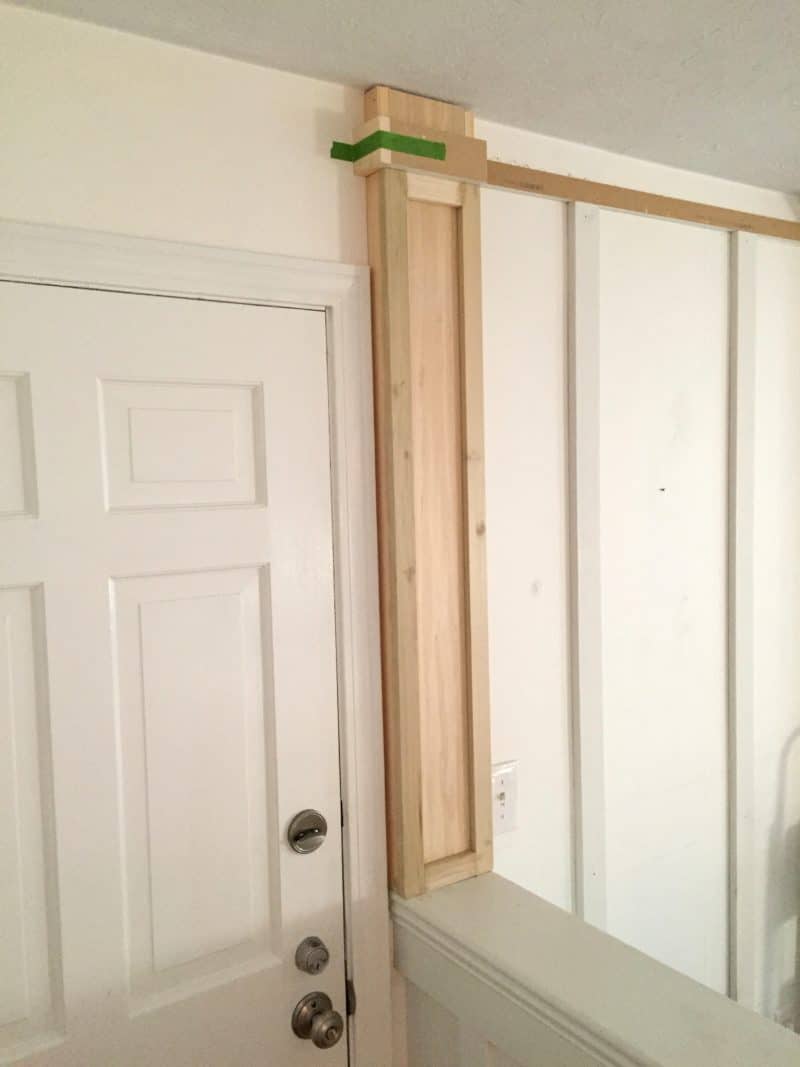
Once the wall was cleared I built a simple pilaster, which by definition is a column that is attached to a wall (so essentially a half column for the half wall 🙂 ). First I attached two common boards to the wall with Liquid Nails and nails.
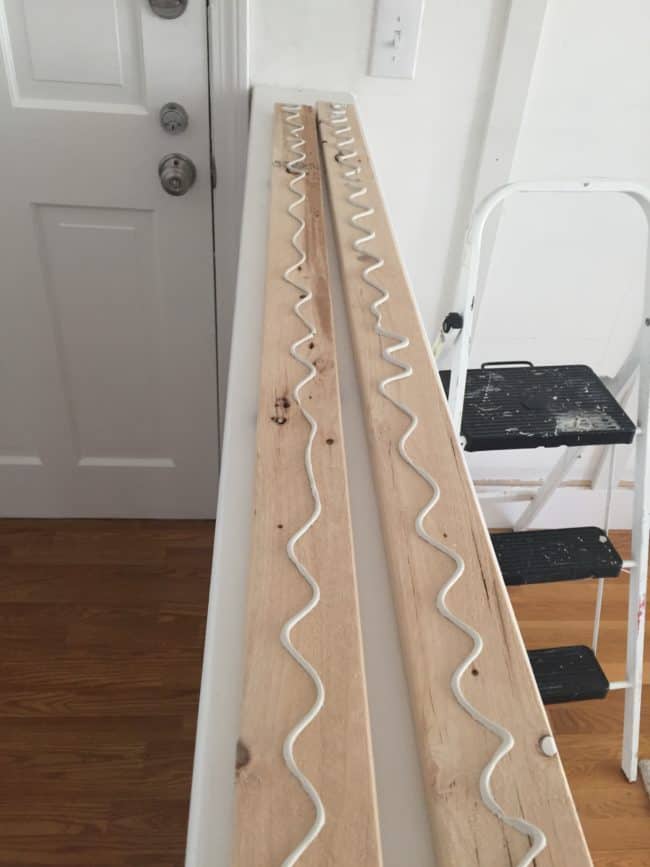
For the face of the pilaster I used a poplar board….
trimmed on the sides and front with the same 1×2″ trim as the column. At the top I installed a 2″ piece of trim to build out the crown moulding a bit, again to match the top of the column.
The finishing detail: crown moulding
The last and most daunting piece of this project was to install crown moulding around the top of the column and pilaster. The pilaster had a couple of tricky pieces on the sides that I coped to fit into the longer wall pieces. This is the 10% that took me an entire year to finish but it was worth the wait!
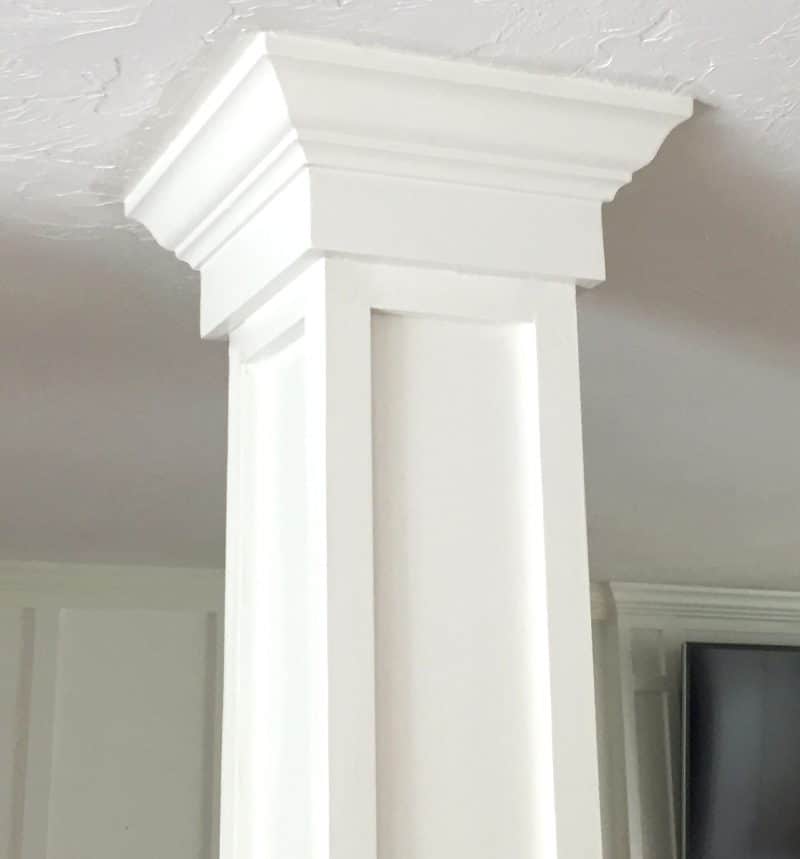
Remember this little tidbit from the One Room Challenge? I labored over this part, I can’t even tell you! Learning to cope crown moulding well is challenging but totally ups your moulding game.

One Last Look At The Before & After
Before, during……
 …and the final version with the family room finished too!
I have been considering what to do with this half wall and column since the day we moved in and am so happy I tackled this project (and finally finished it!)
This might be my longest post ever in 8.5 years but I really wanted to impart all these tiny details for those of you who might tackle a plain jane half wall and/or encase an existing drywalled column with moulding! The devil is in the details and if I can make it any easier for someone else by sharing what I learned along the way then I am glad to do so!
Since I completed this half wall I started a new moulding project in my dining room which I’ll be sharing on the blog soon – you can catch a bit of it in this video I posted to the Shine Your Light Facebook page! I invite you to follow SYL over there, where I post fun tidbits and inspirations daily, by liking the page right here!
This was such a fun and gratifying project (well, except for those little pieces of crown moulding! HA!) If you have a hankering to try a moulding project I sincerely encourage you to give the board and batten style a try! It’s pretty simple and if I can do it, so can you my friend!
Cheers to tackling new projects in 2019!
XOX
PIN THIS POST

HAPPY NEW YEAR! & Highlights From Twenty Eighteen
Welcome to a bright and shiny new year my friends!
I hope you had a wonderful holiday season! I just love the calm after the (happy but completely chaotic) storm of Christmas, don’t you? This past year was a doozy for my family, but there were many joys too. Taking a moment to look back on some of the positives always fills my heart with gratitude. We are blessed with friends and family who have buoyed us in hard times, and here on the blog I feel so lucky to have some of the kindest readers out there! I love your enthusiasm for all the big and little things we chat about here and it’s always fun to look through my blog statistics and see what really hit home with you!
Here are a few popular posts from the past year (click on the pink titles to take you to those posts)…..
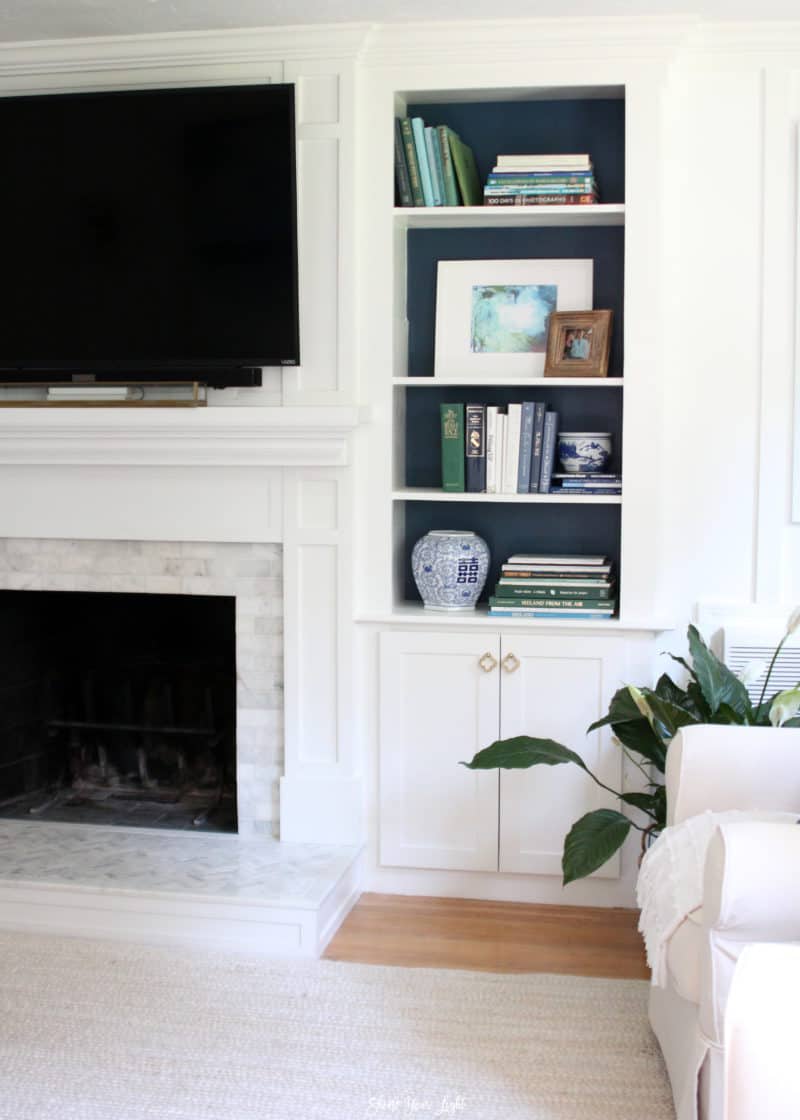
Fireplace Makeover Start To Finish
With the addition of cabinet doors our fireplace makeover is finally finito after 2.5 years! It evolved from this…….
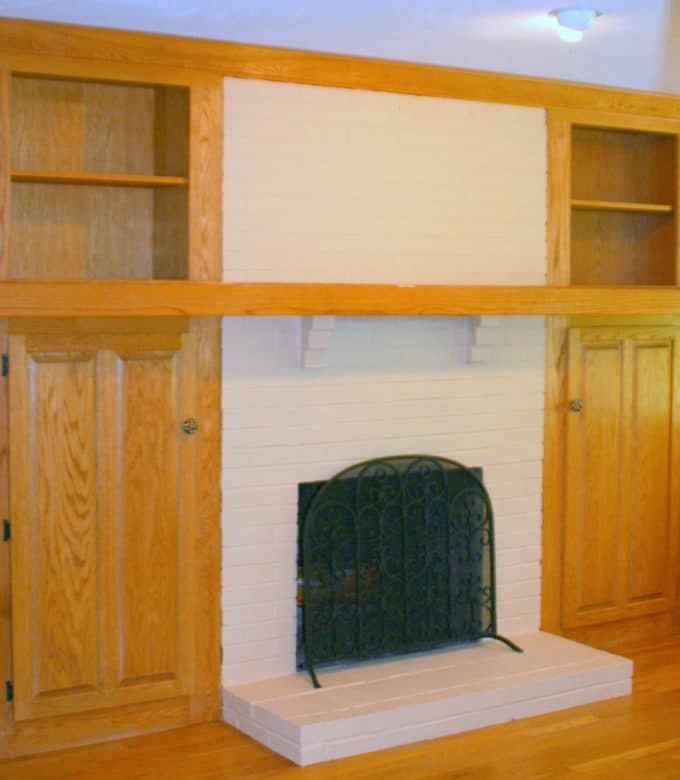
….to this. My makeovers are not always quick but in the end I’m happy with the final result!
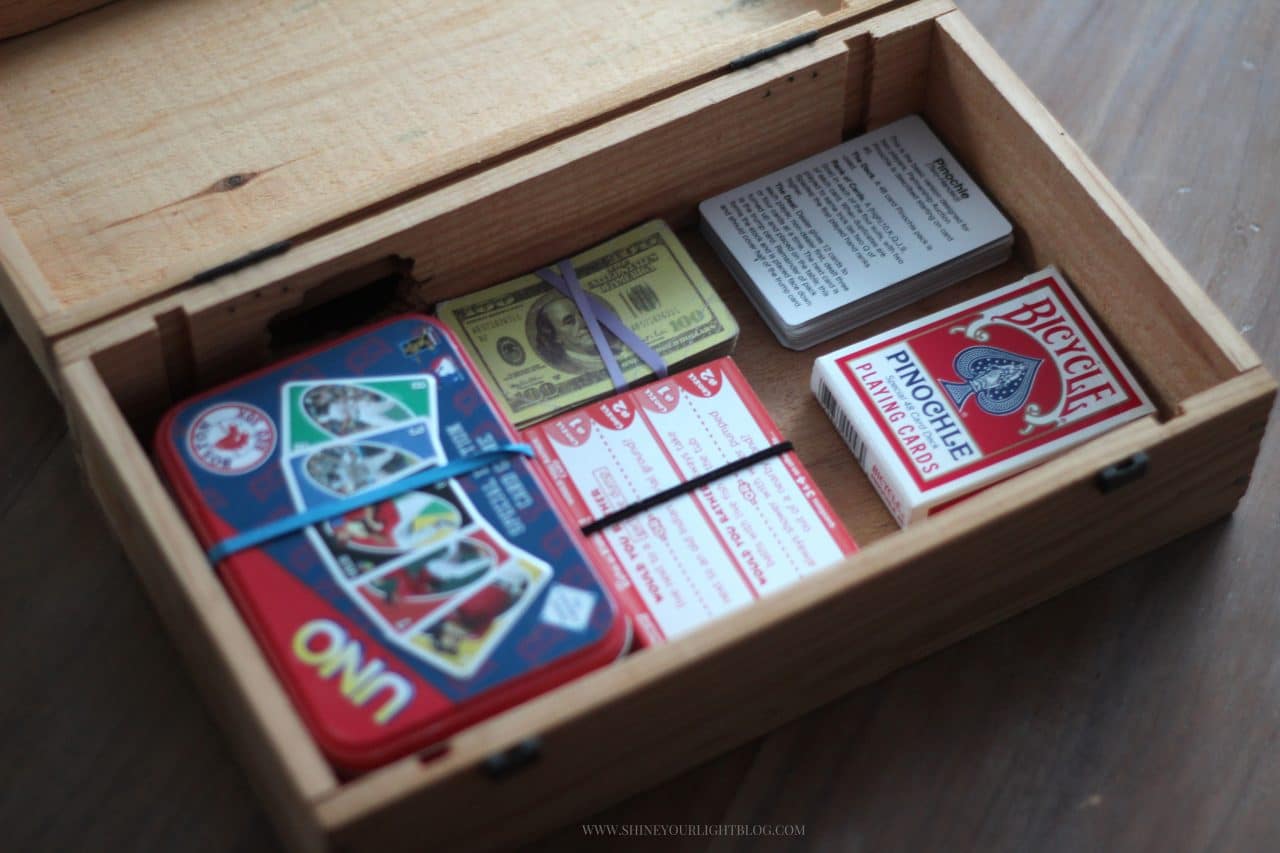
Organizing Ideas Room By Room
What is it about January that gets us all so fired up to get our homes and our lives organized?! For those of you who are craving some order in your home, join me for a new weekly series on organizing all through the year, here and on the Shine Your Light Facebook page!
Home Basics I Can’t Live Without
We are seriously obsessed with our bed pillows (the sleeping kind, not the decorative), they are at the top of this list amongst other tried and true items that I love and recommend.
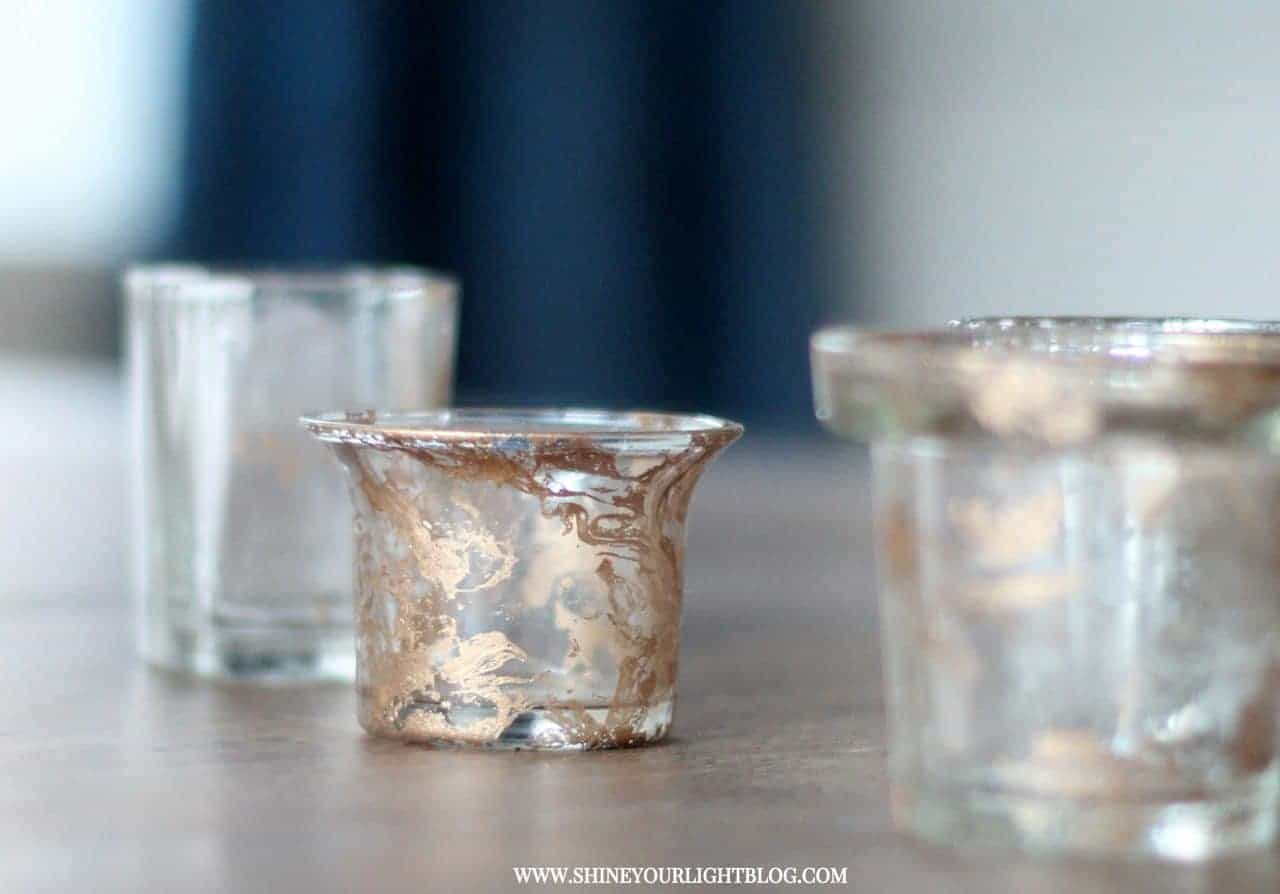
Water Marbling With Spray Paint
If you’re in the mood to get your craft on, try this fun and easy way to change up your old glass votive holders or vases.

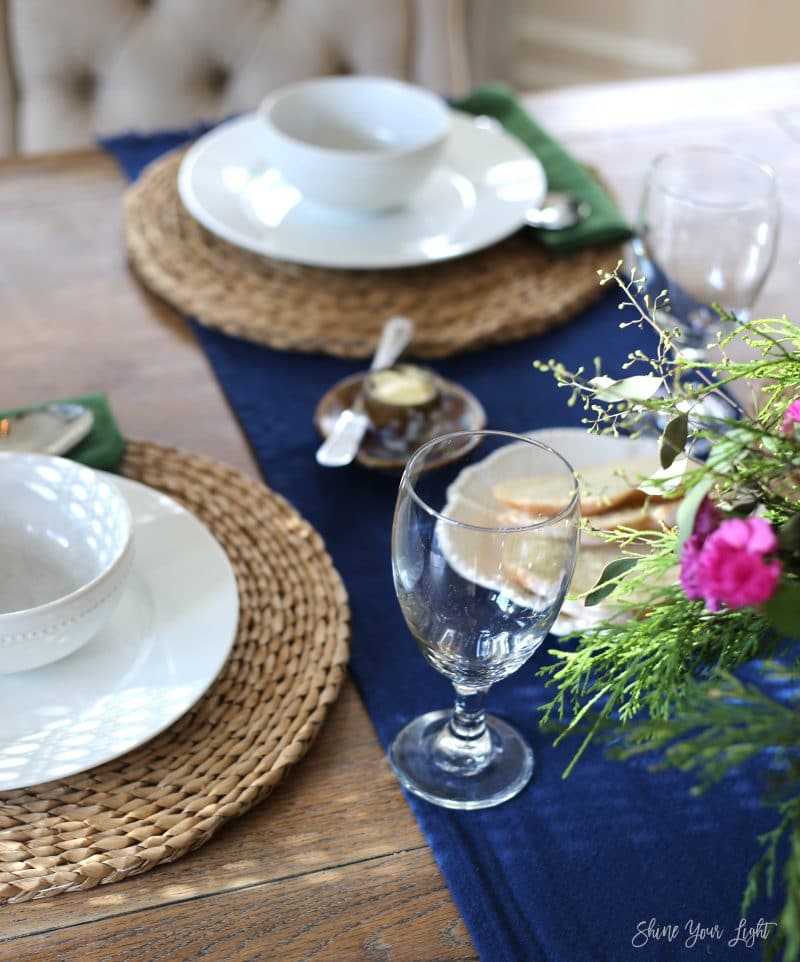
Spring Tablescape Tour
A colorful and cheery table for spring that lends well to Easter (that tablecloth is actually a shower curtain from Target!)

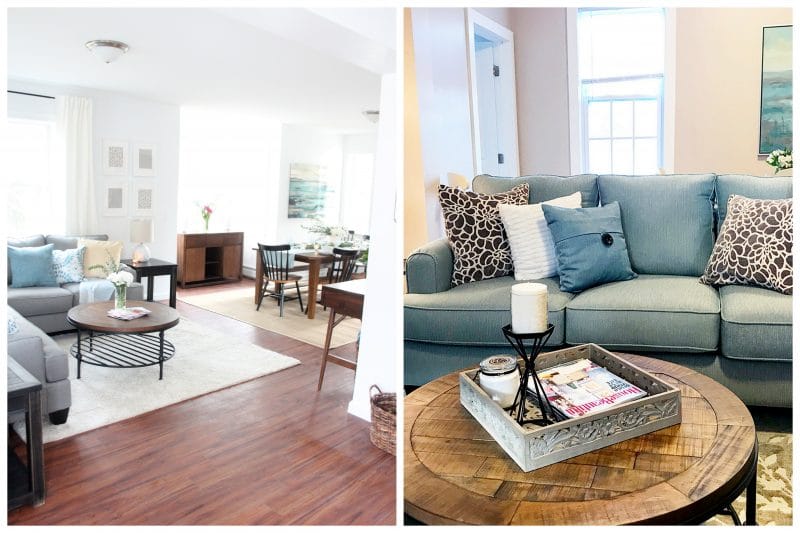
Large Affordable Area Rugs
I was on a mission to find a comfy, big and budget-friendly rug for our family room makeover, and I ended up with too many to choose from! Apparently many of you are on the same hunt because this post saw a lot of traffic this year.

Biggest Bangs For The Buck
A popular post from the My Five Favorite series – some high impact home improvement projects and design ideas for short money!
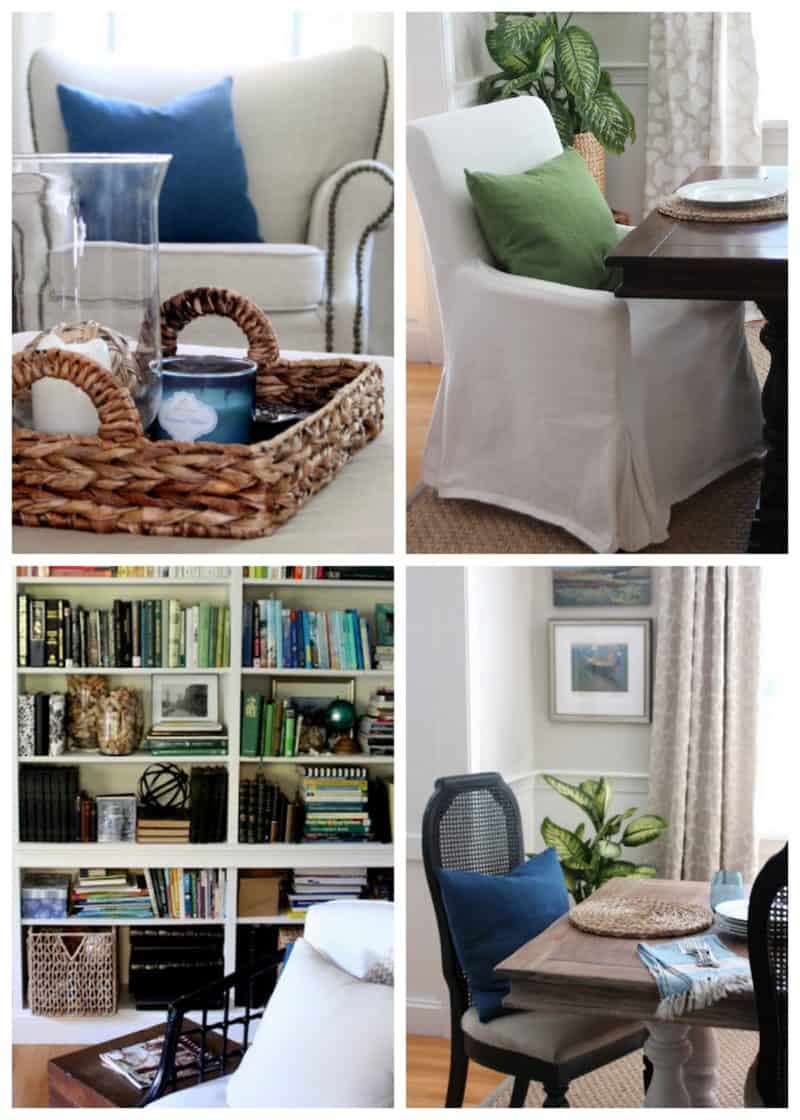
Family Room Makeover
I partnered with Raymour & Flanigan for the One Room Challenge, which turned out to be both a reader favorite and a family favorite as well!! Installing the floor-to-ceiling battens and crown moulding added so much character to this space, and we couldn’t love the comfortable new furniture more, especially the velvet chesterfield of my dreams!! It was so fun to share this makeover week to week with you – I’m definitely doing another One Room Challenge this year!
My personal favorites this year…..
Bloggers Heart Habitat & Amos House
Through blogging I’ve met some awesome people and had the opportunity to work on some volunteer projects that have been so meaningful. This year’s Bloggers Heart Habitat house was the third one I’ve done with Charlotte of At Charlotte’s House and other talented New England bloggers. I met Carli of Made By Carli on one of those houses and she pulled together a group to design and install apartments at Providence, Rhode Island’s Amos House, funded entirely by Raymour & Flanigan.
Stay tuned for a couple space reveals that have been long overdue, plus the status on our floors and kitchen!! I have so much to share with you in 2019 and can’t wait to dive into this new year!!
THANK YOU for following Shine Your Light and making this such a happy little part of the blogosphere!
Wishing you a year ahead filled with adventure, good health and laughter!
Write on your heart that every day is the best day of the year.
– Ralph Waldo Emerson
Lots of love,
