Hey friends! Hope you had a great week! I’m back today with the scoop on the herringbone marble tile floor I recently installed in our coastal bathroom remodel.
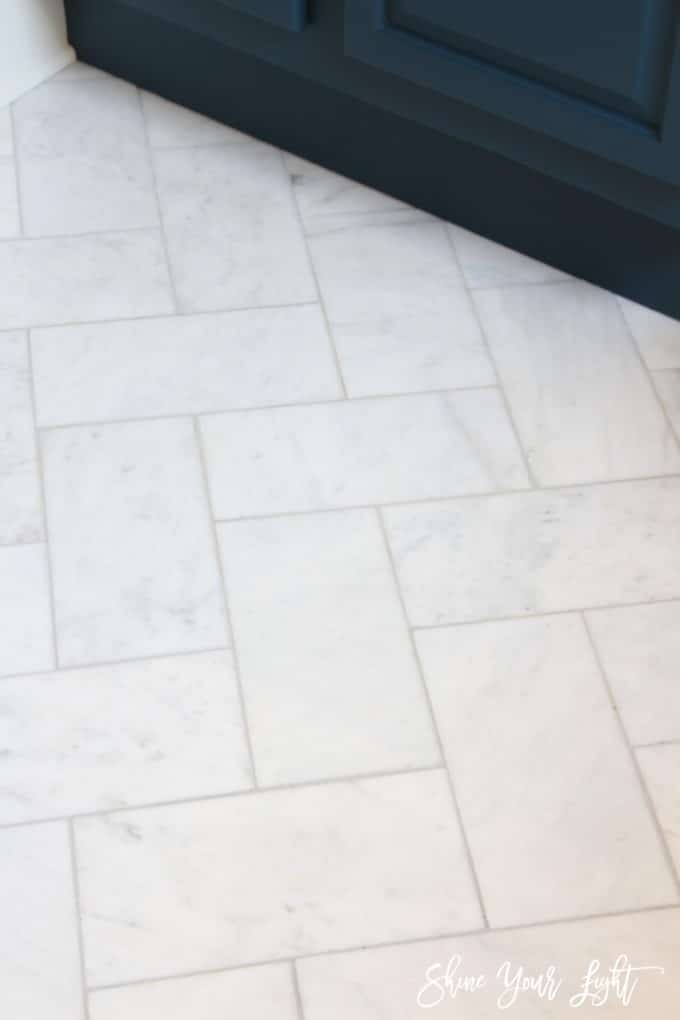
When I took on our bathroom for the One Room Challenge, it had 15-20 year old wood-look linoleum on the floor – the same flooring that runs through our kitchen and abuts real hardwoods in the adjacent dining room and family room. The Big Plan is to replace the kitchen floor with hardwood eventually, but for the bathroom I had my heart set on marble ever since I remodeled the fireplace.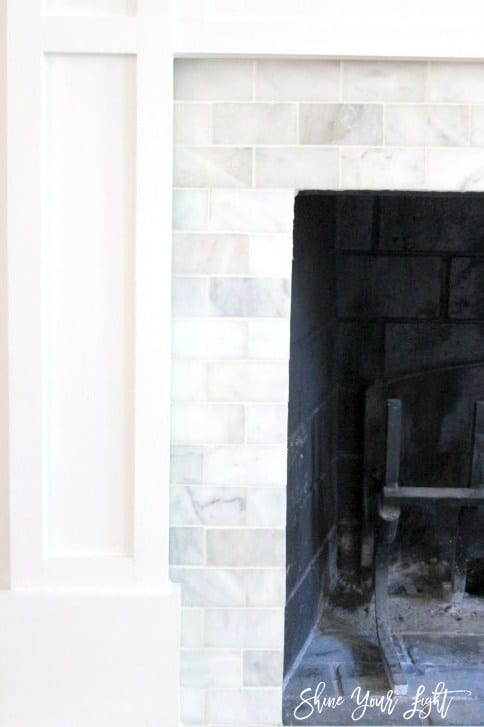

Marble is such a classic material, and also the colors – white, oyster, gray – are perfect for our house. Ask me again in 10 years, but I really feel like the design of a room could be completely changed up without having to rip out marble tile – it’s neutral and has that timeless, old-school quality.
Are you a marble fan too?
If so, I’m excited to pass on this little tip I learned to work pricey marble into the ollllld budget.

This post contains affiliate links. Click here to read more.
I did tons of research online and in stores looking for a white marble tile that I absolutely LOVED the color of, and played around with all sorts of patterns. I considered using small or medium hexagons, small subway tile like I used on the surround or the small herringbone mosaics on the hearth, basketweave, or some other pattern – there are so many beautiful marble tiles on the market – but I felt like the small mosaic tiles would be kind of busy with the pattern and texture of the oyster shell mirror.
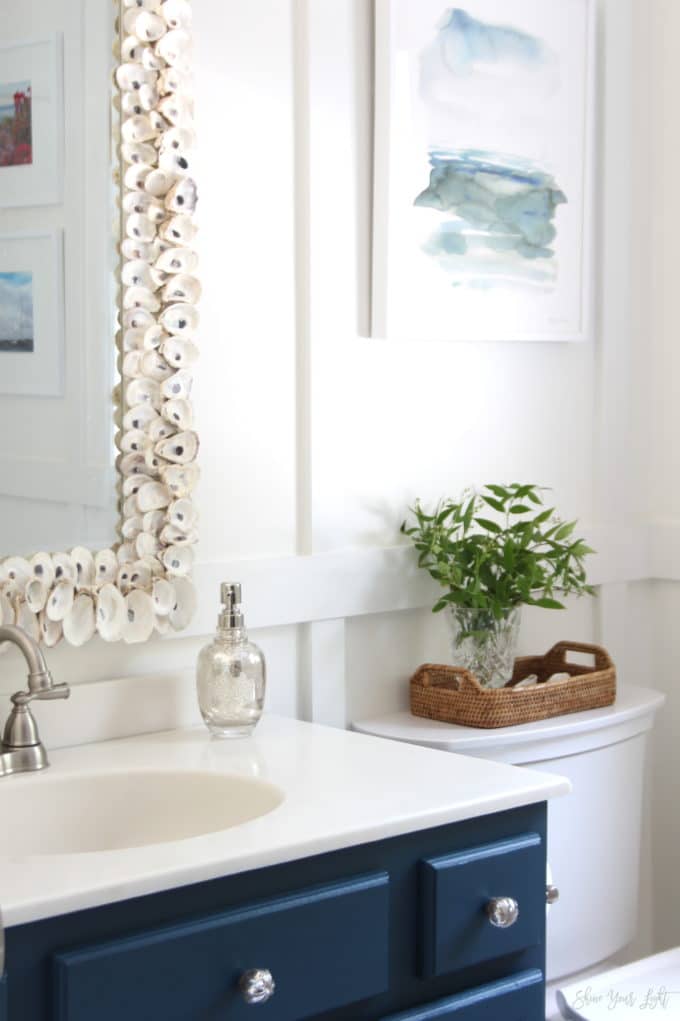
With the mirror in mind I decided a larger scale floor pattern was the way to go (with the bonus of less grouting!). When I was poking around in the flooring aisle, I couldn’t get over that these 12″ marble tiles are only $3.99 a square foot, substantially less than most other marble tiles, and I remembered this fantastic idea from Elsie at A Beautiful Mess.
Elsie had her tile installer cut 12×12 tiles into thirds (4×12) and the outcome is SO gorgeous. Genius!
I opted to just cut my tiles in half for a chunkier herringbone pattern (and less labor!)

Once again I rented wet saw and now I’m lamenting the fact that I didn’t buy a wet saw three tile projects ago – the saw rental of 4 hours goes by in the blink of an eye and I ended up keeping the saw for 2 days. Lets just say I could have bought two wet saws for what I have paid in rentals.
Some of the tiles had more grey to them, so I dry-fitted them to mix up the colors a bit and figure out the triangular cuts…..

…before installing them, using 1/16″ spacers so the grout lines would be minimal.
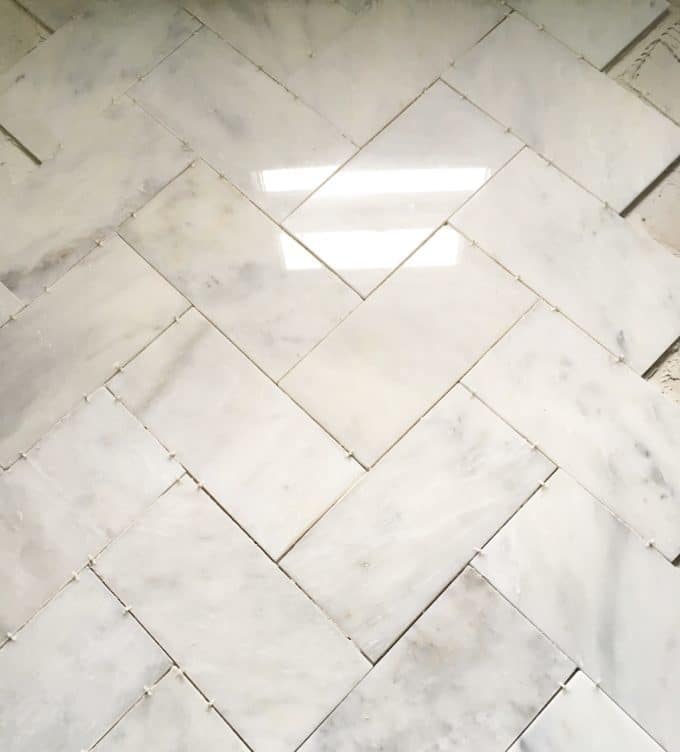
After a quick Instagram poll – white grout or gray grout?? – I went with gray and love it! Thank you to everyone who weighed in on that decision!

What do you think about the large scale herringbone pattern?
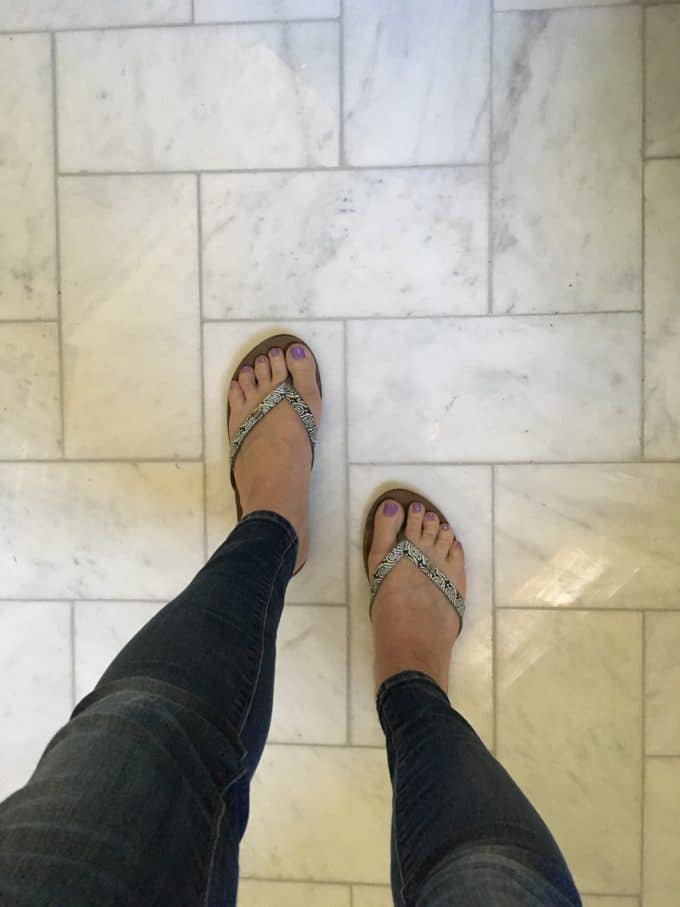
Figuring out how to lay these 6″x12″ tiles on the diagonal takes a little extra thought, but once you measure, mark, and install the first row you’re good to go. It would be WAY easier to lay the tiles square with the walls and not have to make all those triangular cuts around the perimeter, but I loved the idea of repeating the fireplace’s herringbone pattern on a larger scale.
If you love the herringbone pattern but don’t want to mess around with all those cuts, consider the mosaic herringbone I used on the hearth – they come on mesh sheets that you can easily lay by the square foot.
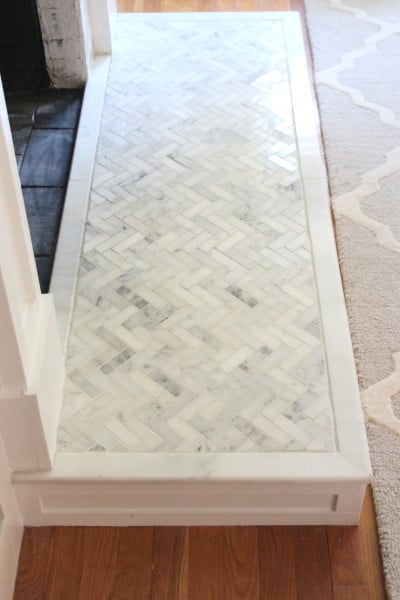
This is the small herringbone tile I used for the hearth.
Check out the rest coastal bathroom reveal here…..

If you have any questions about this tile installation, give me a holler!
Wishing you a fun summer weekend!

SOURCES
Other posts from this bathroom remodel you might be interested in:

PIN THIS POST FOR LATER!

Kathleen Rupp says
WOW that is gorgeous! I am a huge fan of herringbone myself. I love that! I have always wondered about cutting tiles down to fit my needs in some arrangement but always thought it wouldn’t work right because the edges from the factory would be different. It looks like you must have gotten a marble that just had a straight cut on all four sides without any smoothed out edges. It’s brilliant and looks so amazing. I love marble as well and NOW after reading this……may have to install it in my next bathroom project! ha. I will let you know if I do. Fabulous makeover!!!!!
Lisa says
Kathleen thank you SO much for you very kind comments through this reno! You’re so sweet! The tile I chose doesn’t have a beveled edge, just a straight cut, so cutting it in half was the same cut. Marble is prone to chipping a little in the cutting process but making sure your wet saw has a lot of water spraying out helps. I do have some chipping on the cut lines but once it’s grouted it’s not noticeable at all (well, just to me!) I also had a few tiles crack and I needed them all to avoid buying another case, so I used the cracked ones behind the toilet and heater so they aren’t noticeable at all. I hope you do it and if so, send me pictures! I’d love to see!
Alison says
A wet saw! I am so impressed. The floor turned out beautifully!
Lisa says
Thanks so much Alison! I used a wet saw for my fireplace makeover and was super nervous at first, but once I made a few cuts I realized it wasn’t hard at all as long as you are super careful, just like any other tool! Thanks for your kind words!
Brenda Botbyl-Velez says
Omg! It is absolutely gorgeous! And you did this yourself??! I have a lot of carrera marble left over from building our last home…..I may just ask for a wet saw for my birthday and put my marble to good use in our new home! What an inspiration!! I’m very impressed!!
Lisa says
Hi Brenda, thank you for stopping by to see this! Yes I installed the tile myself. I gave our fireplace a makeover last year and that was my first experience using a tile saw on my own – if you have someone that can show you how to use it, once you make a few cuts yourself you’ll see it’s not hard, just take your time and make sure you have water running through it all the time. Also goggles are important. If you use your leftover marble, send me pictures! I’d love to see what you do!
Brenda Botbyl-Velez says
I will!, Thank you for the tips! I’d like to replace the black marble surrounding my fireplace with the white marble. Do you think I could just put the new marble over top the old or do I have to chip out the old first???
Lisa says
Brenda, I’d try to remove the tile first – start with one in the most inconspicuous spot and scrape out the grout around it, then place a chisel at the edge of the tile and tap it with a hammer to see you can pry it up. It might break in half but you should be able to remove the tiles pretty easily this way. I did this to remove accent tiles on my old kitchen backsplash and it worked like a charm. Before setting new tiles, you have to scrape off the old tile adhesive but hopefully it won’t be too hard. Good luck with the project!
Brianne says
@Lisa, I had the same thought about tiling over but discovered all sorts of problems with how the tile would line up with the toilet and above the molding and threshold. It cost $350 to have someone demo our old floor tile, haul it away, and remove and replace the toilet. So worth it (I’m in Portland, OR).
Denise says
Oh my goodness Lisa! What a smart idea! I have been drooling over marble floor tile for a while now but it’s just not in the budget. But cutting the larger tile in half might just make it work!! Thanks for sharing – it’s gorgeous!
Lisa says
Thanks Denise!! I tiled the whole floor for under $200, including the adhesive and grout, which relatively speaking, isn’t too bad!!
John says
@Lisa, where did you purchase the tiles?
Lisa says
Hi John, there’s a link at the end of the post for the specific 12×12 tiles I cut in half!
Kris {Driven by Decor} says
Lisa that is seriously amazing!!!! Love it so much! Want to take on my kitchen with me? Just kidding.. you’d have to move in for months. This room was definitely worth the wait!
Lisa says
Thanks so much Kris! So excited for you for your kitchen remodel! It’s so pretty the way it is but I know you’ve wanted to change some things up for a long time! Can’t wait to see.
Shelley | Crazy Wonderful says
This is so brilliant!!! The pattern is absolutely gorgeous and I love the beefier scale. They gray grout is perfect too!
Lisa says
Thanks so much Shelley! That tip from A Beautiful Mess was so smart. I’m happy that I went with the bigger tiles just for the time saved grouting!! 🙂
Cristina says
Oh yes, another marble lover around here. I love the herringbone pattern. How clever of you to cut the big tiles. I’m taking notes, thanks! ?
Lisa says
I’m so glad I read about that trick Cristina. It saved my budget big time! It was less than half the tile I was originally going to go with!
Leota says
@Lisa, was it difficult to cut the tiles? Did it leave chipped or sharp edges? I desperately want to do this, can you offer tips on cutting? Looks great! Thanks!
Lisa says
Hi Leota, using a wet saw with a new blade and making your cuts into the marble tile very slowly helps to avoid chipping. The tiles do not have sharp edges, especially once grouted, but it wasn’t a problem with handling them after they were cut. Try cutting a few pieces of tile that you won’t need just to get the hang of it – I promise if I can do it, so can you! It’s intimidating at first but you will quickly get the hang of it!
dana says
hello,
I love what you did with that tile. I am just wondering if it is polished tile and is it slippery?
thank you!
Lisa says
Hi Dana, the tile is polished but hasn’t posed a slipping hazard at all! However this bathroom does not have a shower in it so a wet floor is not too common in here.
A says
Could you share what brand grout you got for the light grey color? Or even a link would be better!!
Lisa says
Hi, there is a link to the exact grout brand and color I used at the end of this post: https://www.shineyourlightblog.com/herringbone-marble-tile-floor/
Christy says
First of all, your floor is beautiful! I am currently remodeling my guest bathroom shower and then moving onto the bathroom floor and want it to look just like yours. Where did you buy the transition piece between the herringbone pattern and your wood floor outside the bathroom? Thanks so much!
Lisa says
Hi Christy, I bought that marble threshold at a local discount tile store and cut it to fit with the wet saw. Thanks for your kind words on the herringbone floor!
Mackenzie says
Thank you so much for this! I have been racking my brain trying to figure out how I can afford marble in my new bathroom. I never would have thought of this. What a great idea!
Becky says
HI! This floor is beautiful! What did you use for the threshold? You are giving me confidence to do this!
Lisa says
Hi Becky, I used a marble threshold I purchased at a local tile shop. Definitely give it a try! If I can do it, so can you! 🙂
Jessica Black says
Love the look of the marble! Did you find that it is slippery with wet feet? Wondering if I should try to find a matte finish instead
Cate says
Love this, looks gorgeous! Thanks so much for the idea!
I’m planning out my guest bath and I think this would look great for us….however, I’m a bit nervous about laying out the herringbone pattern. When laying out the tile, did you start in the very center of the room or at the doorway?
Lisa says
Hi Cate, I recommend dry fitting the tiles first.If you look at my photos, I have full pieces whose corners touch the threshold of the doorway which I planned so that the most visible tiles would line up there nicely.I installed all the full size tiles before making all the small triangular cuts for the perimeter of the room. Also, after cutting the tiles I mixed them all up so a 12×12 tile divided in two would be spread out across the floor and like how that mixed up the color variations.Hope this helps with your project! Good luck!
cate says
@Lisa, thanks so much for your advice, I really appreciate it!!! I’m in the middle of the install right now and it’s looking amazing! You were right….dry fitting the whole tiles worked well and it wasn’t as hard to set out the layout as I thought it would be. Just one more question if you don’t mind (and I apologize in advance for bombarding you with questions)…I’m using the same tile adhesive that was linked in your blog. I know a lot is dependent on humidity/temperature, etc….I’m just curious as to how long it took for your tile adhesive to dry with the same tile size (6″x12″). I’m on day 2 of waiting for it to dry (with fans blowing on it) and it’s still squishy under the tile.