Welcome back to Shine Your Light! I hope you have been well! I’m back to update you on some of the projects I’ve shared bits and pieces of, and show you how they came out! I get so many inquiries about the color of our hardwood floors so I thought it was high time I share the details of this epic before and after!!
If you’ve been around here for a while you may recall that when we bought this house a dozen years ago, it needed a lot of cosmetic love. We decided to renovate the floors at the same time we gutted our kitchen so we only had to live through that mess once! The two projects combined took 10 weeks from start to finish.
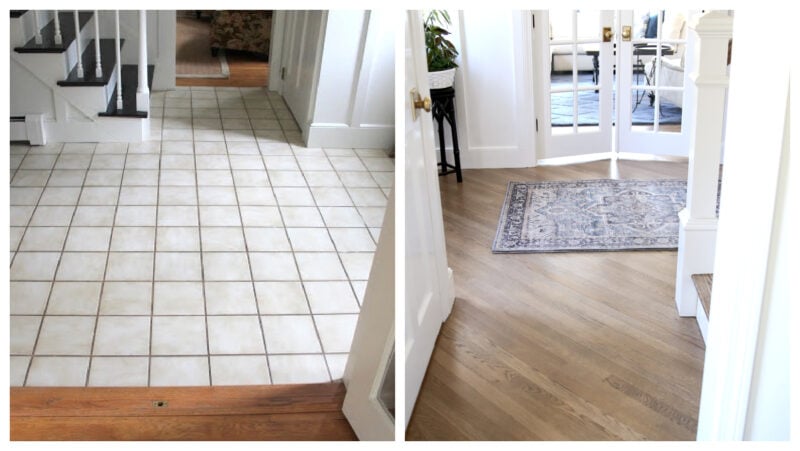
Our living area floors were comprised of worn out oak hardwoods in the living, dining and family rooms, cracked 80s tile in the foyer and two layers of vinyl flooring throughout the kitchen, hallway and bathroom.
The Floors Before Renovating
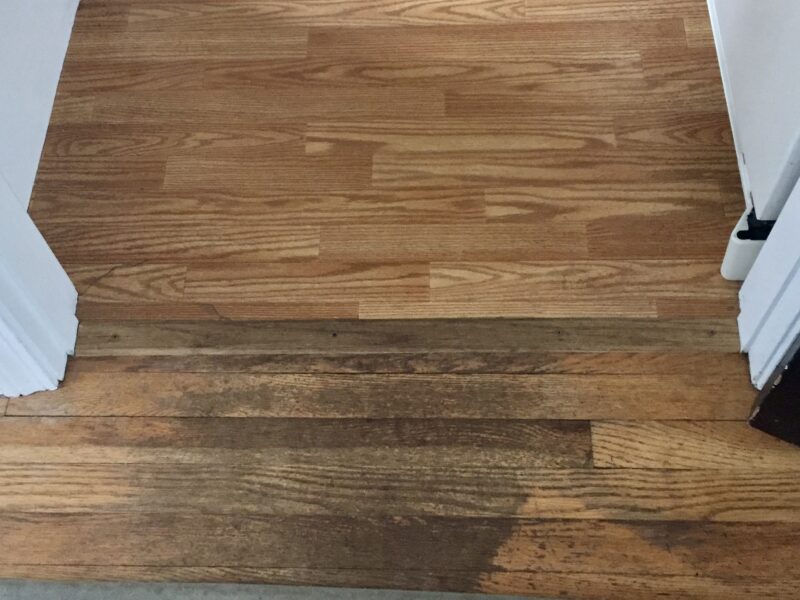
This grainy old photo shows the intersection of these different floor coverings.
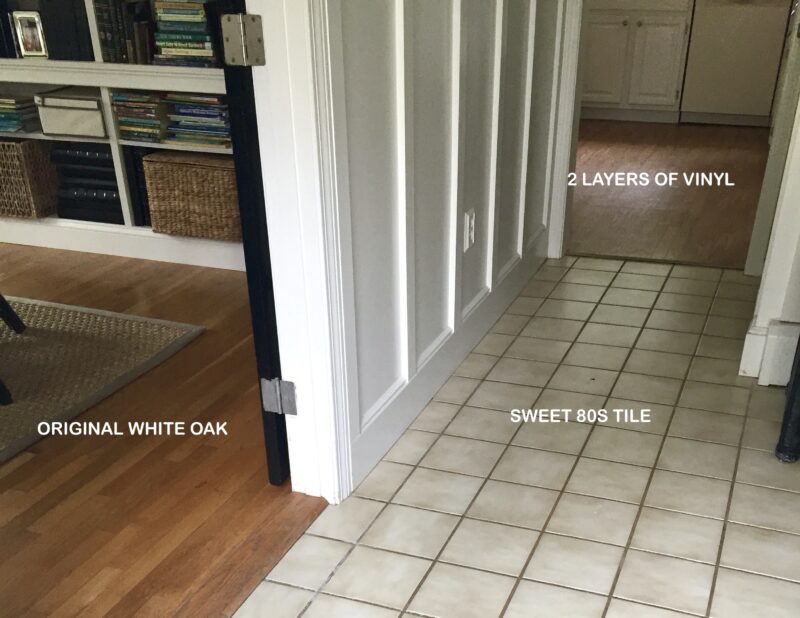
Except for it’s orangey color, the vinyl floor in the kitchen wasn’t too bad to live with, but the original hardwoods were in tough shape in some areas!!
The Demo of the Floors
We removed all the flooring, and let me tell you it was a beast of a job!!! Before we started, we moved all the furniture off this floor and removed all curtains, curtain rods, art, etc. We also covered our bookcases and tv with plastic drop cloths taped up with painter’s tape to protect them from dust. Additionally we removed the dining room chandelier.
To remove the tile we broke up a few tiles around the edges with a sledgehammer and then used a rented rotary hammer to jack up the rest. Once the tile was removed, we carefully cut up the plywood underlayment into pieces with a circular saw, being careful to set the blade just deep enough to cut through the plywood but not damage the subfloor, and then used a crowbar to pry it up.

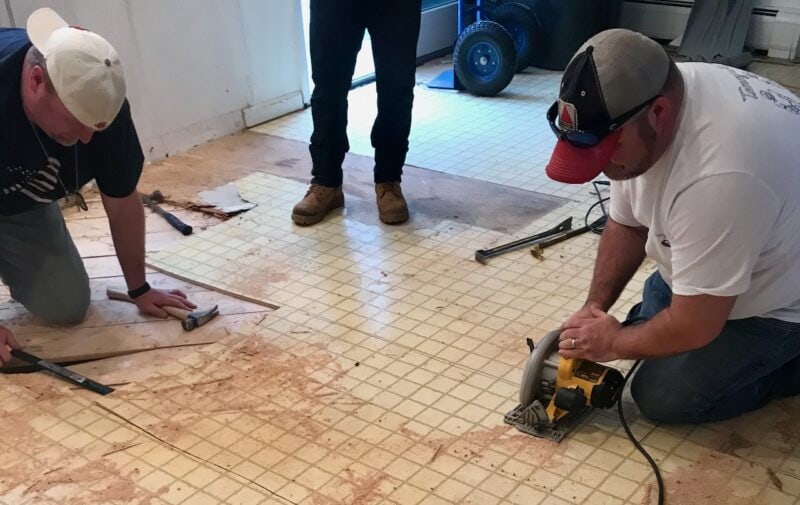
Our awesome friends who have done a lot of demo helped remove the entire kitchen, along with the two layers of vinyl flooring. This flooring was also cut with a circular saw and pried up. In this picture below one layer of vinyl had already been removed and the guys are working on round two.
A Fresh Start
After removing the vinyl and tile floors we were left with the subfloor in the kitchen and foyer. Woohoo, a clean slate!! We had lived in this house for nine years and had been dreaming of doing the floors since day one – I can’t begin to tell you how excited were were at this point!!!
After demo and clean up, we handed the job over to a hardwood flooring professional who started by repairing any issues with the existing sub floor.

Next he sanded the old finish off the existing hardwoods, and the solid white oak installed almost 40 years ago looked brand new again!!
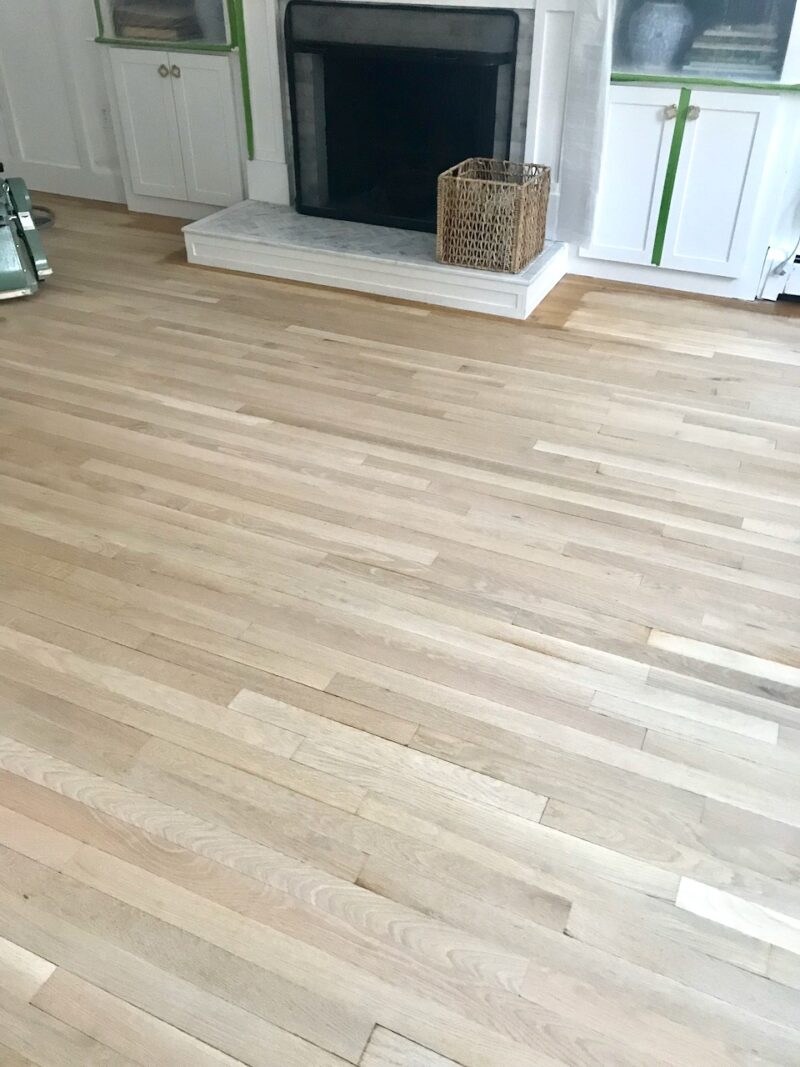
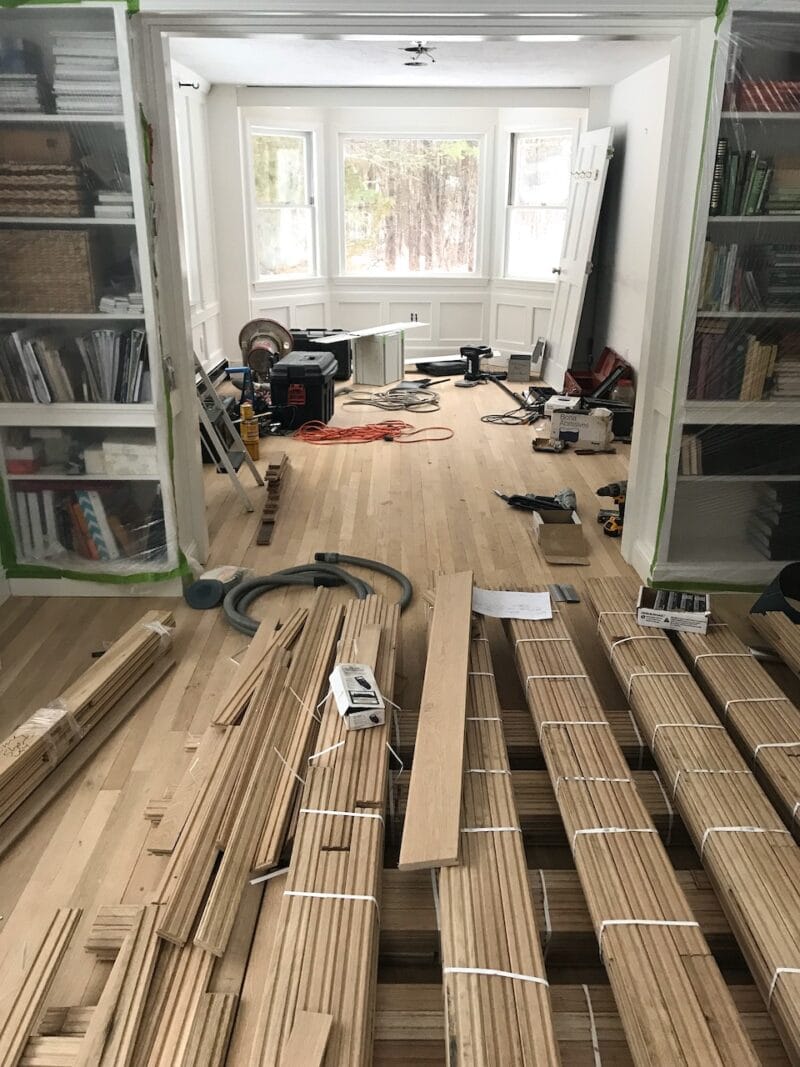
New matching solid white oak was brought into the house to acclimate for a week before installation. Between the kitchen renovation, crown moulding and other trim being installed in several rooms, and the floor project, our house looked like this for weeks on end!!
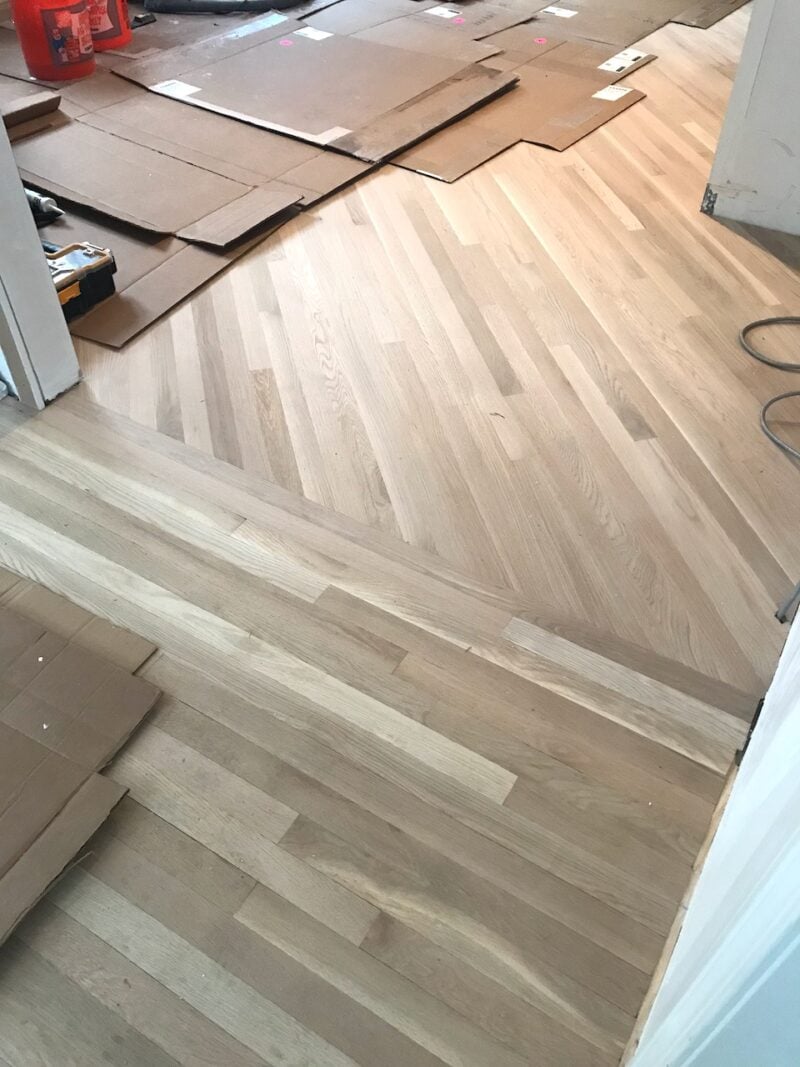
I am obsessed with herringbone wood floors and had planned to do that pattern in our foyer, but our hardwood floor pro said it would look a bit choppy with the the shape of our foyer. After mulling it over, I decided to have the new foyer and kitchen hardwoods laid on the diagonal. This photo below shows where the newly installed diagonal floor in the kitchen meets in the original, newly sanded dining room floor.
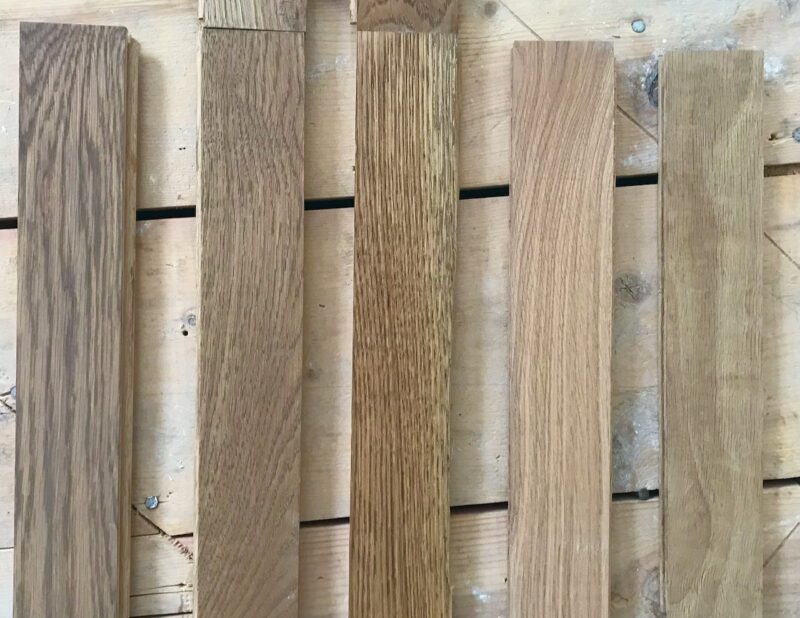
Next up, choosing a stain!! I had been dreaming about this project for so long that I had already tried out several stain colors on remnants of white oak, but still hemmed and hawed and worried and stressed – it’s such a big decision!!!!
We narrowed it down to three stains or combinations and our hardwood floor pro did big swatches of them right on the floor so we could live with them for a couple days and see them in the light of different times of day. In the lower left corner of this picture below you can see the leaf from my dining room table – I knew I wanted something that worked well with our current furnishings but was also a fairly “natural” and neutral wood tone.
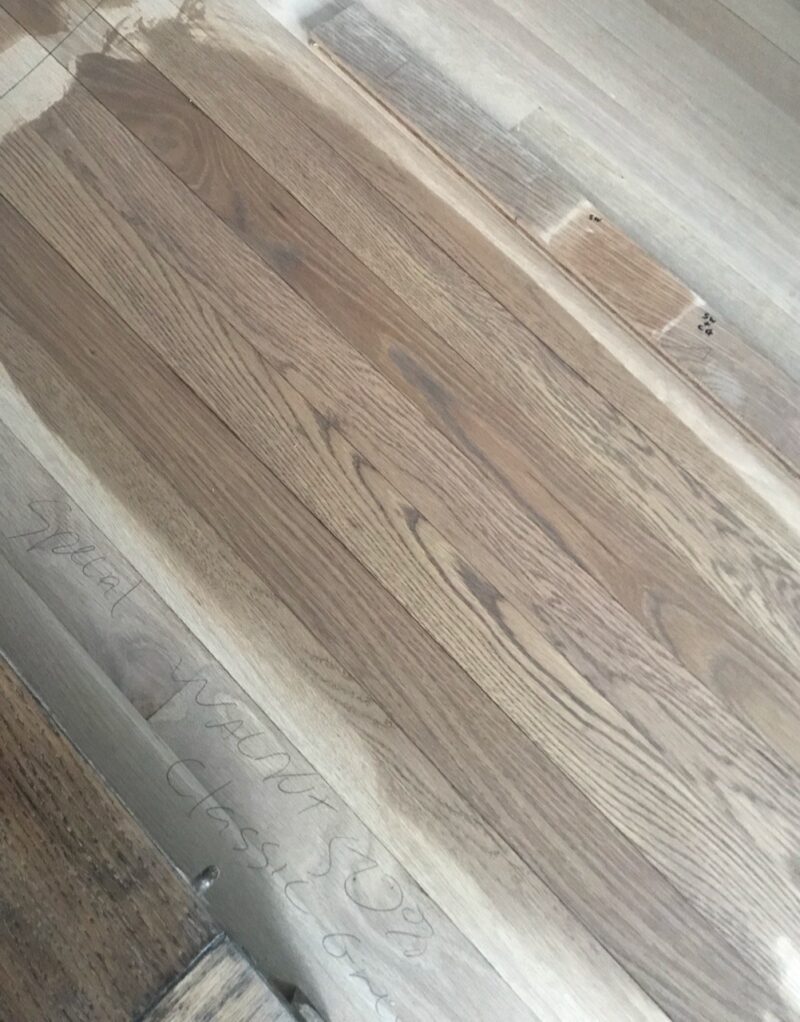
Our winning color in Minwax stains……
50% Special Walnut + 50% Classic Gray
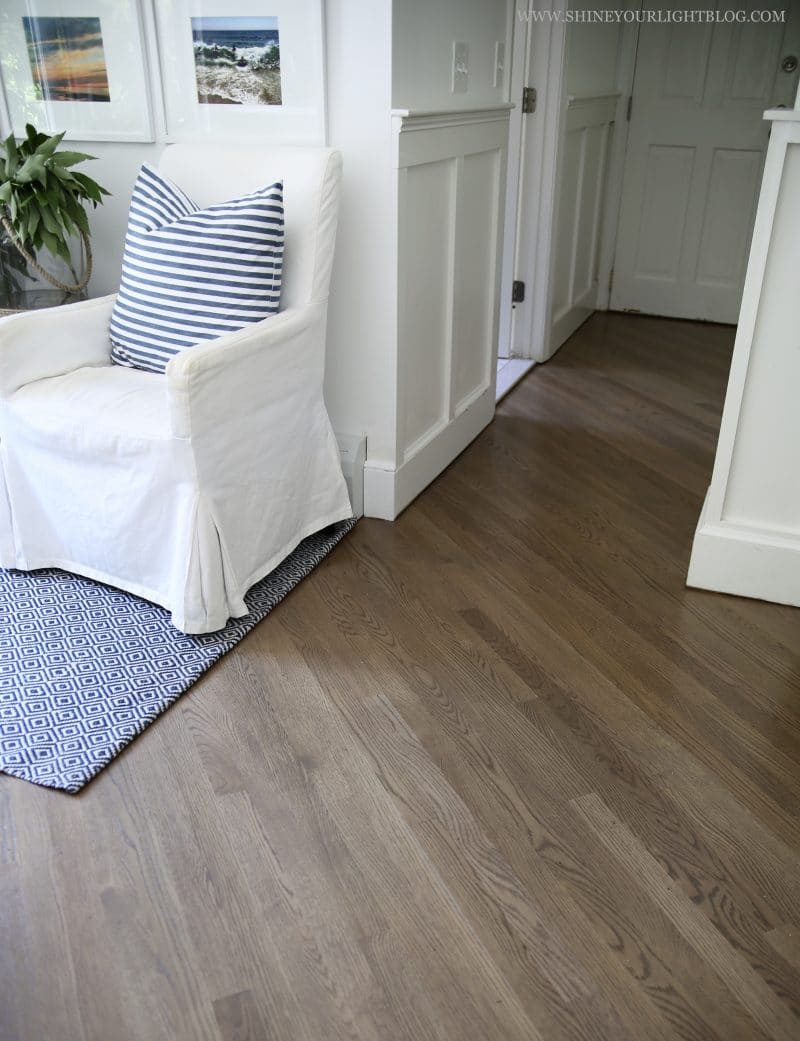
After staining the hardwoods, our flooring pro sealed them with Bona high traffic products in a satin finish.
We love how they came out! Depending on the time of day and presence of the sun, it can look more warm or lean more gray, but mostly I find it to be a very neutral light to medium brown which works great with our furniture and vibe.

Before and After Side By Side
The grand finale!
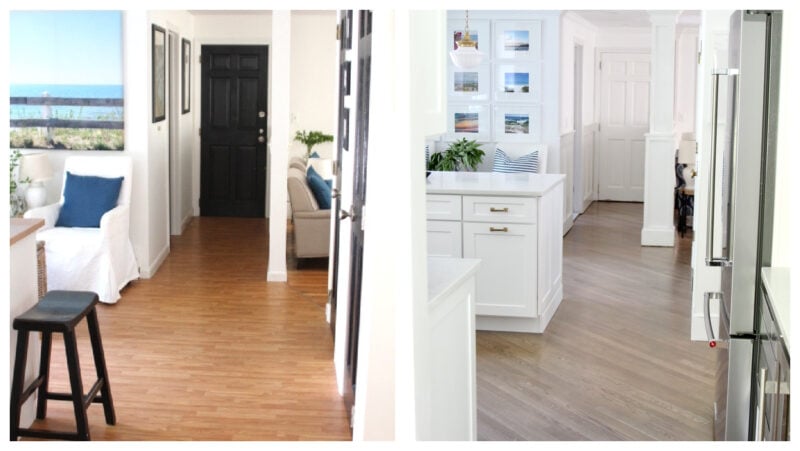
I love this transition between our kitchen and dining room. That worn out part on the below left is the same wood on the far right!! It sanded and restained so beautifully!

The foyer (opposite view). What a difference!! The stairs had a big makeover too, details coming soon!
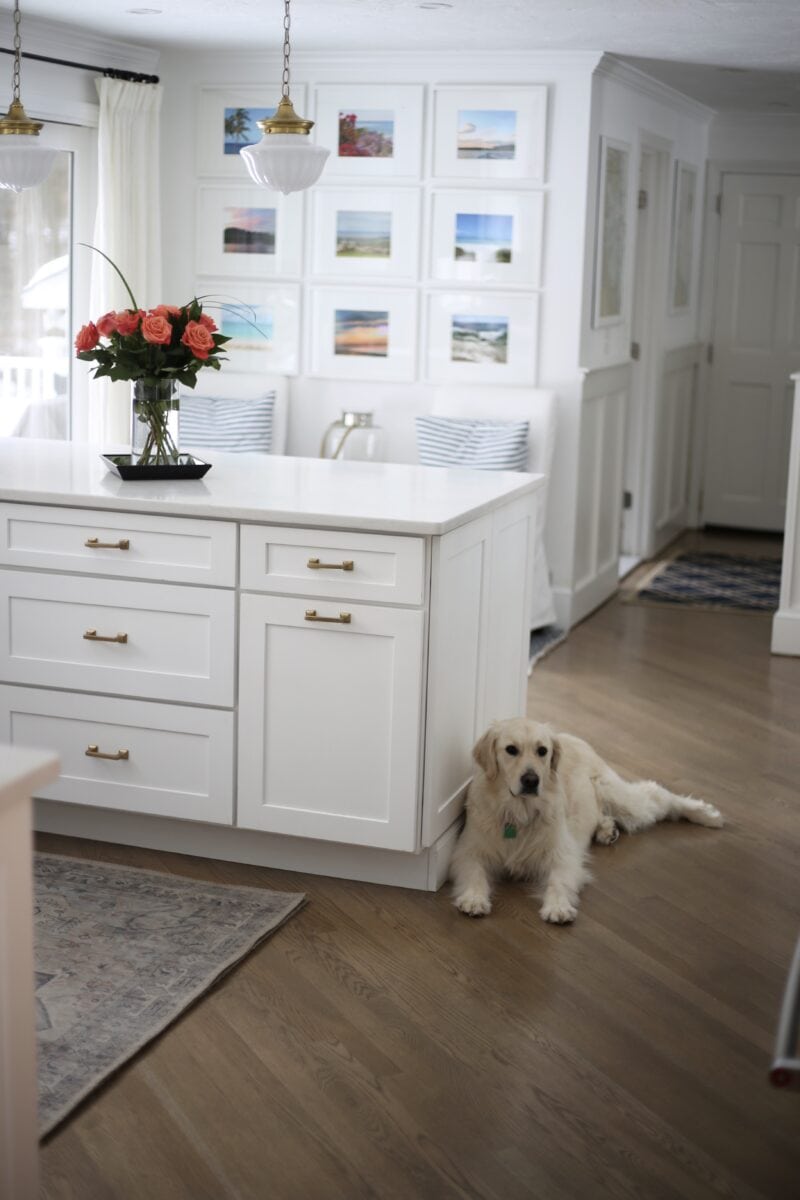
When the lights are on in the evening the color appears a little deeper.

After years of looking forward to this project, we could not be happier with how our floors came out!
Read more about our kitchen renovation here. This is still one of Kaia’s favorite spots, she can see where everyone is!
Thanks for following along with my renovations and projects through the years! I have the best readers ever and appreciate you and this space so much!


Brie says
Beautiful! It must feel so good to finally have another dream for your home come to fruition. 🙂
Lisa says
Thanks so much Brie! It was great to knock that big item off the house bucket list!
Susan says
I have missed you so much! Blessed that you are back