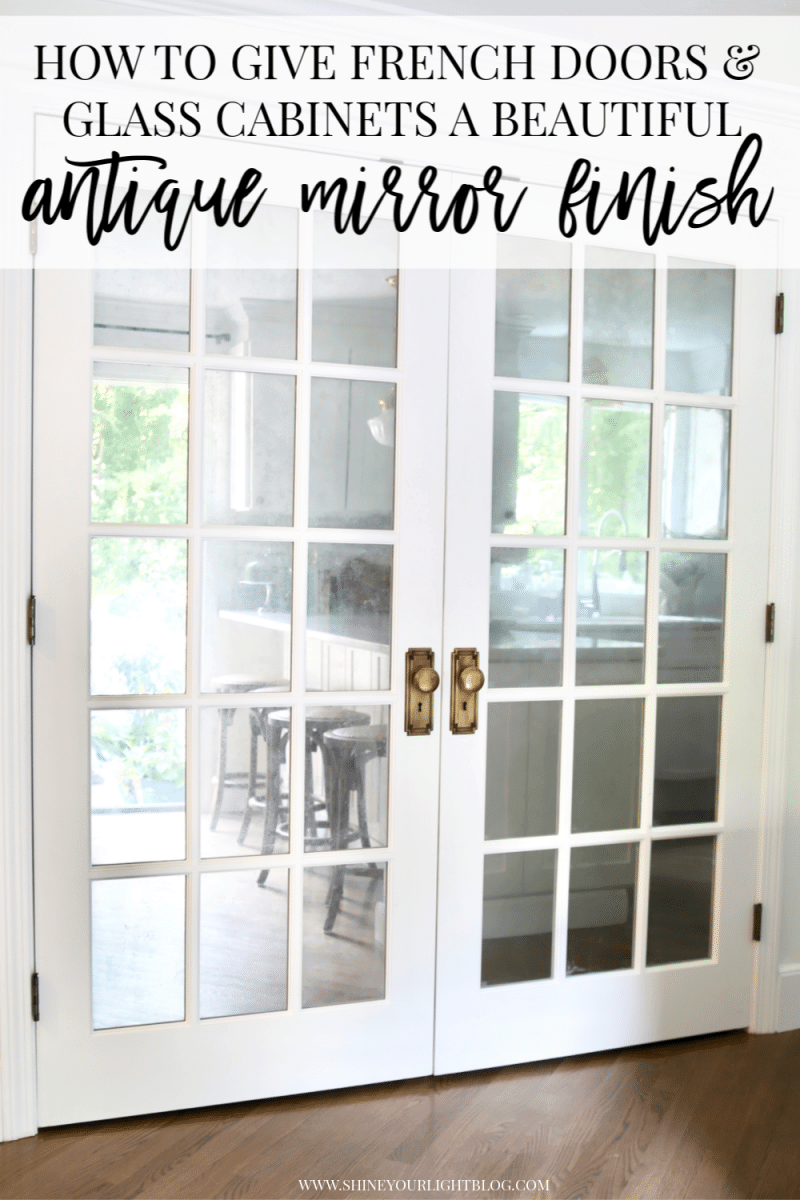
Learn how to give French doors or glass cabinet doors a high end antique mirror finish.
I love to DIY anything and everything I can in my house! However, I don’t want my DIYs to LOOK like an amateur (me) did them!! With a little extra time and effort your end result can be flawless and make you proud of your work and effort for many years to come.
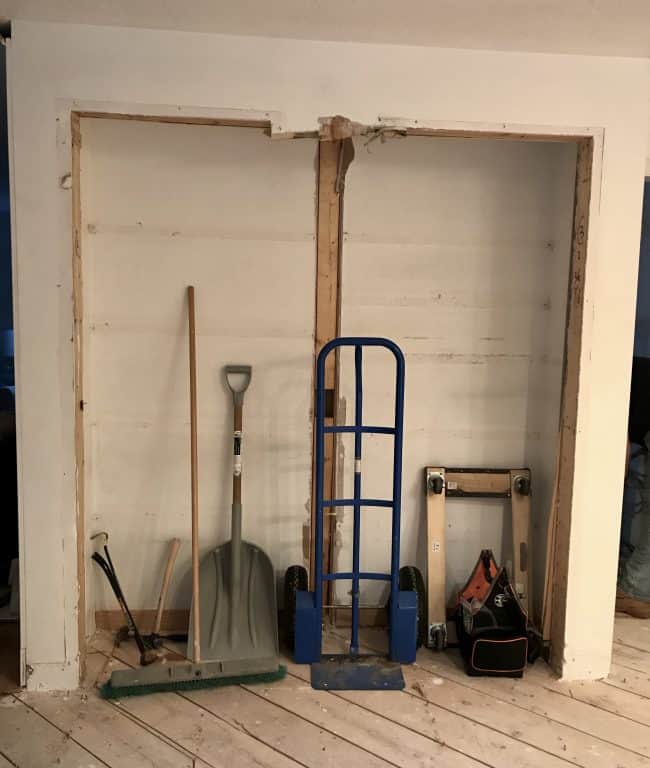
One of the parts of our kitchen renovation I spent a lot of time thinking about how I would change is our pantry wall. The original kitchen in our 1985 standard colonial had two side-by-side closets with about 16″ of dead space in between them that I wanted to take advantage of. We could have replaced this whole wall with built-in cabinetry, but honestly the simple shallow closets did function pretty well, and I thought this would be a great place to do something a little different in our kitchen.

When we demoed the kitchen we removed the existing pantry structure and opened up the 16″ between the closets so we had a clean slate to work with. It was amazing how much bigger this space felt without that wall in the middle!
My original plan was to use a set of salvaged old doors to give our new kitchen a bit of patina, but finding wide double doors that worked with our 8′ ceilings – and that we loved – turned out to be a bit more challenging than I anticipated. One of my blog readers, Mary, mentioned a Fixer Upper episode that used antique mirrored double French doors on a pantry that I thought was an interesting idea.
At one point during the renovation, French doors from our foyer that were removed for the floors to be done were temporarily leaning against the pantry wall. With the light from the adjacent slider reflected in the glass, it really struck me how pretty it would be to have glass here, but I definitely didn’t want to use clear glass for a pantry. Mary’s suggestion came to mind – a DIY antique mirror finish on French doors was really the perfect way to disguise the pantry contents and reflect the natural light.
I have used this antique mirror finish with several projects through the years – shelves for a bar cart and Ikea lanterns among other items – and was pretty confident I could make the mirror look old and give our kitchen some character. These doors were custom ordered and fairly expensive, and it was really important to me that they have a high end, professional finished look for our new kitchen.
These are similar to the unfinished, double hung French doors with regular glass that we purchased at a local mill company. Our kitchen contractor reframed the closet space, installed them and built pantry shelves.
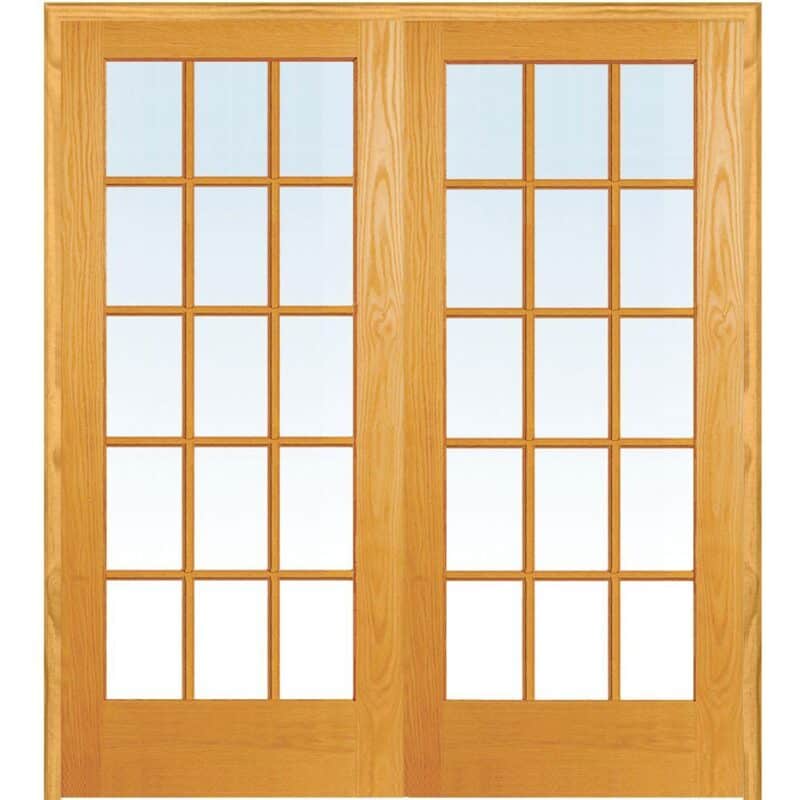
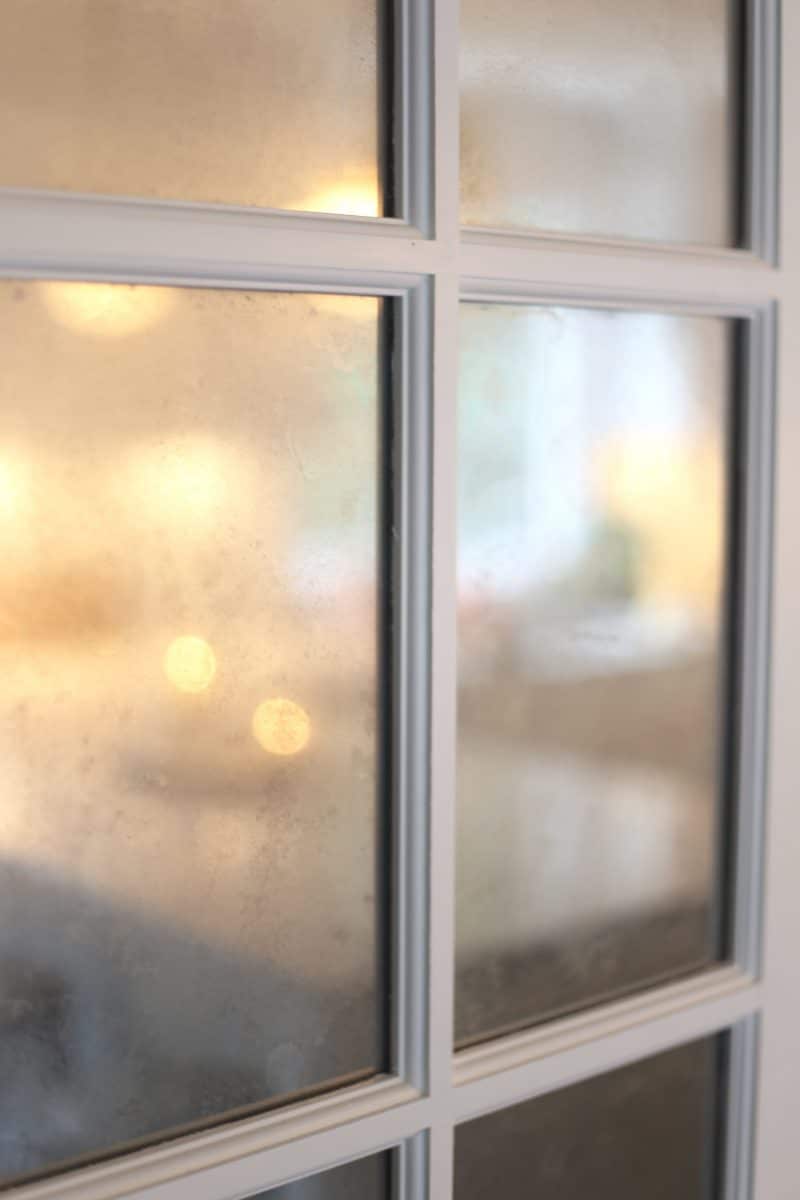
And after they have been painted and given the antique mirror finish.
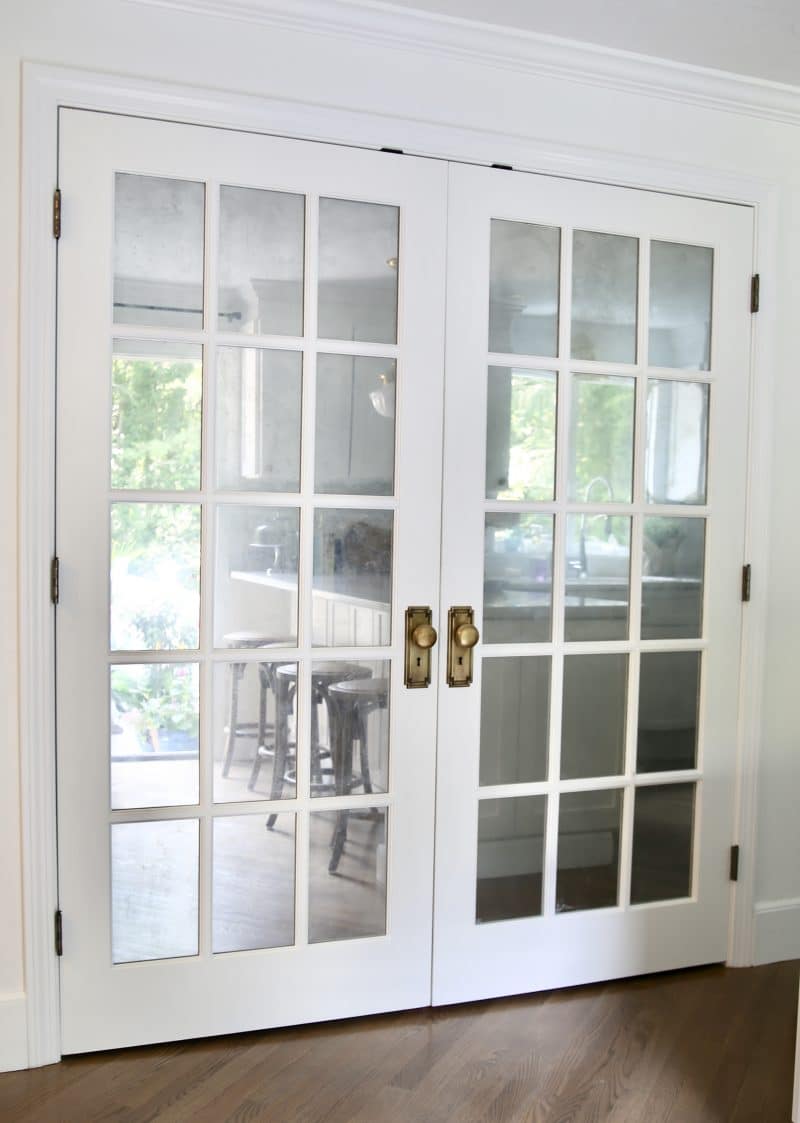
We love how the doors came out, particularly how much light they bring into our kitchen! Thank you Mary for giving me this great idea!
This DIY antique mirror finish would also be great for French doors on a bedroom closet, into a room where you need a little privacy or a space you want to brighten up by bouncing the light around a bit.
Do you have a French door you want to try this finish on? Here’s my step-by-step tutorial to walk you through the process!
How To Give French Doors A Beautiful Antique Mirror Finish
Affiliate links are included in this post for your convenience. Read more about affiliate links here.
Supplies
Krylon Looking Glass Spray Paint* (see more about this paint and sources for best prices at the end of the post!) – for each French door you will need about 2 6oz. cans of spray paint
Spray bottle with 50% water + 50% white vinegar
Rags and old towels
Painter’s Tape
Drop Cloth
Saw Horses
Silver Spray Paint
Fine Grit Sandpaper
Finish Paint (door color)
• ONE • Prepare your work surface with a drop cloth and two saw horses for each French door you will be working on. If you are working on more than one door, leave a space between the doors so you are able to walk between them during the painting process. I put old towels on top of the saw horses to protect the front of the doors from getting banged up.
• TWO • The mirror finish is applied to the inside glass of the doors so remove doors from casing and lay on the sawhorses front side down. Optional: tape off the panes of glass to minimize paint overspray. As you will see in later steps, I finished the inside of the doors with the door paint color over the mirror, but taping off the panes minimized how many additional coats of finish paint I needed to do and took under 10 minutes per door.
• THREE • Coat the panes with the Looking Glass paint. Once the doors are prepped, shake the Looking Glass can for a good minute or two, then evenly apply light coats to half the panes of glass on one door, holding the can about 10″ from the glass. You will notice the paint immediately starts to dry.
• FOUR • Mist with diluted vinegar solution. As soon as you are finished spraying half the panes on one door, grab your spray bottle of water + vinegar and lightly mist each pane right over the wet spray paint.
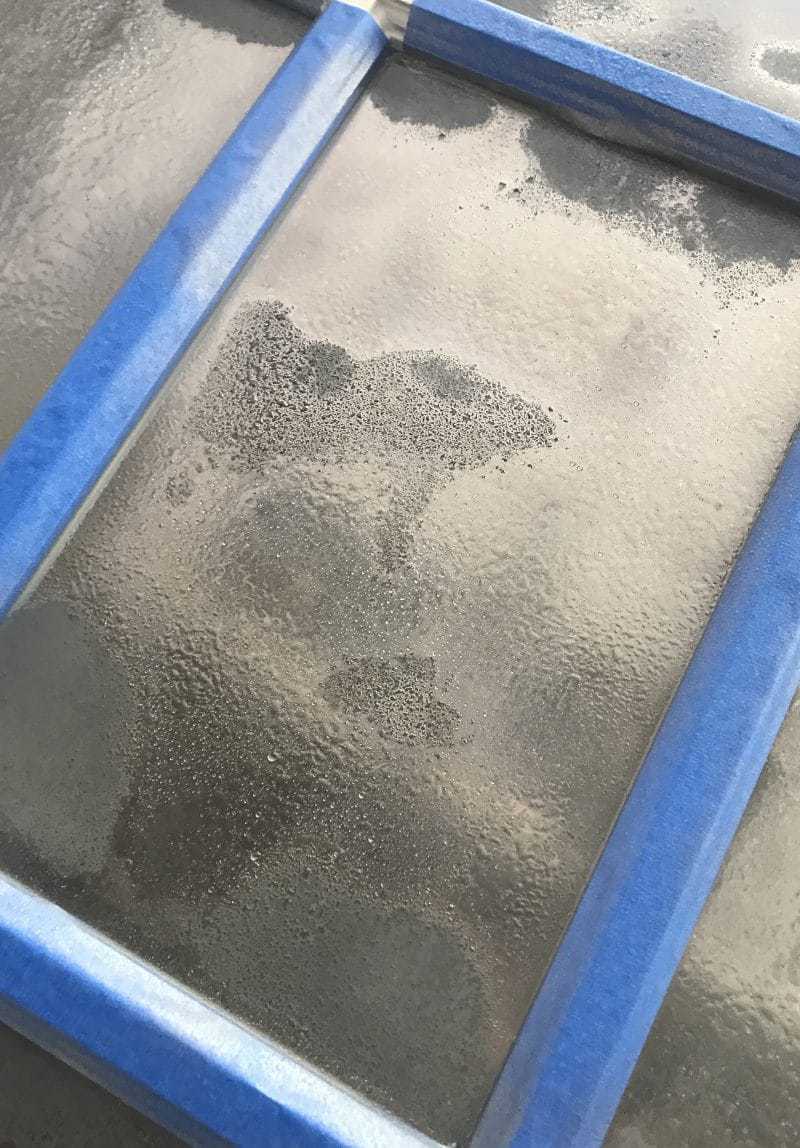
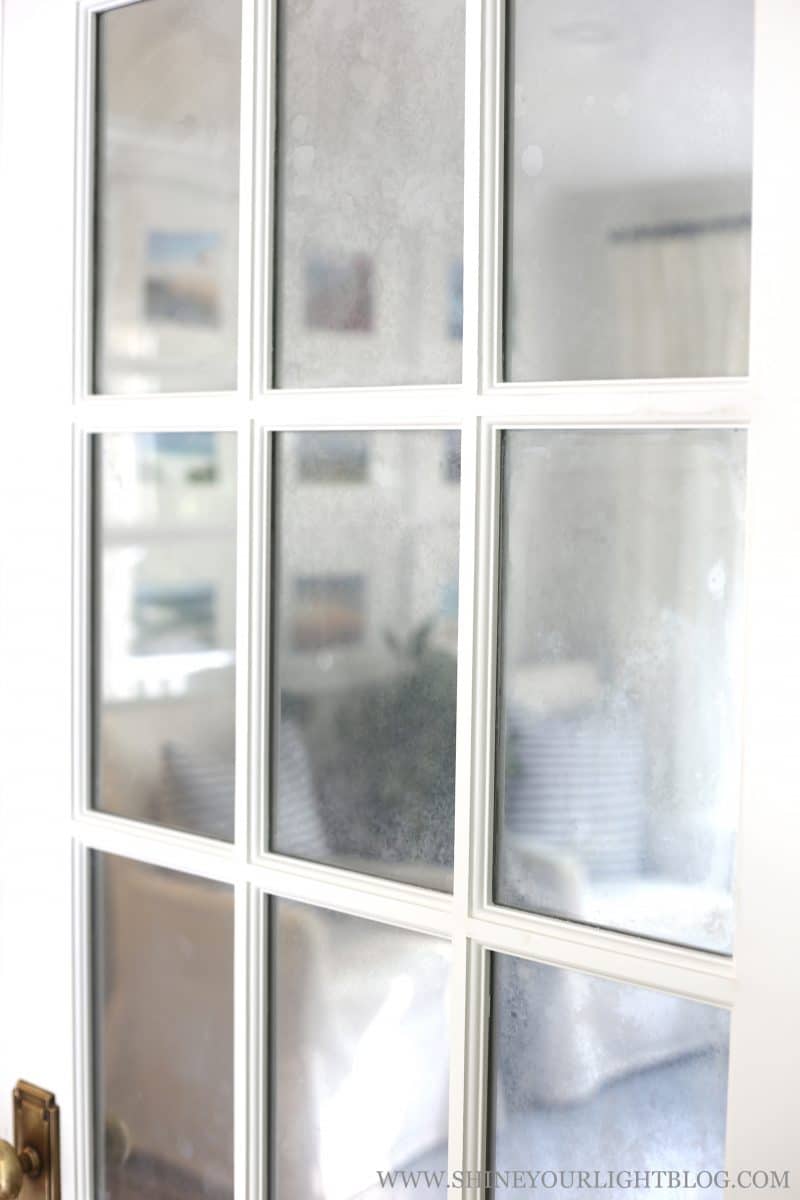
• FIVE • Continue spray painting half the panes of each door, immediately misting with the water + vinegar. Let all the panes of glass dry completely. Use a rag to gently blot each pane of glass to remove any paint that hasn’t adhered, creating a spotted, aged affect on the glass. In this photo below you can see how the diluted vinegar has caused some of the spray paint to flake off, giving the glass the desired mottled affect of antique mirror.
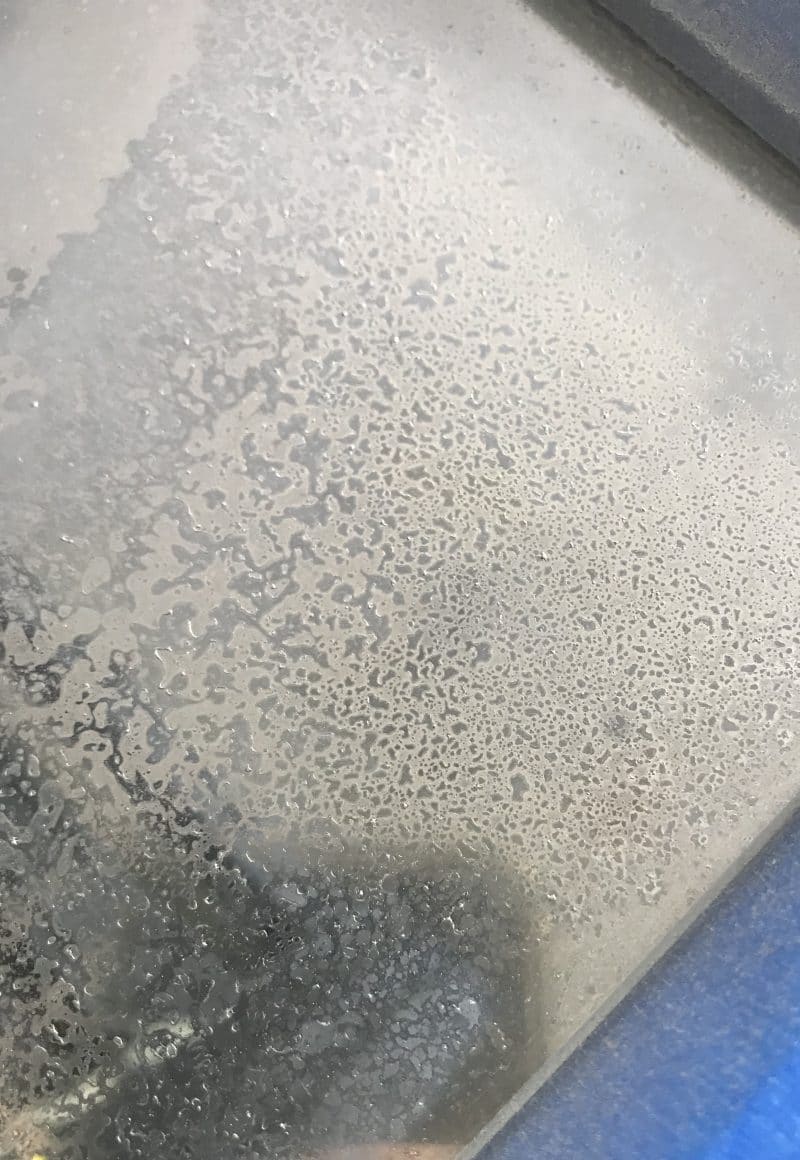
• SIX • Repeat the process of spray painting/water + vinegar misting for a second coat and let dry completely. Blot gently with a rag. The end result after two coats will be a reflective mirror finish that is slightly opaque (not completely solid), that looks like it has oxidized over many years. From the back, the Looking Glass spray paint is not reflective, but the front will be along with showing the “age spots”.
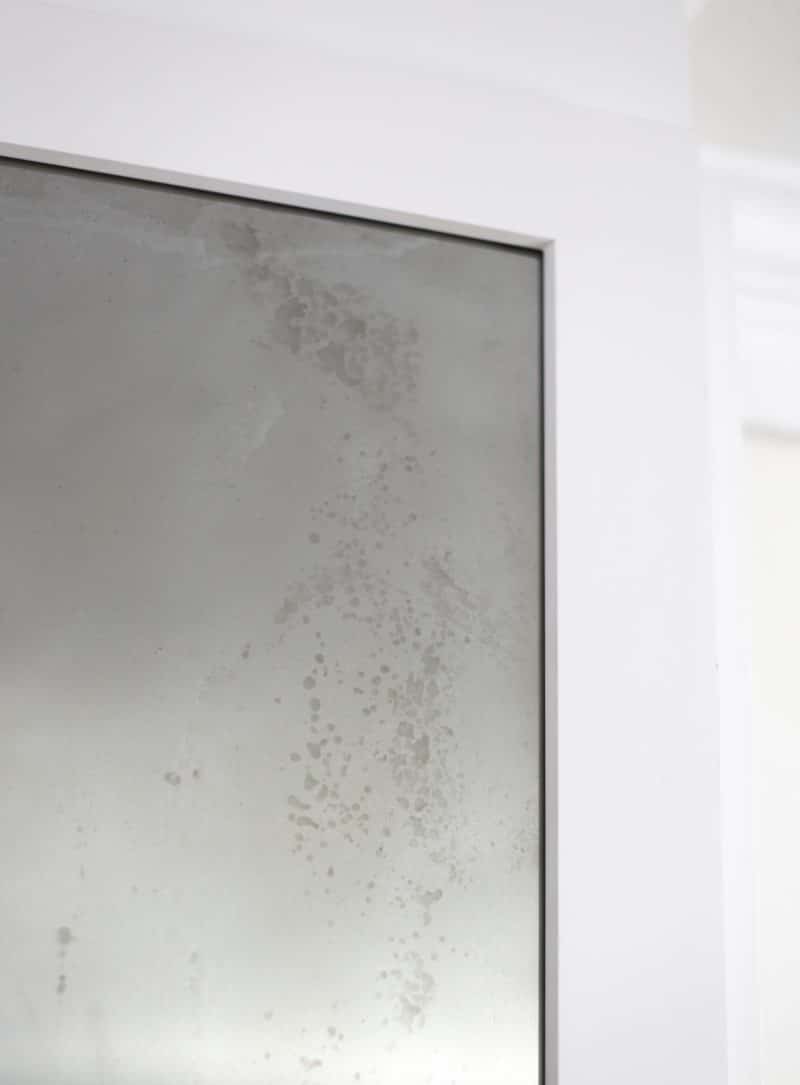
• SEVEN • Coat the panes with silver spray paint. To prevent your finish coat of door paint from being visible through the mirror spotting, I highly recommend a coat of regular silver spray paint. Initially I went over one pane of mirrored glass with my white finish paint and the white was really noticeable – not the look I was going for! The silver paint did the trick perfectly without having to use more of the expensive Looking Glass to get a solid coat. Shake the can of silver spray paint vigorously for 1-2 minutes, then lightly spray each pane of glass.
• EIGHT • Finish the back with door paint. To give the doors a really finished look when they are open, I removed the painter’s tape from around the panes and painted right over the back of the mirrored finish with door paint (I used Benjamin Moore Chantilly Lace in semi-gloss). Before I sprayed the final coats of white paint on with a paint sprayer, I lightly sanded the trim to remove any drips or rough areas, then vacuumed each pane with a brush attachment to get every speck of dust off the door. I gave the back of the doors two coats of the finish paint so they are solid white and the mirror finish is covered from the inside.

• NINE • Rehang your doors and enjoy their beauty!
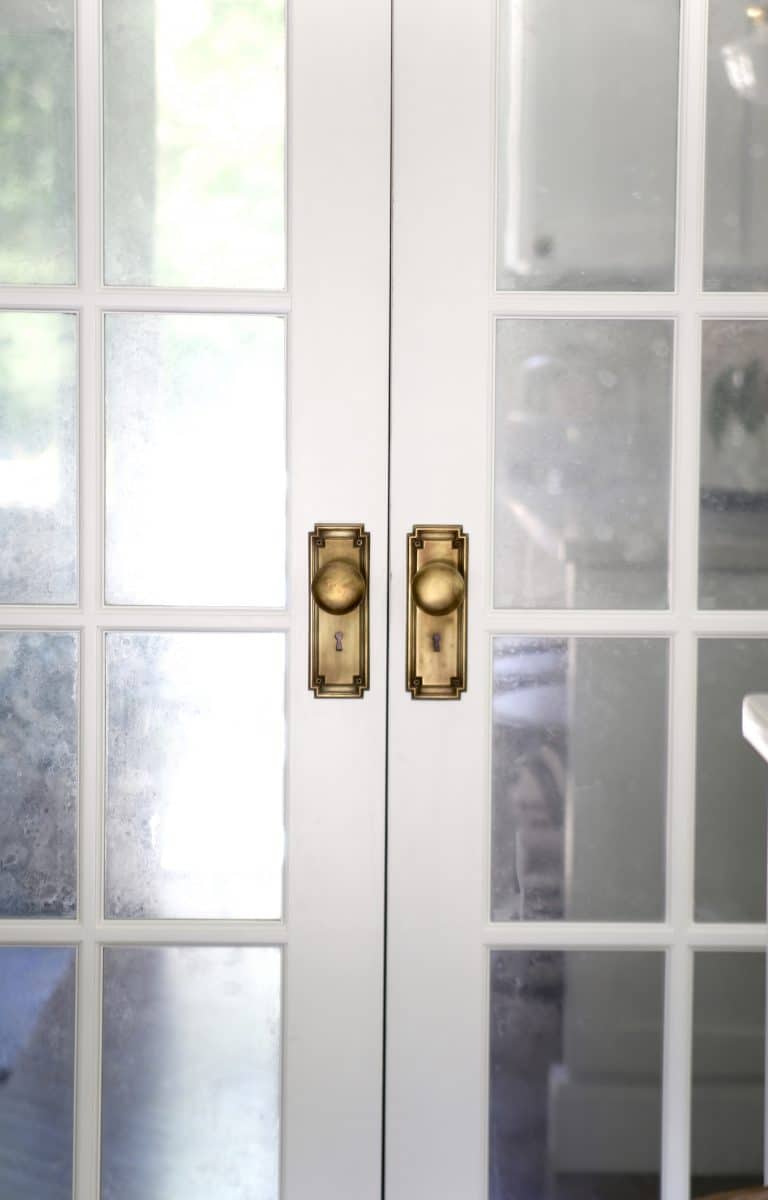
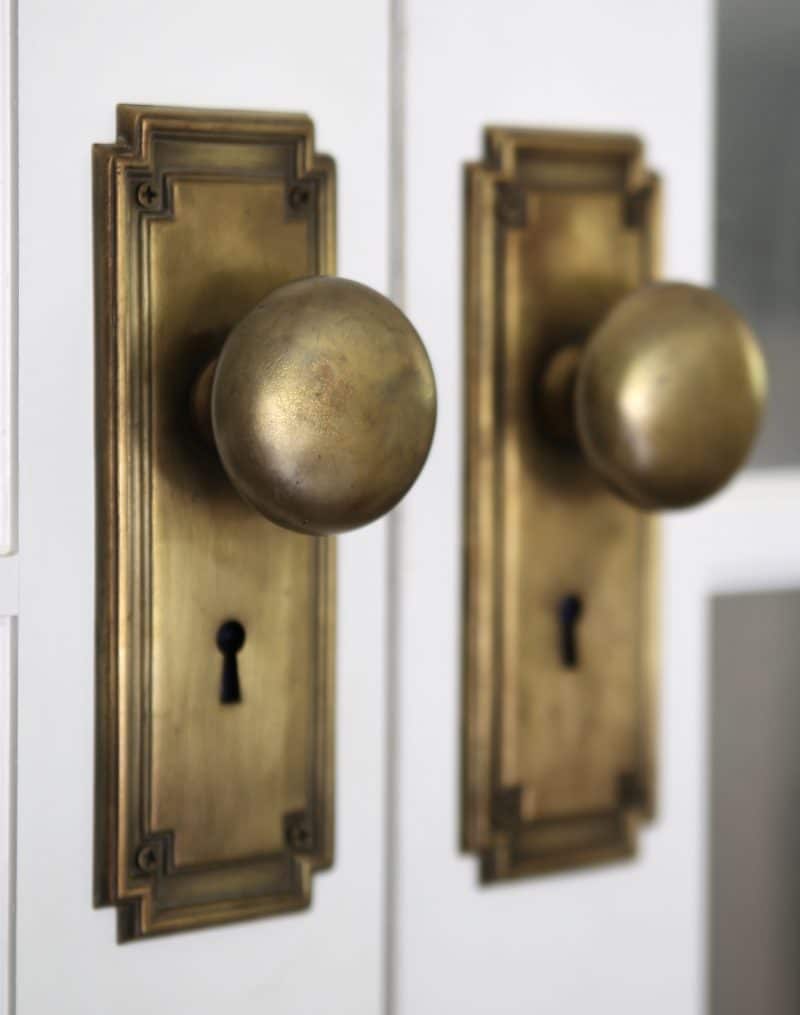
I finished off our antique mirrored doors with vintage brass hardware I found on Etsy and the doors turned out to be one of my favorite parts of our new kitchen!
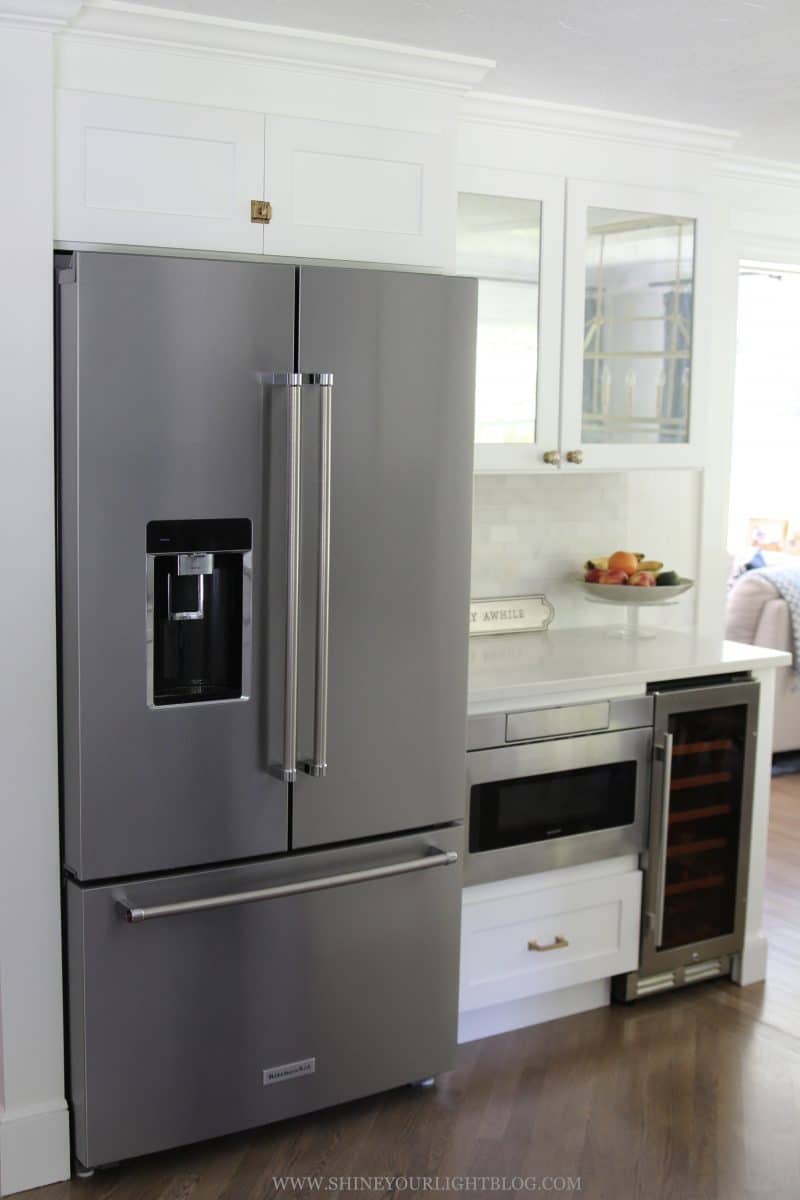
I used this same antique mirror finish on two glass cabinet doors and absolutely love how these doors reflect the windows in the dining room and the light fixture! (More on this area later when I finish the moulding project I’m doing in there!)
A Few Tricks For Achieving A
Non-DIY Looking, Professional Finish
On Antique Mirror French Doors and Cabinet Doors
- The Looking Glass spray paint is very delicate when dry, so use a gentle touch when dabbing it with rags.
- I recommend doing at least two coats of the Looking Glass paint.
- Be sure to seal the Looking Glass layers to protect them from scratches and flaking off.
- Do not paint over the Looking Glass layers with a brush. I learned the hard way that brush bristles, and even a foam brush, remove the delicate mirror paint. If you wish to use a brush to get into the nooks and crannies of trim around each pane of glass, seal the Looking Glass paint first with either the silver spray paint or some kind of spray on sealer.
- For the most finished look, paint the back of the door with your door paint color so the panes are covered. This truly makes the doors look more professionally finished. A paint sprayer makes painting the final coats a breeze and gives your doors a smooth, beautiful finish.
- If your Looking Glass spray paint can drips, return it! Spray paint drips are not the same as the mottled finish the diluted vinegar will give your mirrors and they make a mess of your project (see below!) Nothing worse than a drippy spray paint!
How To Redo A DIY Mirror Finish Gone Wrong!!
If you are unhappy with how the finish comes out on a pane of your door (or your whole project!) and want to start over, no problem!!
One of the cans of Looking Glass I bought had a major dripping problem that made a mess of my finish. I wanted age spots on the mirror, but not crazy splatters everywhere! On a couple of the mirrored panes I really didn’t like, I stripped the layers of paint off and redid them and they came out much better the second time around. Out of curiosity I tried a couple different strippers to see what was best – my favorite furniture stripper Citristrip on one pane, as well as a low-toxicity paint thinner I already had in my garage on the other, to remove two coats of the Looking Glass spray paint, one coat of the silver spray paint and two coats of the finish paint. They both worked but the Citristrip took up more of the paint on the first try and I had to do less scraping (and therefore less risk of scratching the glass), so I’d recommend that if you want a do-over!
- Apply stripper with a cheap paint brush or foam craft brush and allow to penetrate for 20-30 minutes.
- Gently scrape up the layers of paint (I found this painter’s tool worked well, along with a new razor blade to remove the little flecks left behind).
- If not all of the paint was scrapable on the first try, apply more stripper and let it do it’s job.
- Clean the stripped pane with a glass cleaner and paper towel.
- Tape off the cleaned pane with painter’s tape and then repeat the process of applying the Looking Glass paint, diluted vinegar, silver spray paint and finish paint.
Round two came out perfectly and I’m glad I took the time to fix these two panes that bugged me. It’s worth the effort to get it right.

What Mirror Spray Paint To Use???
I have used both this Krylon Looking Glass spray paint and Rust-Oleum’s Mirror Effect spray paint and in my experience Looking Glass goes on lighter and more even and gives a better finish and is my go-to. That being said, if you are planning to antique your mirror with diluted vinegar as I have shown in this tutorial and my other “mercury glass” tutorials, then how smoothly the mirror finish goes on is not as much a concern than if you were not antiquing the paint or going for a more distressed, old look like I have.
Keep in mind either brand their mirror spray paints in smaller-than-normal cans (6 oz. versus a typical spray paint can size of 11-12 oz.) For the two French doors plus two cabinet doors I showed in this tutorial I used FIVE 6 oz. cans of Looking Glass. It’s also expensive, ranging from around $10 to upwards of $17 depending on where you buy it. Rust-Oleum Mirror Effect is a little less expensive.
You can buy Looking Glass at many brick and mortar stores but sometimes it’s a hit or miss so I’ve reverted to buying it online instead of wasting my time driving around. I have an Amazon Prime membership so I usually buy it there (plus I have the inability to wait longer than 2 days for orders to arrive :)) but Hobby Lobby currently has the best price I can find anywhere at $9.79 for a 6 oz. can.
One last look at the finished doors! The “antique” affect gives the mirror a more subtle appearance than a bright new mirror, which I prefer for such a large space in our kitchen – it doesn’t scream out for attention but just has a muted, pretty, soft look, reflects the natural light, and best of all, hides the contents of the pantry!

See how the interior of the pantry was rebuilt and organized here!
Thank you for your kind words about our new kitchen. This DIY project in particular was so gratifying! If you try it I would LOVE to see your before and after photos!!
Have a great week! 
PIN THIS POST TO SAVE!

Myrna says
That’s truly amazing and a lot of work. I missed something. What did you do about the two pantries and the unused space between them ?
Lisa says
Oh thank you for catching that Myrna, I updated the post with how we took down that wall! Thank you so much for your visit!
Linda says
How long should it take to dry between coats? Love the look!
Lisa says
Linda, the conditions of where you are working and temperature can affect drying times. You want the spray paint and water to be dry before spraying the second coat. The silver spray paint used to seal in the Looking Glass layers should be dry to the touch after a half hour or so, and then you can give the whole inside of the door a coat of the door paint color.
Laura Ingalls Gunn says
This is so beautiful! I really appreciate this tutorial. I am curious as to what the other side of the glass looks like. I’d like to do this on my French doors but wonder if the backside is as pretty?
Lisa says
Hi Laura, the other side of mirrors is more of a flat grey. After I did the mirror affect on the window panes, I sealed them with a silver spray paint and then gave the inside of the doors 2 coats of my white door paint. See steps 7 and 8 in the tutorial. You can also see the inside of the doors in this post: https://www.shineyourlightblog.com/how-to-organize-a-reach-in-pantry-our-new-pantry-closet-a-super-easy-diy/! Thanks for your kind comment!
madison says
I am going to do this to our paned mud room door- since we will see and use both sides, could you do the process to both sides instead of door paint on the back side?
Lori says
This is awesome! I’m doing this on French doors that will become pocket doors. What did you use to seal the delicate Looking Glass paint so it wouldn’t flake off? Thanks! Lori
Lori Tolar says
Lori here, again! I figured it out. I thought you were painting on both sides of the glass. Now I see its just the inside. The seal is actually the silver paint and two coats of white…..correct?
Lisa says
Hi Lori! Yes I used the Looking Glass paint, then a regular silver spray paint to seal it, and finally the white door color to finish the inside of the doors!
Lori says
I used your technique on French doors that I changed into barn doors that divide a den and the hallway. Since both sides are visible depending on which side you’re standing, I was wondering if I can brush on another coat of white paint after spraying on two coats of white per your instructions. It would be a pain to take the hardware off to spray again. Once we hung the doors, I realized it doesn’t look solid white from the den/white side when my hall light is on. I can’t see through, but it actually does look silvery, and I’d prefer it be solid white. But even as they are, it’s a vast improvement, and I love them!
Karen says
I LOVE this! Beautiful job and inspired idea.
My doors are already hanging and it costs hundreds to reinstall them if I take them down to paint the glass. Is there any way to do this on a door that is already hanging without taking it down?
Lisa says
Hi Karen, I took my doors down and carried them outside with the help of another person. It’s not too hard. I think this technique is best done when the door is laying flat versus being hung because the Looking Glass paint is very thin and drippy, and I think it will run a lot, but you could try one pane and see how it goes. Make sure to cover everything around the door so you don’t have overspray ruining your space! Best of luck with your project.