Thank you to The Home Depot for sponsoring this project!
Today I’m thrilled to be partnering with The Home Depot for a DIY Workshop Virtual Party, to share a really fun project with you for the holiday season! I’m joining 25 DIY and design bloggers to build and create our own versions of the same project and give you some ideas on ways you can customize it.
THE DIY WORKSHOPS
Did you know that The Home Depot offers free workshops at all their locations for do-it-yourselfers of all ages and experience levels? There are three types – DIY (do-it-yourself), DIH (do-it-herself) and the popular Kids Workshops. You can learn how to build décor projects, how to make easy home repairs and how to operate tools through demonstrations and step-by-step instructions. (Check out The Home Depot DIY Workshop site to learn more about these free Workshops.)
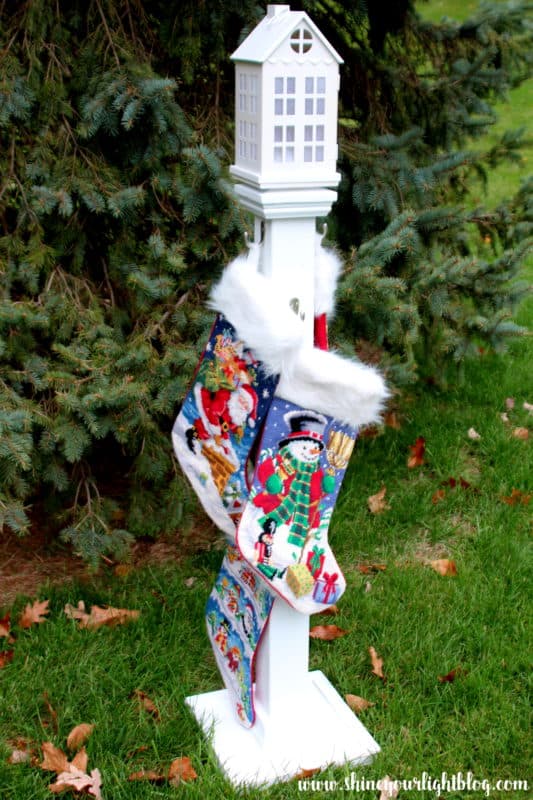
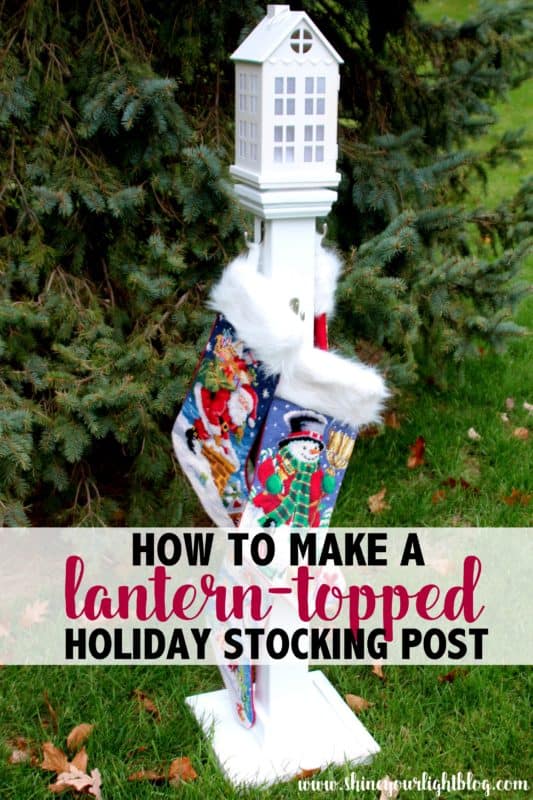
This Saturday, November 19 the workshop du jour is this cute holiday stocking holder! Isn’t this such a great idea for homes that don’t have a fireplace? In our case, we have a fireplace but we use it all the time, so I was looking for an alternative way to hang the Christmas stockings. This could not be more perfect for us. It would work well in an apartment or small space too.

I had so much fun doing this project, I can’t even tell you!
Here are a few ideas to bring some holiday cheer to a corner of your home, and I’ll show you how to utilize the post after the holidays too! This post may include affiliate links. Read more about affiliate links here.
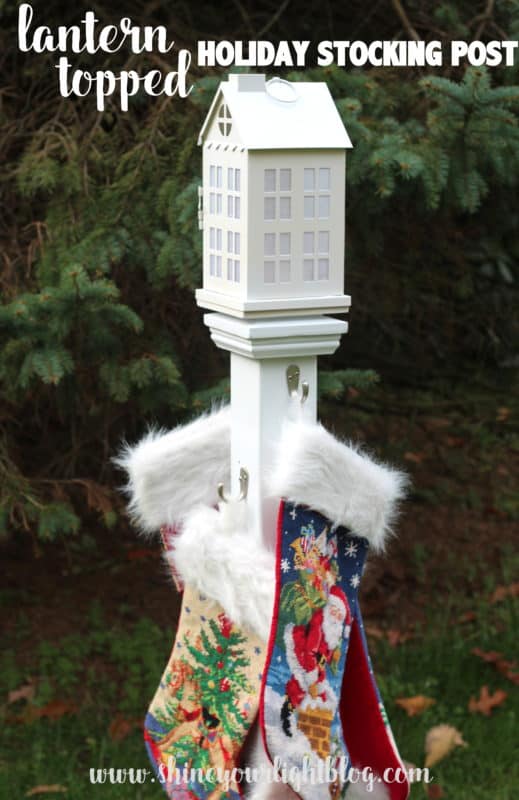
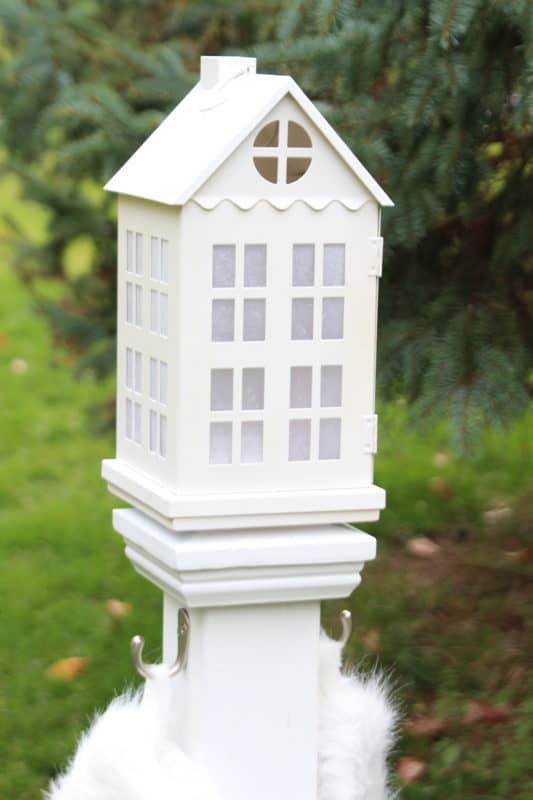
My version of the holiday stocking post is all about the battery-powered light up lantern that I made into a finial for the top of the post! It’s from the Martha Stewart line at Home Depot and was exactly what I had in mind for this project. I couldn’t believe my eyes when I came across this lantern amidst the Christmas decor – it was the perfect fit!! With a little tweaking it is securely attached to the post, but can be removed easily too (more on that later!)
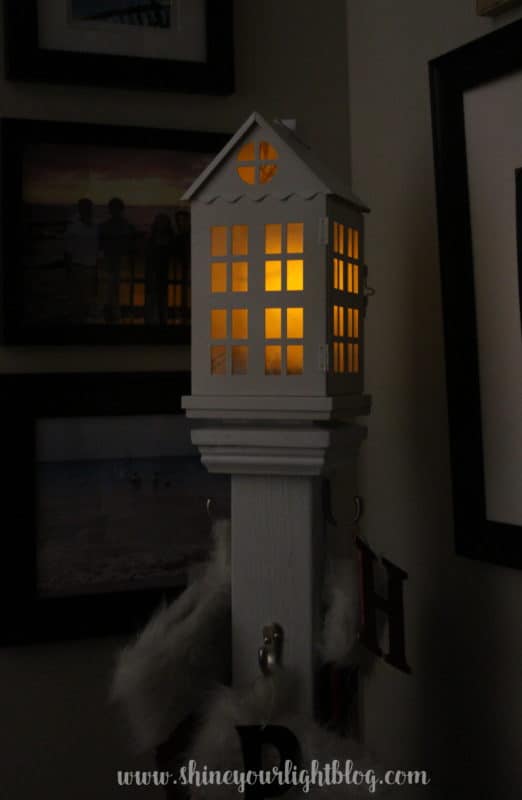
The post is space saving and functional, but the real magic happens when it’s dark out and the little lantern is all lit up!
There are so many ways you could make this simple post your own, starting with paint or stain to match your decor. I kept this one white and added some trim to compliment our craftsman style fireplace.
We also needed a lot of hooks for the 5 of us and more for overnight Christmas guests if need be (like my 11 and 12 year old niece and nephew and their mom and dad, who stayed with us last year.) Santa needs to be able to find the stockings!!

By the way, our stockings used to look like this – check out the non-commital way I changed them up with little faux fur!

Here’s how I made a lantern “finial”, with a few tips and tricks thrown in to customize your own holiday stocking post!

BUILDING THE POST
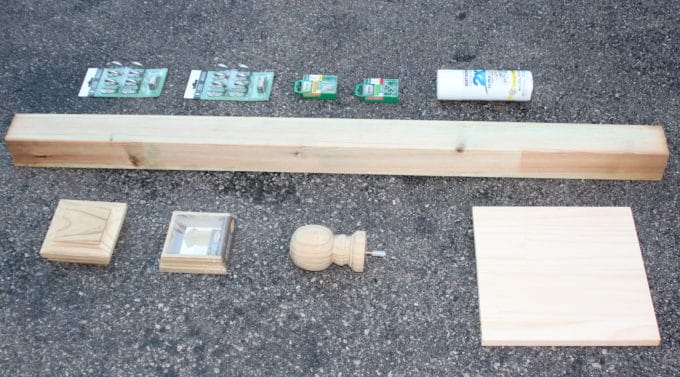
The basic holiday stocking post design consists of a base, a post, a post cap and a ball finial. You can learn how to put them all together at Home Depot’s DIY Workshop on 11/19 (click here to register!)
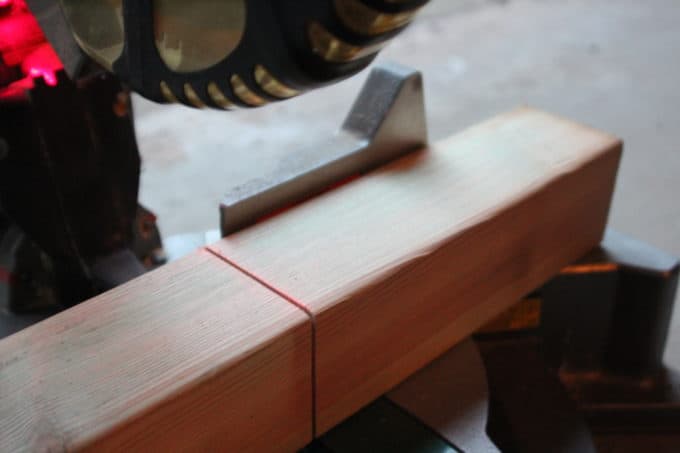
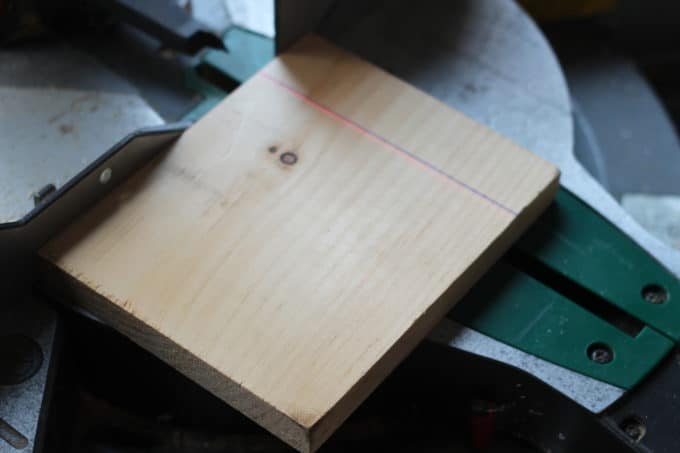
I wanted my post to fit on my fireplace hearth, so I made the plywood base a little smaller than called for. I also trimmed down the post a bit on my miter saw.

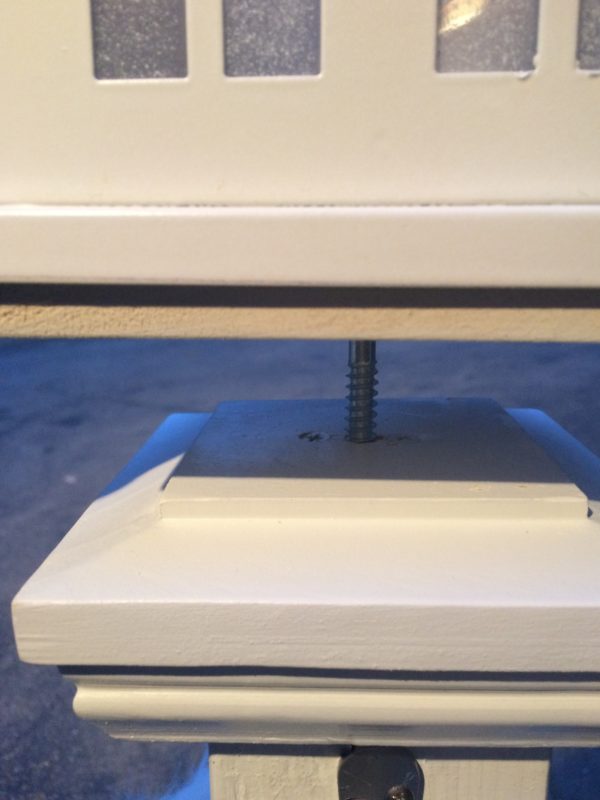
Before attaching the post to the base, I outlined exactly where the post should be so that when I flipped it over……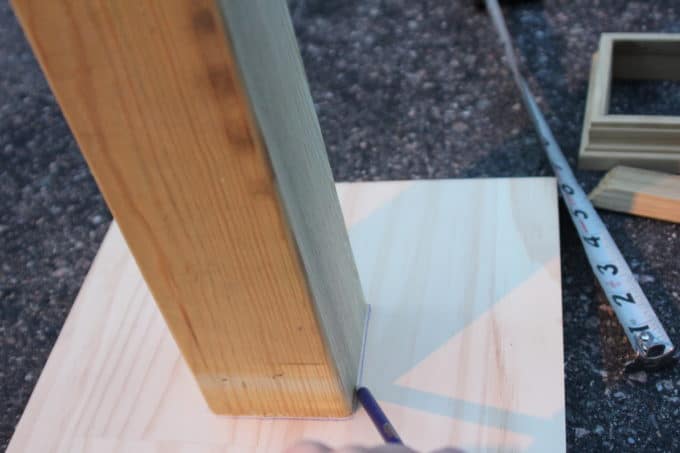
I could screw the two pieces together from the bottom of the base and keep an eye on the post position.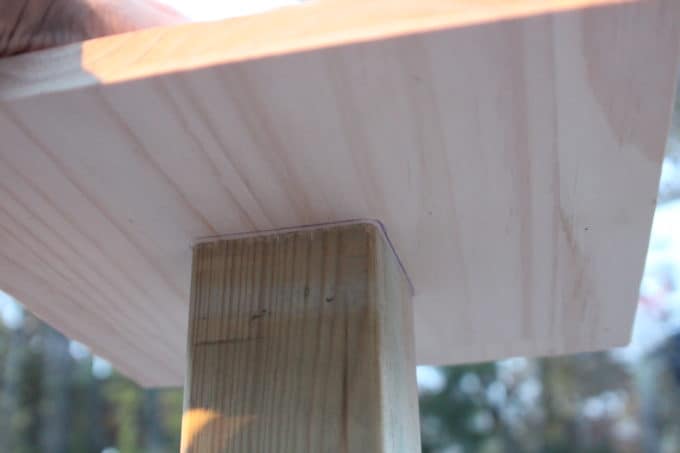
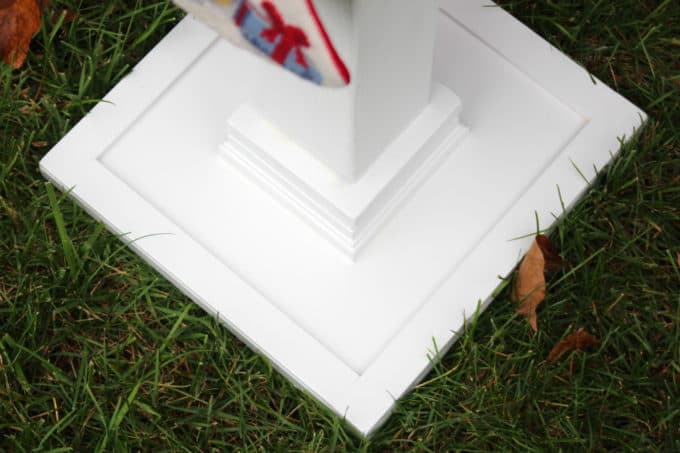
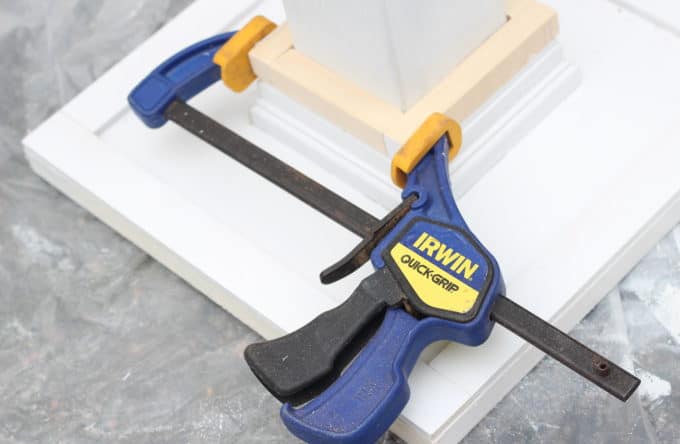
I used lattice moulding on the perimeter of the base, and added this little post base trim kit with a little bit of wood glue and a few finish nails (it comes with one side unattached so you can add the trim easily).
The only problem was that the base trim was a little too big and created a gap all around the post….
so more trim to the rescue! I cut and glued this small box trim onto the base trim kit, then clamped the pieces in place. Later I added a few finish nails, filled in the seams and gaps with wood fill, caulked and painted it.

RETROFITTING THE LANTERN TO FIT ON THE POST
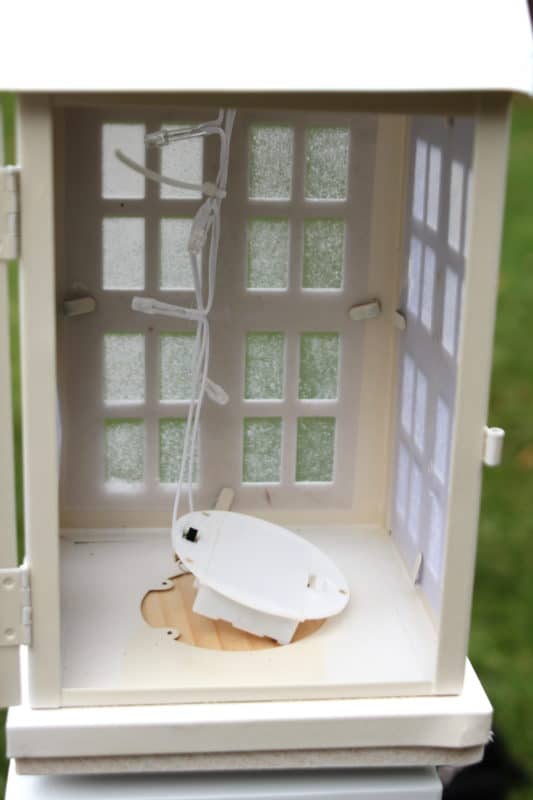
The cute little lantern has battery operated LED string lights inside. 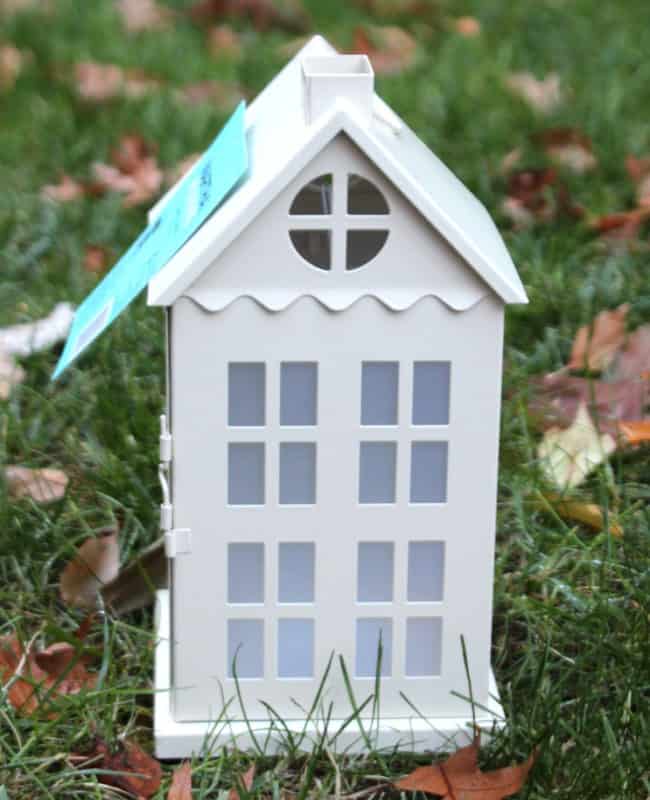
Because, you know…..

This is a lighthouse of sorts so he can find the stockings!
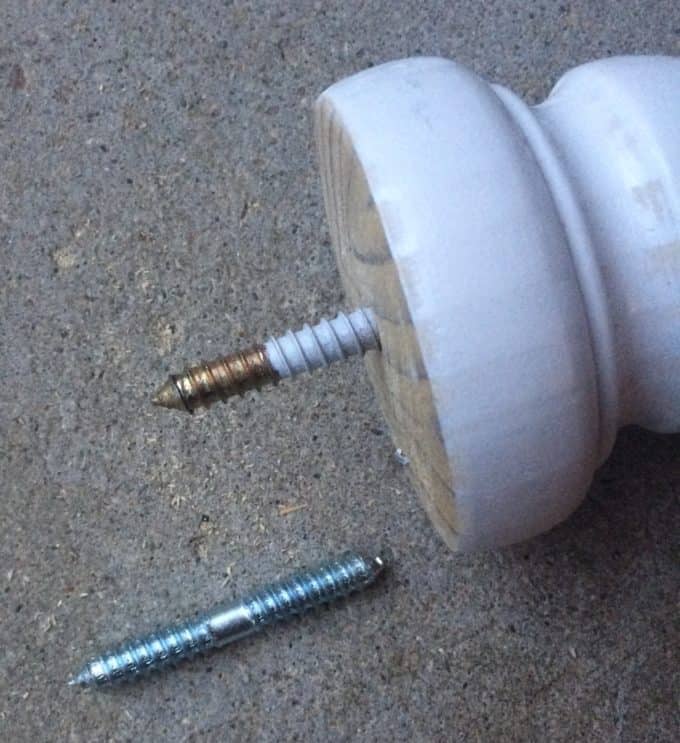
To attach the lantern to the post, I opted to add a wood base and a screw like the ball finial has, basically making the lantern into a finial of it’s own. This worked out great.
I took the ball finial over the Home Depot screw aisle, where I befriended an elderly gentleman who was also looking long and hard at all.the.screws (seriously, have you been in that aisle looking for a specific screw and there are about 70 million different ones to choose from?) I always meet the nicest people in the aisles of HD. He helped me figure out what screw size I needed and he was right on the money! Chatting with him was seriously the highlight of my day. 🙂
SO – the double sided screw. It is actually called a HANGER BOLT (like what I used to hang my dining room curtains with cabinet knobs). I used a 5/16″ size for the lantern finial, which is what the ball finial screw is as well.
The switch to turn the lights on is on the bottom of the lantern, and needs to be relocated before adding a wood base, so use a tiny phillips head screwdriver to remove the screws and push the battery pack into the lantern.

The battery pack is untethered but works just fine.
Now cut a piece of wood a bit smaller than the bottom of the lantern,
….add a bit of Liquid Nails, and attach the wood base.


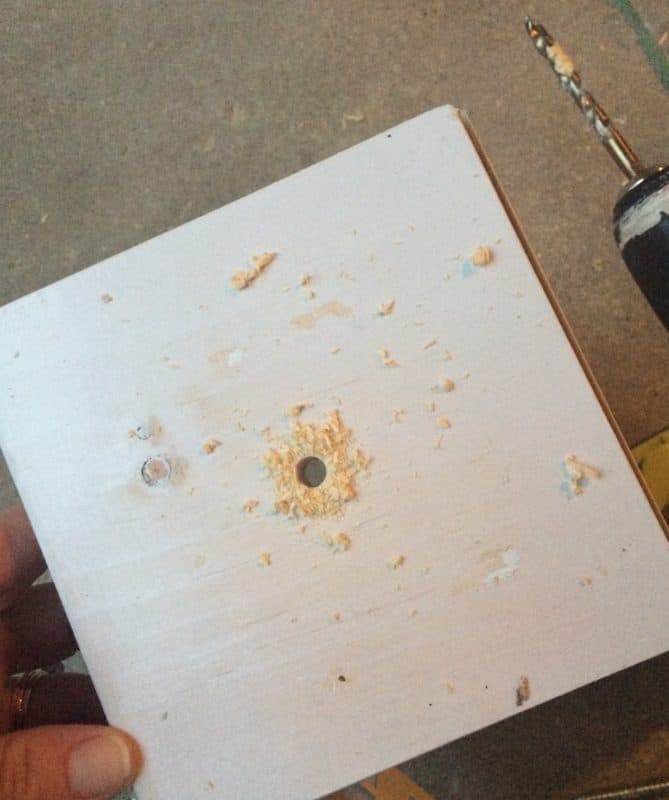
Using a drill bit a little smaller than the hanger bolt, drill a hole into the lantern base.
Using the same drill bit, drill a hole in the top of the post, through the post cap.

Screw the hanger bolt into the lantern (I used a wrench to get it in there easily)….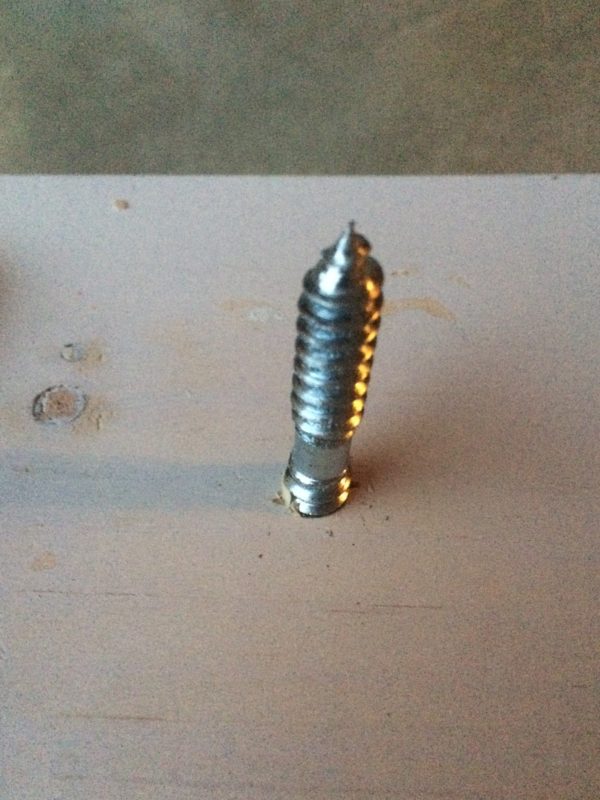
…and twist the lantern into the top of the post.
Works like a charm!
You just made your own lantern post finial!


ADDING THE HOOKS
A couple quick notes about the hooks.
Pre-drill the holes for the hook screws, because the post is very dense and you will make yourself crazy trying to screw them into the wood without a pilot hole.
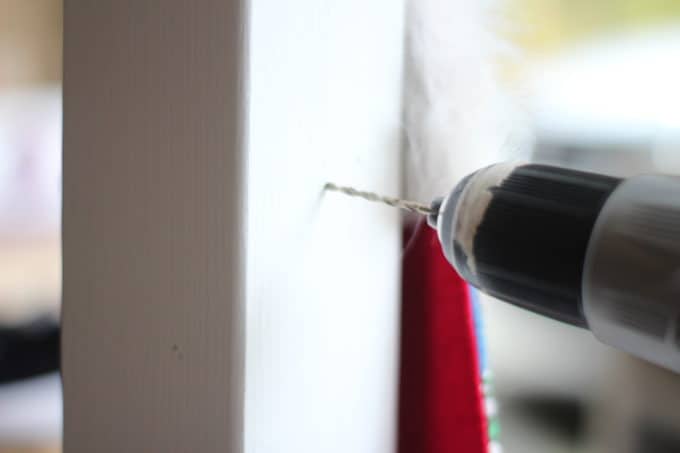
I use my drill to drive in the screws and then hand tighten at the end.

Also, either pre-drill these holes while the post is on a worktable or your kitchen counter where the base can hang off the end, OR add the base to the post after you pre-drill the hook holes, because it’s difficult to drill into the post if it’s not braced against a solid surface (garage floor, table, etc.)

BUT WAIT, THERE’S MORE! UTILIZE YOUR STOCKING HOLDER ALL WINTER LONG!
(Do I sound like an infomerical host? I hope so.)
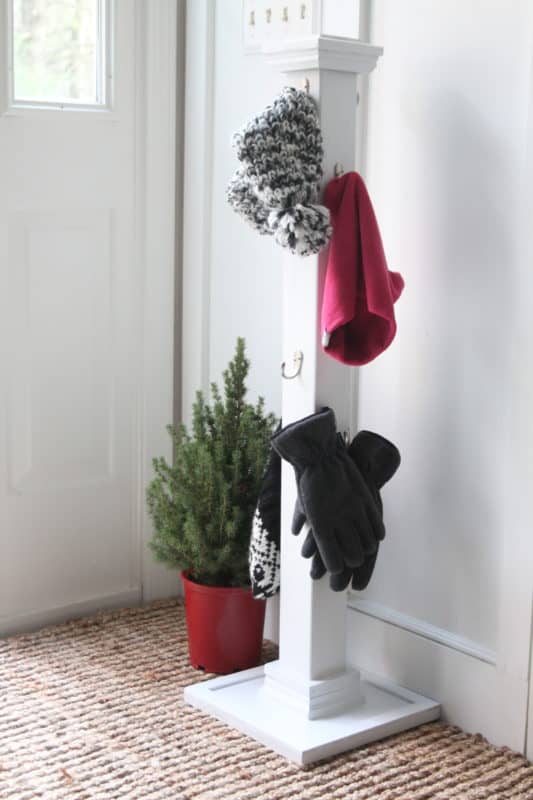
I was so excited to build this post because in addition to holding stockings, it can be put to use as a drying rack for wet gloves, mittens and hats all through a snowy winter!! Where was this when my kids were itty bitty?? 20 minutes of bundling everyone up, 10 minutes outside in the snow, and then back in again sopping wet. But man were those 10 minutes fun!

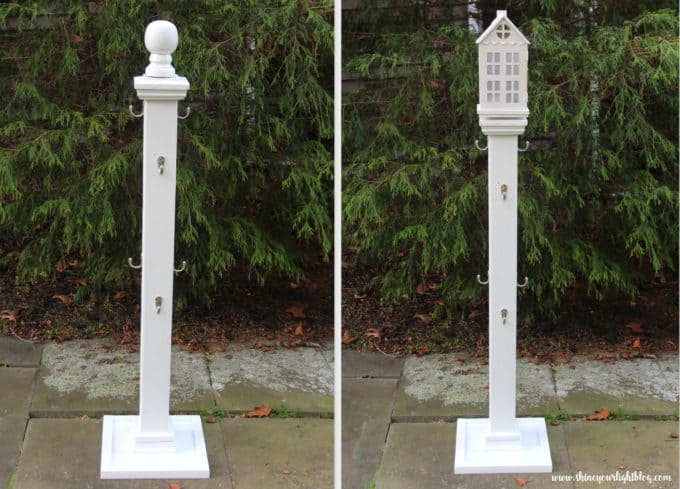
I thought the little white lantern looked very holiday-specific, so I painted a ball finial white too. After the holiday season, I’ll just unscrew the lantern and replace it with the ball.

It’s cute without the finial too, perfect in a corner for everyone to hang their cold weather gear on when they come in from snowball fights and shoveling.
So there you have it folks – a holiday stocking post that serves as a beacon to Santa and can double as a mitten-and-hat drying post.
All that glory from a free DIY Workshop at The Home Depot!
Now it’s your turn! You can build a holiday stocking post at The Home Depot and then gussy it up however you’d like! (I heavily contemplated using a copper post cap and then spray painting the hooks copper, wouldn’t that be so pretty?)
Register below for a DIY Workshop at your local Home Depot.


Thank you to The Home Depot for sponsoring this project!
Pin this post for later!
Don’t miss the many other creative ways you can customize a holiday stocking post by visiting these amazing blogs!
Domestic Charm • Homemade By Carmona • My Altered State • Smart Girls DIY •
Chaotically Creative • Ciburbanity • Lazy Guy DIY • Build Basic • That’s My Letter • Her Toolbelt •
The Handmade Home • The Heathered Nest • Designer Trapped • The Chronicles of Home •
Cherished Bliss • Just a Girl and Her Blog • House of Wood • Shades of Blue Interiors •
Uncookie Cutter • Ella Claire Inspired • Shine Your Light • Sawdust 2 Stitches •
Remodelando La Casa • Paper Daisy Design • Fix This Build That

Brenna@Domestic Charm says
That is so cute! Great job!
Lisa says
Thank you Brenna! I loved yours too, adorable!
Robby says
Did you find the house lantern at Home Depot too?? So so so cute!!
Lisa says
Hi Robby! Yes it’s from the Martha Stewart line and you can find it where all the holiday decorations are! It’s online too – I put a link in the post for it! Thanks so much for stopping by 🙂
Cristina says
Lisa, I love your version! As I told you, I also considered this lantern. It’s fun to see the final result. I think lanterns are such a good holiday toppers to the posts.
Lisa says
Cristina, thank you so much for your kind words. I had so much fun doing this project, thanks so much for inviting me to join you! I absolutely loved your version of it! XOX
Kris {Driven by Decor} says
OK, this is just way too adorable for words! And I love the idea for how to use it after the holidays (because gosh knows that I don’t have lots of storage space in this old house!).. Thanks for sharing – going to check out some of the classes they have near me!!
Lisa says
Thanks Kris! I am definitely going to start utilizing those free workshops! I don’t know why I haven’t yet! As far as using this as a drying post, I cannot wait to put that into action – wish I had it when the kiddos were small!
Adelina Priddis says
That is so cute! My friend actually signed us up for this workshop, but now I may not be able to go 🙁 I’m still hoping to make it, but in case I don’t, now I know what it looks like and how to do it! Thanks so much!
Lisa says
It’s a really easy build, Adelina, you would definitely be able to tackle it at home! Although it would be fun to go with a friend 🙂
Josie says
This is so creative and amazing!!!!! One of the best DIY’s I’ve seen 🙂 Thank you for sharing.
Lisa says
Aww that’s so sweet, thank you Josie! It was really simple and fun to build! Thanks for stopping by 🙂
Stephanie @ Casa Watkins Living says
It’s beautiful Lisa!!! I love the lantern topper and it’s so well decorated. Makes me want to go right now and decorate.
Lisa says
Stephanie thank you! I’m actually looking forward to breaking out the Christmas stuff after building that!
KariAnne Wood says
Your stocking holder is adorable! I LOVE the house (I had to buy a couple, too)!
Thanks for the inspiration!
Happy day friend!
karianne
Lisa says
Thank you KariAnne! Those little house lanterns are so cute 🙂
Carol @ CAD INTERIORS says
Lisa, those are great ideas for how the post could be used to hang a multitude of things other than the stockings! Love how you topped it with the lantern. Such a warm and inviting glow at night!
Lisa says
Thanks Carol! I put it in our basement so the kids can enjoy it when they’re down there watching tv with the lights out 🙂
Julia@Cuckoo4Design says
This is such a cute idea! Love it Lisa