A lot of my friends and family say I am lucky to be so handy, and that attempts they make at DIY always end poorly. Cutting in the paint on a wall, for instance, or installing curtain brackets. But I am here to tell you, any DIY skill is something you can learn to do well. As necessity is the mother of invention, so a stay-at-home-mother-on-a-small-budget-with-a-husband-that-travels-for-work learns how to tackle home improvement projects.
While I’m all for dividing chores around the house, today I say, enough with the honey-do list! It’s time to stop thinking we can’t do something because we’re girls. Seriously. We’ve all grown up with the notion that a woman can do anything a man can do, but deep down inside I think a lot of us subconsciously feel that women are better at some things and men at others. And no – this post is not about arguing that topic! But allow me yell it from the rooftops —-
the fact that we have a ** and he has a *** (PG rated blog!) has absolutely NO bearing on whether we can learn to use a saw, install our own board and batten, frame a room, refinish our floors, remove ugly tile, or install a new closet system!
I’m talking to those of you who don’t have the funds to pay someone, think you don’t have the skills, and feel frustrated that you are waiting on someone of the male gender to get a home improvement project done.
Give your husband the laundry basket and start googling how to do a home improvement project you want to accomplish, or go take a free class at Home Depot. Learning some basic home improvement skills will empower you! You can do these things yourself!
I’m speaking from experience here, ladies.
The doorknobs, oh they troubled me. You see, the new knobs I searched for a great deal on finally arrived at my doorstep, and I was all fired up to go around and change them all out. I could figure out how to remove the old ones just fine, but then the obstacle presented itself: the new knobs didn’t fit.
What’s that saying about trying to fit a square peg into a round hole???
Turns out most newer knobs come standard with this rectangular casing. Can I get a group sigh for a project that just got more complicated and time consuming? …. Okay, thanks.
I’ll admit right here that I hemmed and hawed and suggested to my husband a few thousand times that maybe he could tackle the doorknob issue. And he was like yeah I’m all over that this weekend right after I coach two basketball games, drive the kids to their practices, clean up the yard, shoot hoops with the kids, make you a yummy dinner Saturday night, go to mass, make a big Sunday breakfast, watch the golf tourney, go for a run, shoot hoops with the kids again, give the dog some attention and read the Sunday paper.
Yeeeeeah. Now let’s figure out how to get this done.
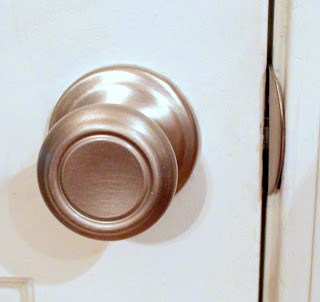
First, gather your supplies and tools: the new doorknob that comes with a strike plate and latch assembly –
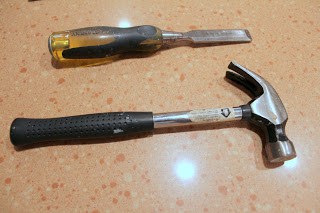
and you’ll also need a hammer and chisel (and Phillips head screwdriver which is not pictured).
1. Hate all over that old scratched painted-on knob for a good long time, then buy yourself a new one.
2 & 3. Unscrew and remove the door knob, then use a screwdriver to push out the innards of the doorknob, also known as the latch assembly.
4, 5 & 6. Insert new latch assembly into hole and trace with pencil.
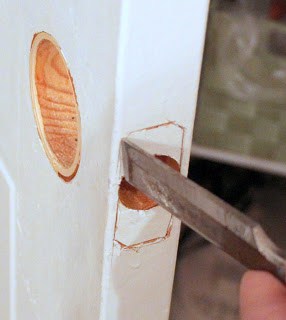
7. Line up your chisel with the pencil marks and gently bang the back of the chisel with the hammer. Be careful not to be too aggressive or you will crack the door frame. Work around your pencil marks, making an indentation that should be about 1/8-1/4″ deep all around.
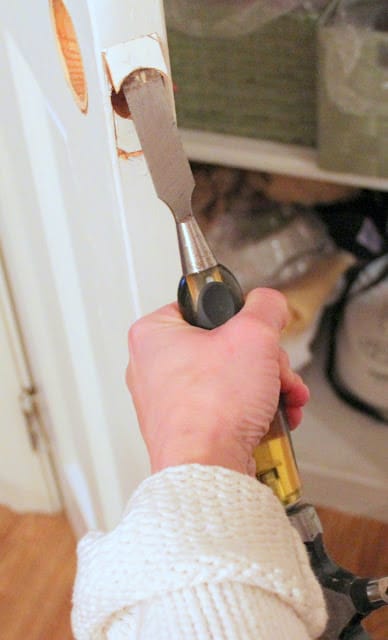
8. Place the chisel inside the existing hole at an upward angle, and tap with the hammer to remove the top piece of the rectangle. Repeat with the bottom portion.
Voila! You are woman, I can hear you roar!!!
So, what’s next??


Lisa - A Room with A View says
I could possibly do all of this until the part where the chisel needs to be used -I'd be nervous to undertake it myself.
pam {simple details} says
I'm totally impressed, Lisa! To be honest I'm just into the fun stuff and would probably try to draw the attention away from my door knobs with a pretty pillow or piece of art! 🙂
Cassie @ Primitive & Proper says
i am with you- i keep trying until i figure it out…. oh and i cuss while trying. 😉
Erin says
Lisa @ A Room With A View,
Get a scrap of wood and practice making the shape that way you don't mess up your door with the chisel. It's easier than it looks, though!
Michelle says
Great job Lisa!!!!!
Jennifer L. Griffin says
Oh, we need to do this someday! Pinning for future reference…
Elizabeth (Blue Clear Sky) says
Good for you for tackling the project!
Calypso In The Country says
Lisa, I am so impressed and thank you for the detailed tutorial. Your doors look like they are wood so the chiseling worked well. I happen to have the cheap white builder doors that I think are some kind of wood/plasticy composite of some sort. I wonder if i could chisel those?!!!
-Shelley
Lane says
I am so impressed! This is something that I would have no idea how to start (not that that ever stops me) but you made it seem so doable. Thanks for a great tutorial!
Suzy www.savedbysuzy.blogspot.com says
Those are definitely some words of wisdom! I got tired of waiting for my super-busy husband to tackle the projects I had for him (plus he HATES DIY stuff), so recently I've started to figure out how to do some things myself. It's empowering!