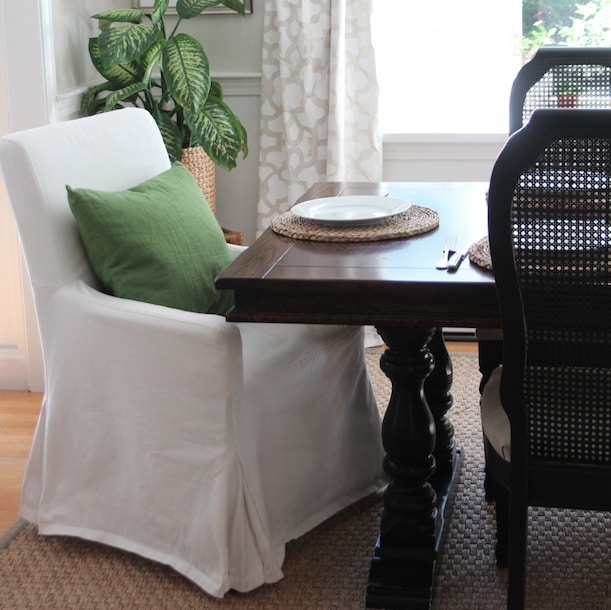
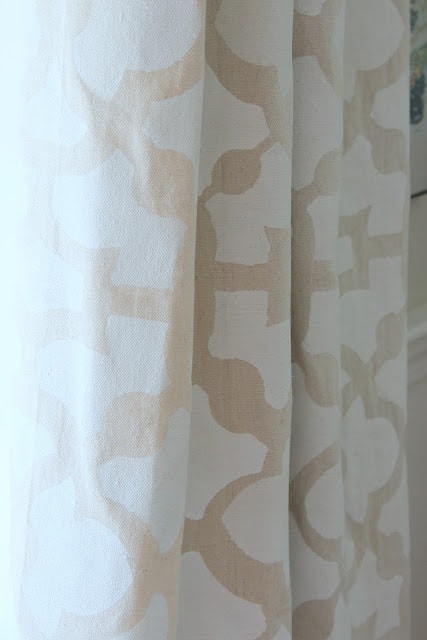
Last winter I won a Cutting Edge stencil from a giveaway at Oak Ridge Revival and after mulling it over for a long while, eventually I decided to stencil drop cloths curtains for my dining room.
“Drop cloths??? In our dining room? That you paint??? No, honey. No. Please? No.”
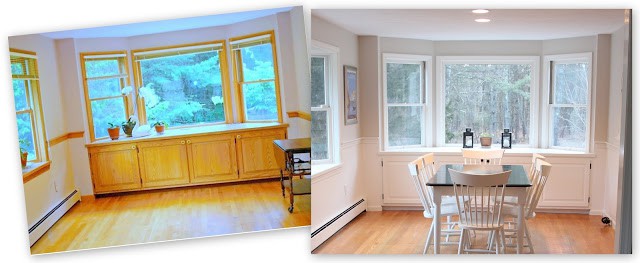
Our dining room, even though it had come a long way with paint and a table makeover, was a blank slate desperately in need of curtains and personality.
Unfortunately, after almost two years of renovating, the budget for giving my house personality was hovering on empty, so I had to find a lot of bang for my buck.
Enter drop cloths, my newly won, fabulously chic Zamira stencil, and the motivation of hosting Easter (and 5 months after Easter, they are finally done!)
“I never should have doubted you, honey. You are always right and I’m the luckiest man alive to be married to you. Do you want a foot massage?”
“They look great! You can’t even tell they’re drop cloths.”
The drop cloths that I used were $20 (free shipping with Prime!) which breaks down to $10 each curtain panel (unlined). $10! Pretty good right?!
Also, drop cloths are 100% cotton canvas, come in a natural oatmeal color that works perfectly in my house, and have a bit of texture that I like.
Note: drop cloths come in various ounces, meaning the weight of the fabric. I used 8 oz. drop cloths (the less expensive version) and found them to have a nice drape.
Here is the scoop on how to make your own fabulous
stenciled drop cloth curtains!
This post contains affiliate links for your convenience. Read my full disclosure policy here.

a note on textile medium: this is found at craft stores like Michael’s, and when added to paint, allows the fabric to remain flexible and washable. I used it on half my panels, ran out, and finished the other panels without it, and they came out almost identical in texture and stiffness to the panels with textile medium. for this application on drop cloths I don’t think textile medium is necessary, but I imagine on other kinds of fabric it would be necessary.
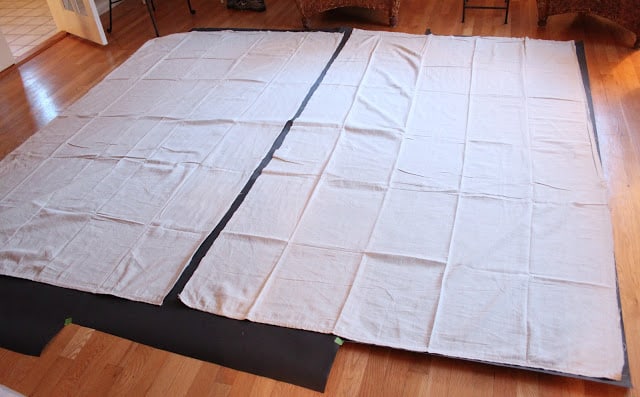
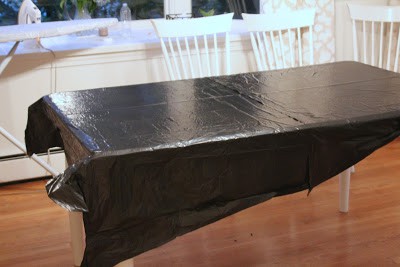
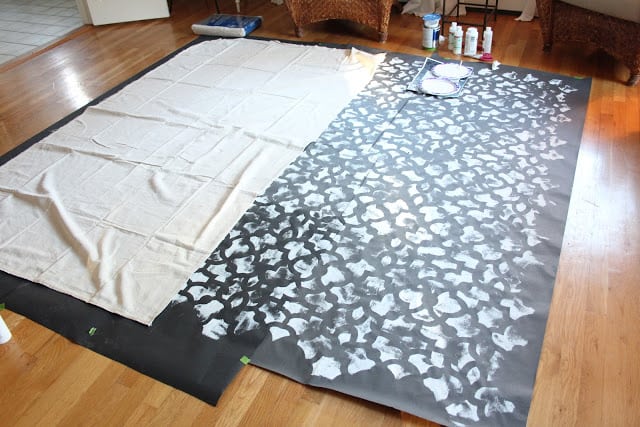
Make sure you put something under your panel before you paint because the paint will seep through the curtain panel. Because I have rolls and rolls of black craft paper from my picture framing days, I used sheets of it to protect my floors (but hit a snag with this underlayment, as you will see!)
Use painter’s tape to keep the stencil in place on the panel. Place the roller in the paint, then roll off the excess on another paper plate before applying to the fabric. Then move the stencil down and roll. Move and roll. Move and roll. Rove and moll. Moll and rove.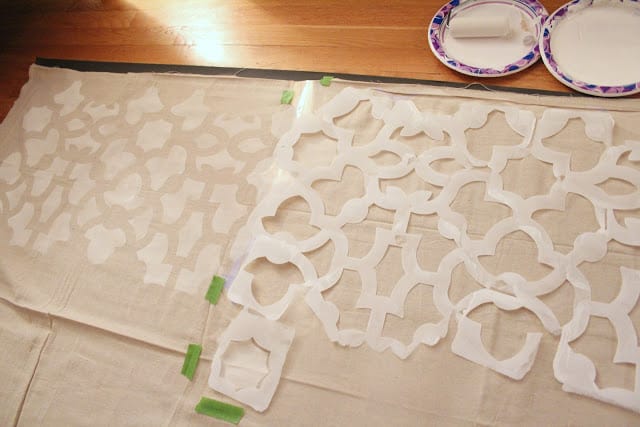
This is what stenciling at midnight when you realllllly should go to bed looks like right here.
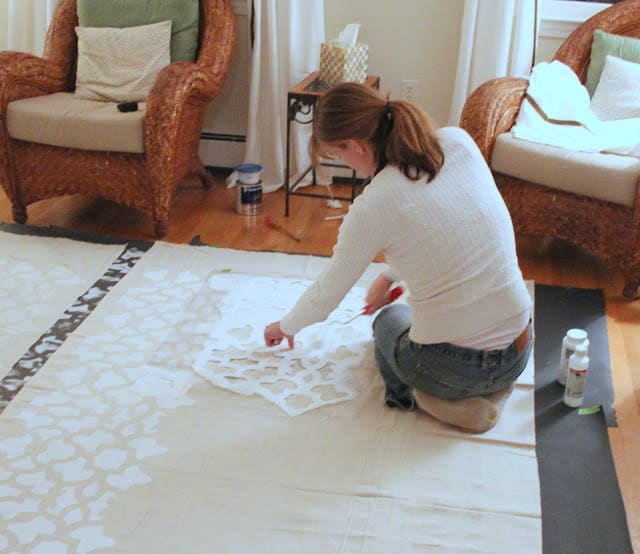
One down, three more to go.
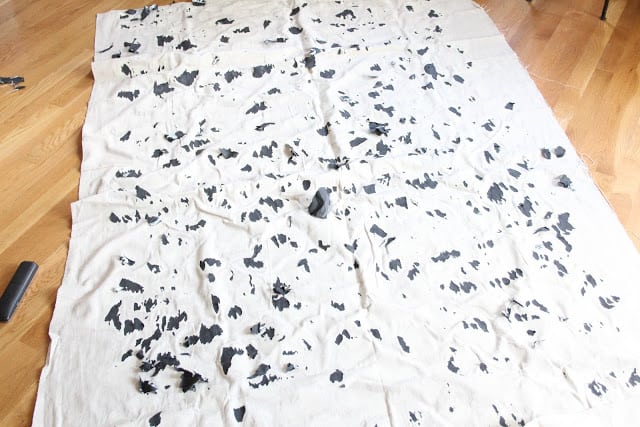
Whatever you do, DON’T leave your freshly painted curtain on top of craft paper and go to bed because it’s 2 in the morning and you can’t keep your eyes open another moment, or you will end up with this: paint that has dried onto the craft paper on the back of your lovely curtain. So sad!!
(Thankfully the drop cloth fabric is so heavy that you can’t see these black stuck-on bits of paper even when the panel is hung in the window.)

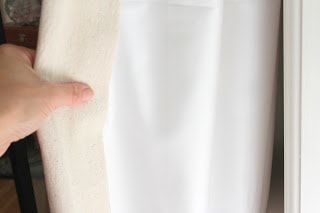
I wasn’t even going to line these panels because I like the way the light came through them giving them a burnout affect, but my mother suggested lining to help them hang well and look more “professional” (if that is even possible when we’re talking about painted drop cloths serving as window treatments!)
Remember how I’m not much of a sewer?
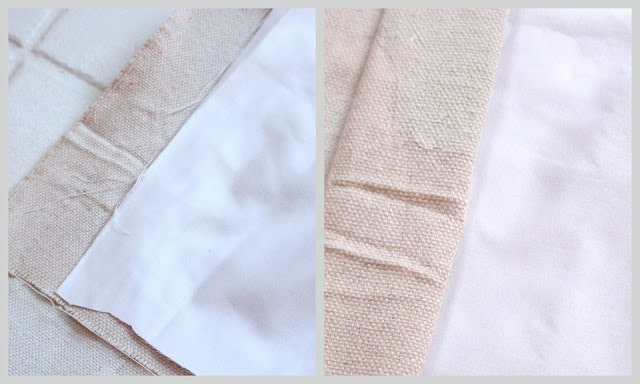
I could have purchased cheap white liner fabric at Joann’s but the halved sheets have the finished edge that serves as the bottom hem and I think cost per panel is still less expensive using sheets.
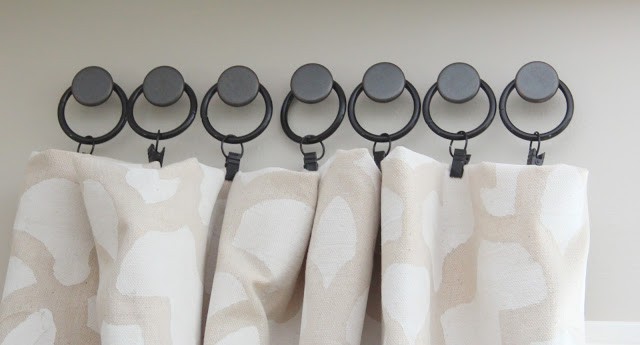
To “hem” the raw edge on the top of the panels, I folded the curtain and lining over together twice, ironed a stiff crease, and clipped them to the rings. (Take your “hems” into consideration when cutting the drop cloths – you will need a few inches at the top to fold over and clip.)
The lining adds so much structure and weight to the panels – I truly can’t even believe how beautifully they hang!
Did I mention ironing??? This is a hugely important step to a pretty finished product.
The drop cloths require a serious amount of ironing. I would highly recommend washing your panels first to get the creases out, but remember that they are 100% cotton so be careful with your drying time, lest they shrink. Even if you wash the panels, I think ironing them before hanging helps them to hang nicely and gives them a more finished look.

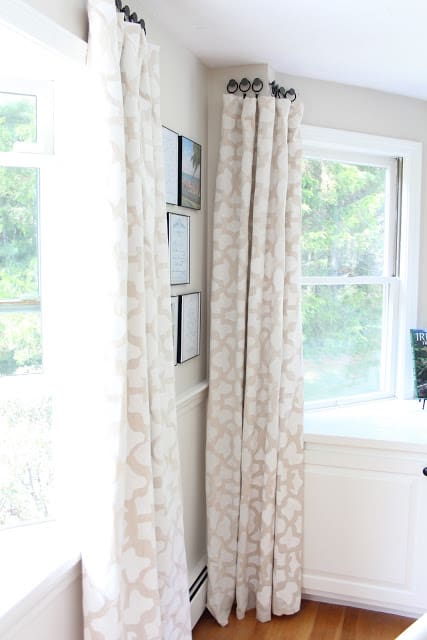
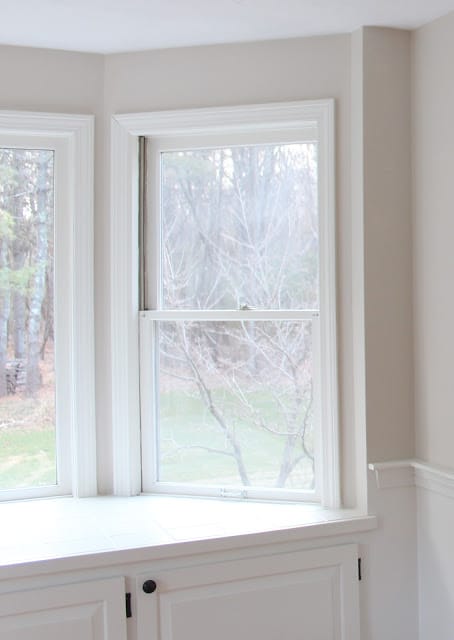
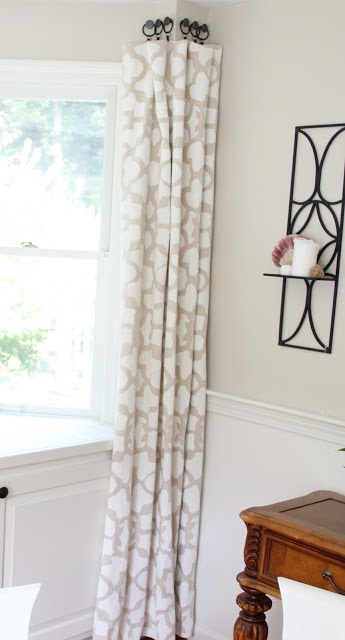
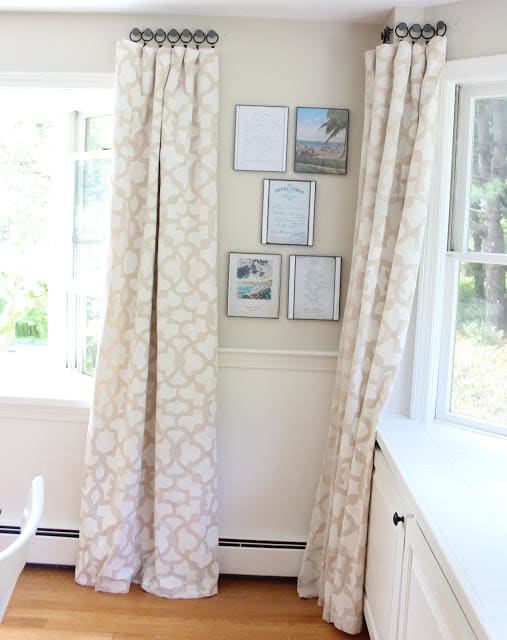
We have two bay windows in our dining room and one of them meets the adjoining walls in this awkward way. There is also a built in cabinet under this window just to complicate matters. I could have used roman shades in this room but I really love the look of full-length panels, and this room needed some major softening with fabric.
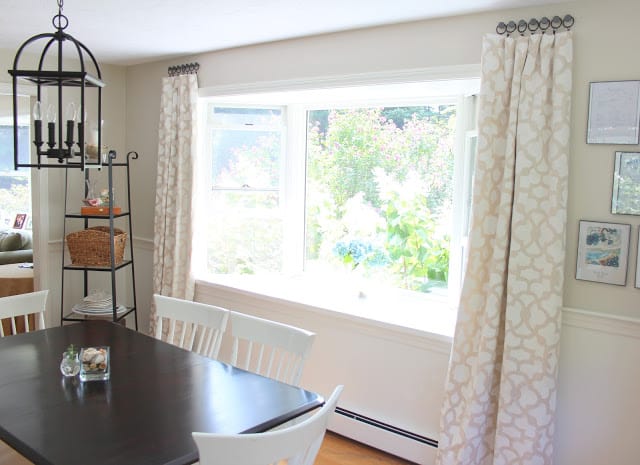
Hanging the curtains on knobs made it possible for the curtains to “bend” around this space. From most angles in the room these curtains look perfectly straight like the other window:
(this panel needs one more knob so it hangs a little fuller)
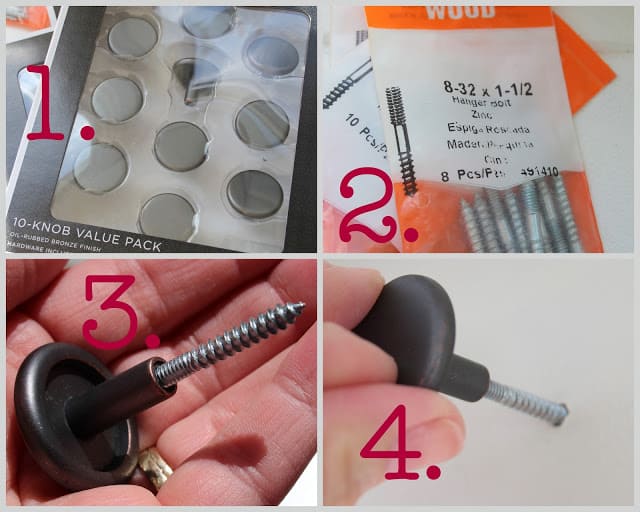
I retrofitted common cabinet knobs (1), with hanger bolts (2). One side of the hanger bolt screws into the knob (3) , and the other side screws into the wall (4). The 8/32″ x 1 1/2″ hanger bolts did the trick for the knobs I used.
To hang curtains on knobs, a level is a must. Lightly draw a line using the level as your guide, then measure, mark and drill evenly spaced pilot holes for the knobs. Erase pencil marks and then screw knobs into the pilot holes.





Jennifer @ Dimples and Tangles says
They are so fabulous, Lisa! Thanks for your great tutorial. One coat of paint was sufficient? So smart hanging from the knobs as well, what a great way to work around a tricky wall arrangement. Hanger bolts are one of my favorite tools! Once I used Christmas ornaments that looked like medallions, and glued them to a dowel rod with hanger bolts on the other end in place of a rod in my dining room. Such a good alternative to a rod! I think you've convinced me to give the stenciled curtains a shot!
marty (A Stroll Thru Life) says
They look fabulous. I love the stencil pattern and the color. Gorgeous and job well done. Hugs, Marty
Maury @ Life on Mars says
They looks amazing Lisa!!! I love how soft they look and I think the knobs may be the best idea I've ever heard of. Brilliant!
Stacey says
Your curtains look amazing! I am working on some right now with some scrap pieces of fabric and painting horozintal stripes and it is a major task! I just need a big block of uninterrupted time to finish and a large space! I hadn't thought of lining them, but I will be sure to do that as I appreciate what you said! Thanks!
Stacey of Embracing Change
Dana Frieling says
Great tutorial, Lisa. I've seen knobs used before but I really like how you have them placed close together. Very uniform and precise. Love how you thought outside the box, friend.
Jessamie {Bird and Branch Redesign} says
I'm so utterly impressed I don't even know what kind of complement to leave you right now. It's incredible!
natasha {schue love} says
Wow, the stenciled curtains are GORGEOUS! Beautiful job Lisa!
Kelly @ View Along the Way says
WHAAT?! Did you say these were stenciled drop cloths in the last post? I missed that. I thought they were fancy expensive fabric. Not even kidding. I am so impressed.
Patricia @ ButterYum says
WOWZERS – I am so impressed!!!! Love the way they turned out. Checking out the drop cloth section tomorrow!
Carmel @ Our Fifth House says
Wow – girlie – they look amazing! Love that stencil – this room looks like it's straight out of a Ballard Designs catalog – just gorgeous! I stenciled some drop cloths for our family room over a year ago and I still love them – I get so many compliments on them – people are shocked when I tell them they're drop cloths!
pam {simple details} says
So inspiring, Lisa!! I remember asking you where they were from!! They look so professional, I pinned them and they look just like all of the other expensive ones on my board! Thanks for putting together the detailed tutorial for us, which probably took longer than painting them!
Andrea says
What an awesome job Lisa, just love them. I have been wanting to try this too, but have been too cheap to buy a stencil. Now you've given me the inspiration to do it.
Love, love how your curtains turned out.
Jackie says
Such a great tutorial! Love the curtains!
Laura from Top This Top That says
these came out beautifully. I am going to feature on my weekly wow's on Saturday, Great tutorial!
Catherine says
Just saw your picture over at Domestically Speaking – these look fantastic! And I love the colours in your room, really beautiful!
Urban Orchard Interiors says
Wow! Amazing transformation! I know it was a lot of work for you but SO worth it! Great job.
Maryann @ Domestically-Speaking says
Those turned out gorgeous! I need to try some drop cloth stenciling. I'm featuring your lovely curtains in the PoPP Spotlight over at Domestically Speaking. Thanks for linking up.
Judy says
those look great! i've been using drop cloths for my "custom" curtains for several years…in my dining room, bedroom and sunroom. I cut off the bottom to add a 20" border to each to give them a custom look…don't you love drop cloths!
Sharon @ Elizabeth & Co. says
Your curtains are beautiful and what a great tutorial!
Dee says
I love how your curtains came out. Drop cloth is becoming my favorite fabric. I use it to upholster my chairs all the time. Wonderful tutorial. Thanks for sharing, Dee from My Painted Stuff.
Our Pinteresting Family says
What an amazing project! I love how it doesn't require sewing…right up my alley. Found you through the Elizabeth & Co features! Megan
Connie says
Really great job and tutorial! Thanks, I've been wanting to make drop cloth curtains.
Jeannine says
These look fantastic! As I've just finished painting my first of two drop cloth curtains, I feel like half the things you're saying I've lived personally! Yes, you have to iron them! Yes, you absolutely have to put something under them for bleed through! So been there, just like you. I only wish I had bought a stencil, cuz hand painting mine is taking FOREVER!! Ours are even the same color. Great minds must think alike 🙂
Jeannine @ The Concrete Cottage
René says
Oh my! Lisa, they look great! I hope you really did get a foot massage after that ;).
René
Korrie@RedHenHome says
These turned out great, and I love how you hung them!
Leslie Stewart says
What a great job! They look amazing. Have a great weekend!
Leslie
House on the Way
[email protected]
Terry S says
I just saw this on Pinterest and love what you did, especially using the hardware for hanging the curtains!
I am wondering where you got the black metal shelf that is on the right side of your bay window.
Thanks!
April Sharpe says
Hi! Could you lease tell me the name of your wall color here? And is it the same as what's in your foyer? I'd like to know both. Thank you! Your house is just lovely!
[email protected]
Paula O'Meara says
Thank you so much for your excellent tutorial! Not only are your curtains so beautiful but your instruction is the BEST I have encountered YET. Trust me when I say I have been searching and searching and then I found your tutorial. Thank you for the gift of your time, your effort, and your direction!
Janet P says
You just solved a major problem at my house of finding curtains the hubby will like. I love this idea!!!! Thank you for posting!!!
Laura, The Start of a Good Life says
Now to just convince the hubby that we should do this. …he's not big into diy…. I lobe it though, and we've got a bunch of windows to cover!
Susan says
Hi Lisa, I love, love , love your stenciled drop cloth curtains. The colors are warm and rich looking. It appears the paint color you used was white for the stenciling, am I correct? I so want to duplicate the colors, will go perfect in my living room and dining room. Beautiful work. Thanks for the tutorial and look forward to hearing back regarding paint color.
Lisa says
Hi Susan, I actually just used leftover white wall paint and when that ran out I matched it with a white acrylic paint from the craft store. A basic white would definitely give you this same effect!!