This week marks the last week of Calling It Home’s One Room Challenge. As an ORC linking participant, I wasn’t ready to tackle an entire room, so instead I decided to build a wall of built in bookshelves within the six weeks. You know, because that would be a breeze to take on. HA! You may have noticed I didn’t post my progress last week – that’s because I was trapped on the phone with Verizon for days upon days trying to fix my mess of internet server problems – so let me get you up to speed.
I started the ORC with three Ikea Billy bookcases that were to go on a wall of my living room – two on one side of those black doors and one on the other. I should mention here that I love woodworking projects but have never tackled built ins before, so using Ikea bookcases seemed like the easiest road, especially since I am working on this project solo.
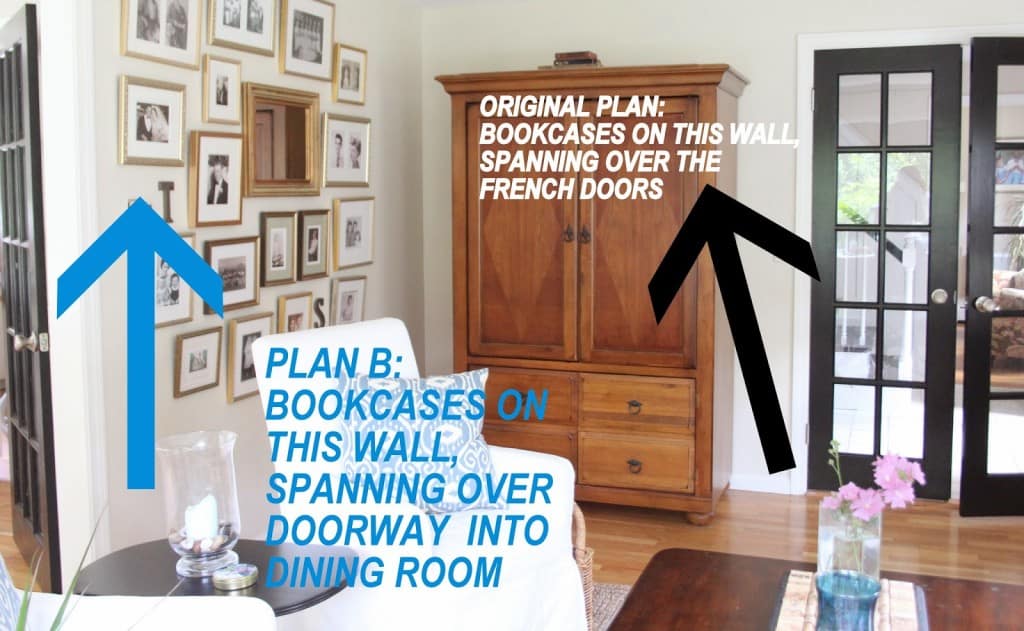
When we decided that the wall o’bookcases would work better on the adjacent wall, I needed a fourth bookcase in a funky size. (The Billys come in widths of either 31 1/2″ or 15 3/4″ and I needed a width of 25″). I considered buying another Billy and cutting the shelves down, but when I came across Ana White’s WILLY bookcase plans, I thought this would be a good opportunity to compare how difficult and costly it is to build a bookcase from scratch vs. using the Ikea bookcases. If you have ever seen the tutorials all over the web of Ikea bookcases used for built in bookshelves, and wondered how cost effective it is – this post is for you!
If you could care less about this comparison, scroll down past all my wordiness to the end of the post to see where I’m at with this project as we head into the final week!

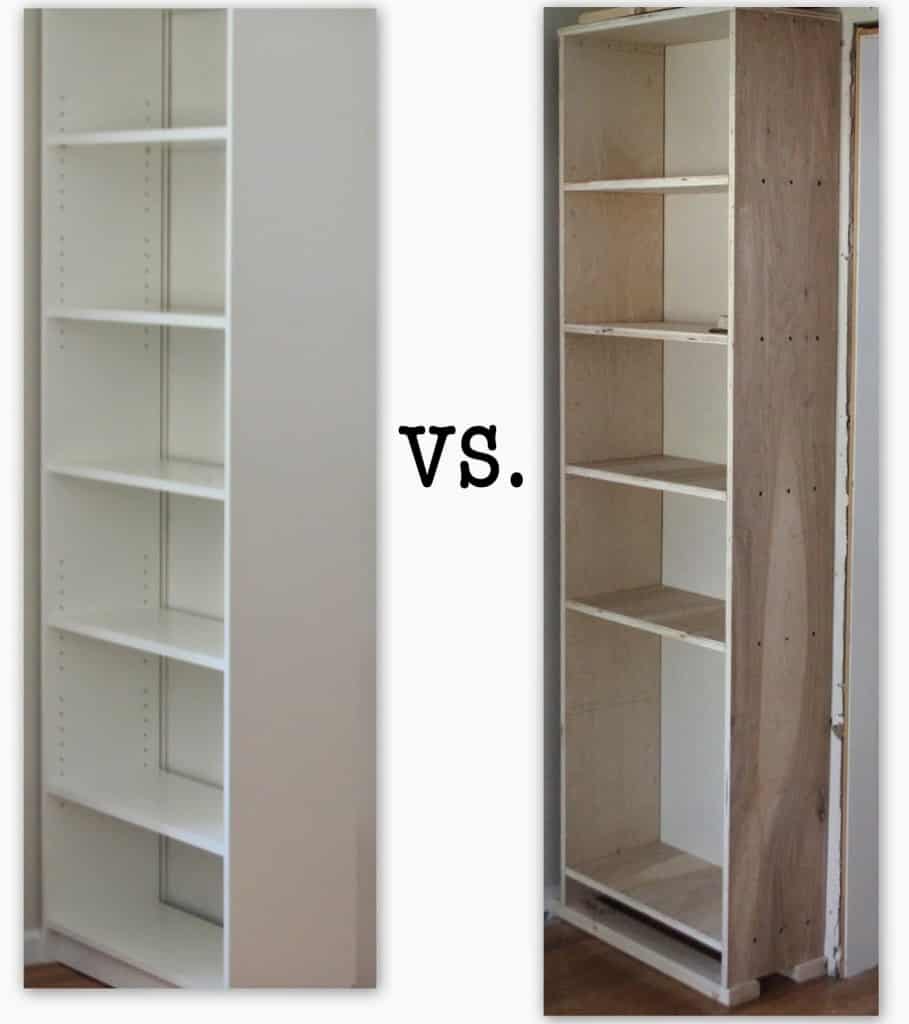
I purchased and put together three Ikea Billys, and then I built one bookcase with birch plywood.
For the sake of discussion, let’s look at an apples to apples comparison (keep in mind that the prices of lumber below are in MA, prices differ depending on what part of the country you live in):
IKEA:
Tools needed: hammer, screwdriver or screw gun to attach L brackets to wall
*A white Ikea Billy bookcase (31 1/2″ wide x 79 1/2″ tall x 11″ deep) made of laminate coated particle board, including all necessary hardware to put it together, and the backing board (pressed cardboard).
TOTAL COST: $59.99
Approximate time to put together: under an hour.
TOTAL TIME: 30-60 minutes.
FROM SCRATCH:
Tools needed: measuring tape, square, pencil, safety glasses, drill (screw gun), sander
*Particle board by the 4×8′ sheet at Lowes : $24.47. For the same size bookcase, you would need either 2 4×8′ sheets, or 1 sheet + particle board shelving, which is roughly $50.
*Backing for bookcase: you can customize this however you like. Options include hardboard ($19-35 for 4×8′ sheet), wood beadboard ($40/4×8′ sheet), planking (such as ship lap or pine boards) or no backing at all. Range for backing for one bookcase: $19+.
*Also needed: countersinking screws, wood glue, sandpaper, primer, paint: $40+.
TOTAL COST: approximately $109 (including backing)
Approximate time to build (for a novice woodworker), excluding cutting wood to size: 1-2 hours.
Approximate time to finish (sanding, priming, sanding, painting): 2-4 hours.
TOTAL TIME: 3-6 hours.
This comparison is based on the lowest cost to build a bookcase. Other options for materials you could use: pine boards (@ $14 for a 1x6x8″ board), MDF (approximately $35 for a 4×8′ sheet), hardwood plywood ($45-$55 sheet depending on wood) or solid wood such as poplar, oak or maple ($$$$).
For my from-scratch bookcase I used 3/4″ thick birch plywood and had it cut by Lowes to my specifications. I figured if I was going to build a bookcase, I might as well upgrade the material I was using, otherwise, why not just buy another Ikea kit and put it together?
You don’t even have to ask any carpenter or employee of Lowes, Home Depot or a lumber yard their feelings on particle board or MDF vs. real wood – every time I have so much as LOOKED at MDF I get unsolicited opinions about how MDF holds up over time. So lets take a quick look at the pros and cons of the different materials.
Plywood is a manufactured wood panel from the family of manufactured boards (such as medium-density fibreboard (MDF), particle board (chipboard), etc.) made from thin sheets of wood veneer. Plywood layers (called veneers or plies) are glued together, with adjacent plies having their wood grain rotated relative to adjacent layers up to 90 degrees. {wikipedia}
PROS: less costly than solid hardwood, not as heavy as MDF, strong – not likely to sag or warp, is not likely to expand or contract over time (like solid wood), takes stain well, great for painting
SOooooooooo…….
after all that big education…….
Pros & Cons of Ikea vs. from scratch bookcases
IKEA
PROS: Cheap, easy and quick to put together, not extraordinarily heavy for one person to build and move by herself.
CONS: Made of particle board, so basically the lowest bottom feeding scum you can get for lumber. Limited life span – I give them 20 or 30 years.
FROM SCRATCH
PROS: Easy to customize size and material. Depending on material, you can build a very durable bookcase that will last many many years.
CONS: Takes more time, labor and brain power to build. Depending on material, much more costly.
If I had it to do over again I probably would build the entire wall of bookcases with birch plywood. It wasn’t hard to do – just a bit of a learning curve, but I’m guessing it be a lot quicker and easier the next time around. I like that it’s made of a strong and resilient material that will stand the test of time.
So here we are at the final week of the ORC.
I have to admit that I thought this would be an easier and faster project to take on by myself, but there’s been a huge learning curve. In the past month I have learned to splice trim together, cope crown molding trim, find perfect angles, cut outside corners, route with my Dremel, countersink screws, and use both a Skillsaw and a reciprocating saw.
I’ve run back and forth from my living room to the compound miter saw on my garage floor about 48735 times. I’ve also been to Lowes and Home Depot a total of 11 times.
I’ve put together/built 4 bookcases, attached planked board as a backing, built a base and a header to attach the bookcases to, boxed out the space over the doorway and bookcases, trimmed the bookcases, and added crown molding.
I also spackled, caulked and wood filled every single hole, nook and cranny, then primed everything inside and out.
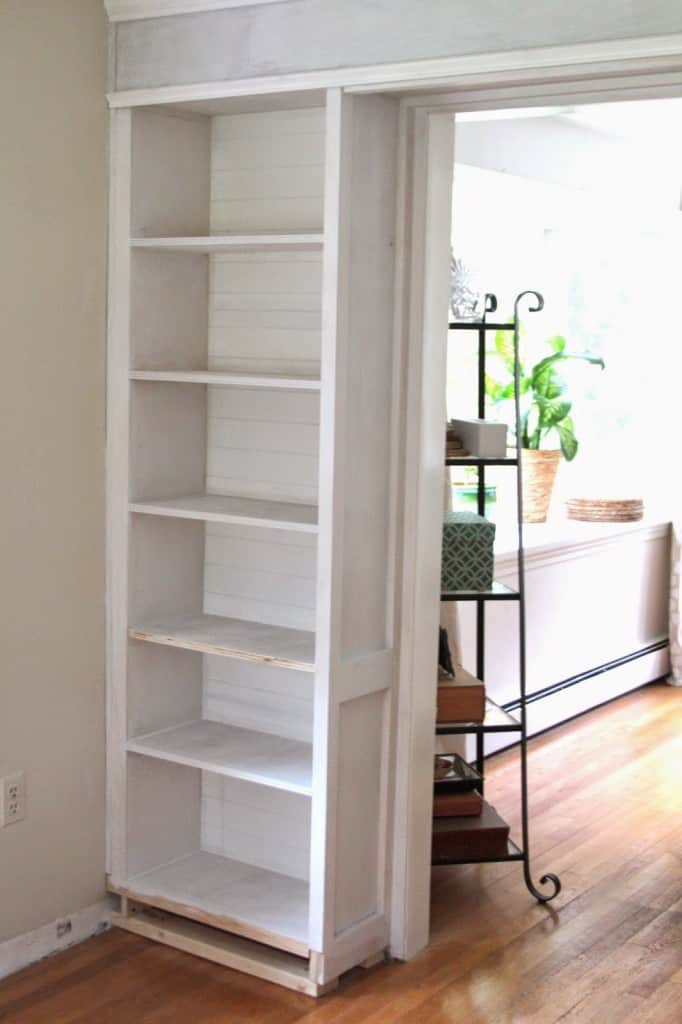
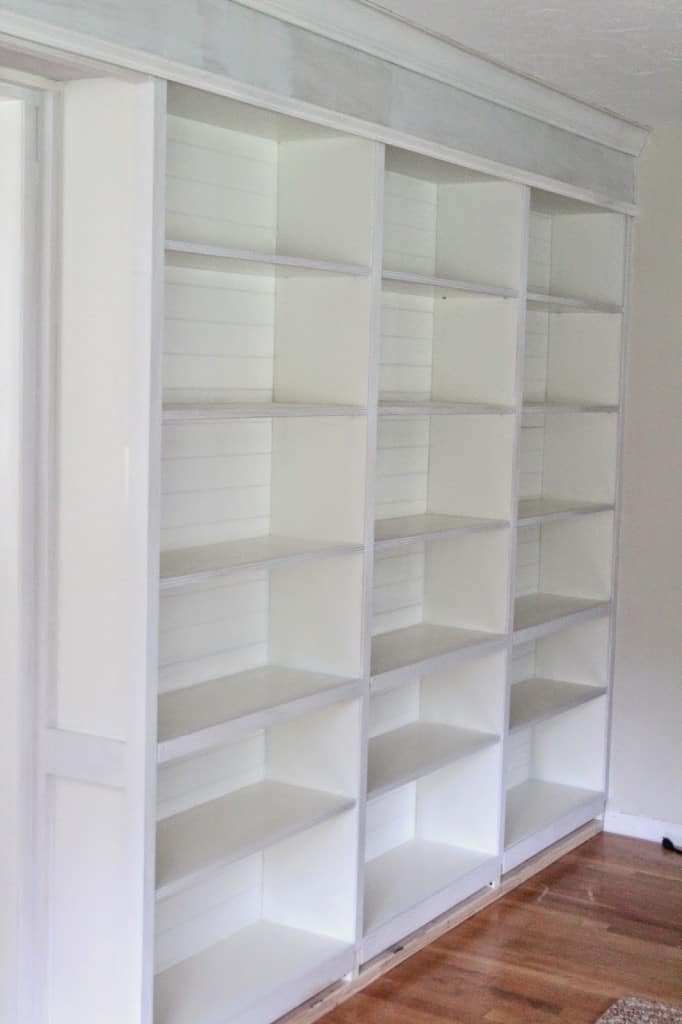
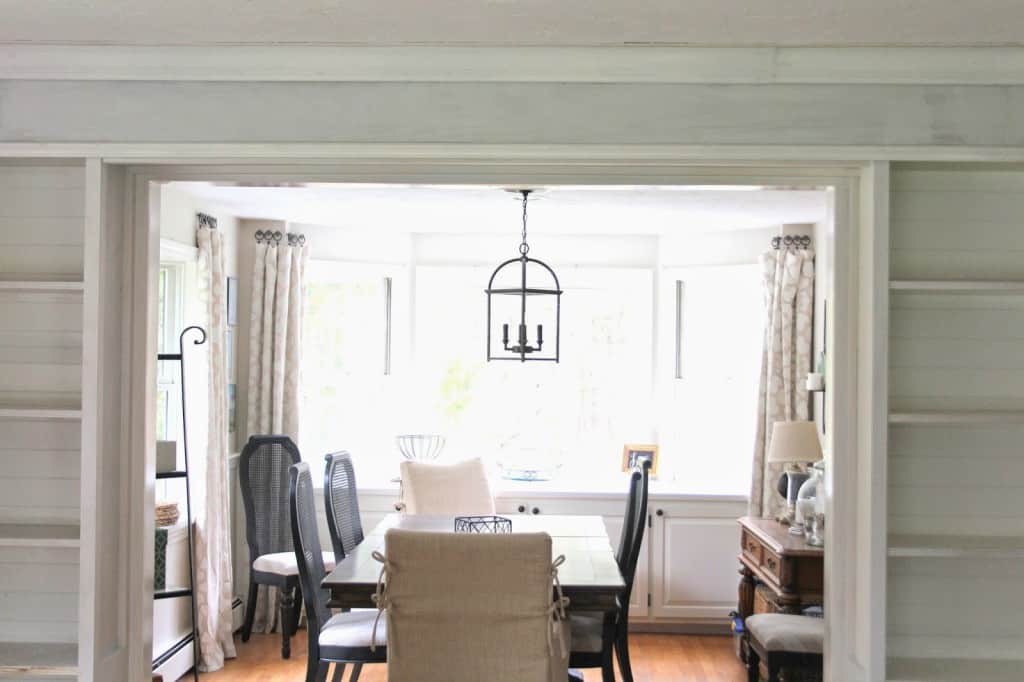
I can’t wait to see how all the other ORCs are coming along! Join me at Calling It Home to see everyone’s progress!

Tiffany says
Omg!!!! It looks amazing. Even more amazing is your skill set. I'm uber impressed. And the time and thought that went in to this post. Above and beyond. You're officially my hero.
Stacey {steward of design} says
Love it love it love it! Now the fun job of filling it up with pretties. 😉
Cathy Wall says
OMG how incredible and I love that you did the side by side comparison. No matter what you woulda, shoulda, coulda, no one will be the wiser because your wall o' shelves is gonna be amazing!!
Calypso In The Country says
Oh Lisa I love them!!!
-Shelley
Sam @ The Junk House says
It looks amazing so far! I'm so impressed with your building skills!
Betsy Dambrosia says
once again…you amaze me!
Simply LKJ says
Amazing! Love what I am seeing.
Elizabeth @ The Little Black Door says
This is an excellent post. I've always wondered if you broke it down on projects like this what you would find. And I think your bookshelves are looking amazing!
pam {simple details} says
OH MY!!!! I'm blown away and completely speechless!!!!
Denise Greenwood says
Lisa they look amazing!! You have done a superb job!! They are gonna look so good all styled up 🙂
Lobster Meets Peach says
They look lovely! I can't wait to see the finished project.
Mary Ann at classic•casual•home says
I couldn't do either and you are amazing.
Beth of designPOST Interiors says
They look so good flanking that doorway! And I am glad to have all of this info stored away for later bc we have alway wanted to do built-ins.
Cassie @ Primitive & Proper says
hello amazingness!!!! they are gorgeous! and i love the breakdown and all the details in case i ever want to build bookcases. but seriously- super detailed and helpful!
Summer Hogan says
Wow, these look amazing!!! Can't wait to see how you style them. I have two big bookcases in my "in progress" office that need some major help 🙂 You rocked the builds!
Kris @ Driven by Décor says
Seriously Lisa, I am astounded! It is beyond words amazing! I can only imagine how many hours you put into it but from the looks of the pics those beauties will be worth every minute of work! Can't wait to see them in their full glory next week!
ElevenGables says
What a beautiful room! I am loving your ORC!! Can't wait to see the final reveal!
Shelia Dowd says
OMG – that is MOST impressive! Excuse me – I'm must go now to find a wall in my house to do exactly what you are doing! LOVE it!!!
Shelia
http://www.houseofhighlands.com
Jen @ RamblingRenovators says
This is looking SO SO good! Love how it frames the view.
Sherry Calamia says
The built-ins are looking great! Very impressive! I can't wait to see it all pulled together!
Alison Fauls says
Way to go, Lisa. I am so impressed you are doing it on your own!
Ron says
OMG, Lisa! I cannot even imagine doing all that by myself. I get frustrated just putting together IKEA "stuff". It usually leads to an argument between J and I, so I let someone else do it. I am so impressed with your skills and how it has turned out. Have a great Friday!
Korrie@RedHenHome says
I'm so impressed! It's looking sooo good!
Vel Criste says
Thank you for all the great info here Lisa – I agree with you on the built-ins from scratch. True that IKEA is easier and faster, durability would probably be not as great, especially for book cases since somewhere along the line, the mid part of the shelving may sag and that's definitely nice to look at. That was the biggest factor on why we opted to build our library book cases from scratch too. But if you use your IKEA shelves with care, your right on it lasting a while without that mid-bent. Also if that ever gets to happen, you might eventually want to put slim wooden covers placed horizontally just to re-inforce the shelves. Your close, it looks great and I think once everything is in place, you won't remember the 'hardships' you've endured for it!
Laura J says
OK — I am feeling seriously un-talented. I LOOOVE those bookcases. I'm a new visitor so excuse my ignorance, but could you rate your carpentry skills pre-bookcase on a scale of 1 top 10? Gives me an idea of whether this is something I could actually tackle . . . .
Cyndy Aldred says
OMG!!! I cannot wait to see this Lisa!! It's gonna be so incredible and I am so proud of you that you have learned how to do all of this stuff. You'll be stronger for it girl! High five! xo
[email protected] says
Looking so good Lisa 🙂 I'm curious to see how our Billys hold up over time. They were are huge time and money saver! After one year they still look brand new, so…so far so good! xo
Alana in Canada says
What a great run down on the various options.
I think My Mom bought her first BILLY over 30 years ago. It is still holding up well. It has yellowed over time, but then she smokes, so maybe that's what did the yellowing and not age. I have Billy's over 20 years old and I've painted mine a few times.
Eris @ The Pink House Reno says
This is AWESOME!!! It looks so good – I die for a built in wall around a doorway like that!
sarah sofia knepp says
Looks beautiful! I'm so inspired by all your DIY, even if it's Ikea. I love Ikea but it does take a while to put their things together. 🙂 Looking forward to seeing your big reveal! A few more days, we got this!
[email protected] says
Laura J, thank you for your comment!! You are a no-reply commenter (there is no email address attached to your profile) so I can't reply to you directly, but I would say for the novice carpenter this is probably a 7 on a scale of 1-10 with 10 being difficult. Putting the Ikea and from-scratch bookcases together was not difficult but figuring out how to trim them all out so they would look seamless and professional was a little tricky (I went back to the store for trim soooo many times!!!!) Not so much HARD vs. a lot of measuring and figuring 🙂 If you tackle something like this I am happy to help as best I can! Email me directly at lscibilia(at)verizon(dot)net with questions!