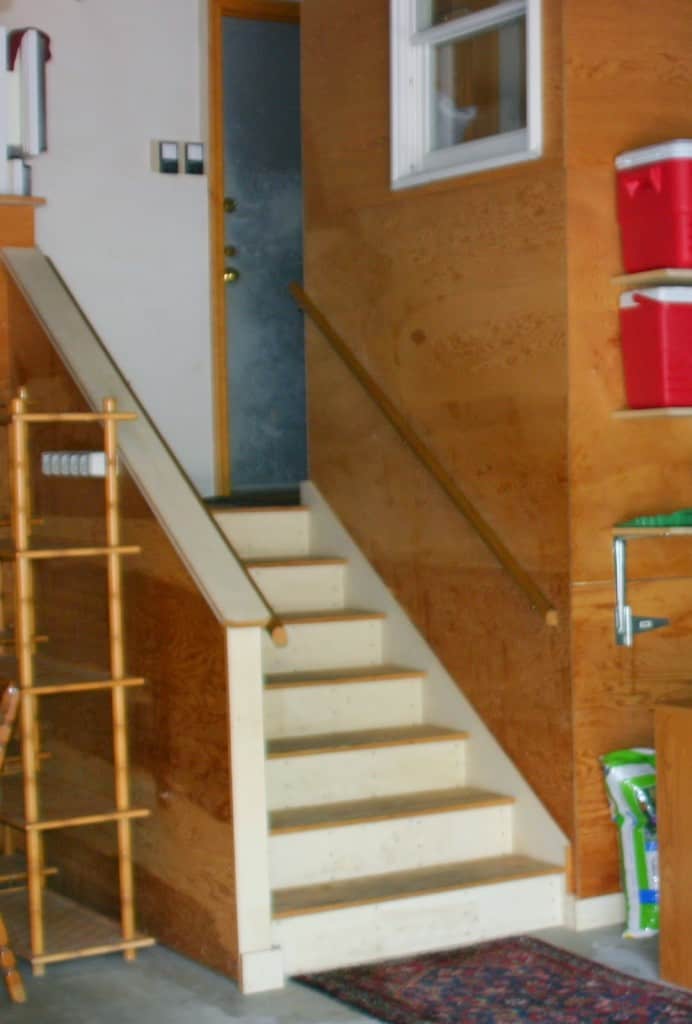
Yesterday I showed you the steps in our garage that I recently repainted.
While I was at it I thought I’d add a little detail to the door into the house.
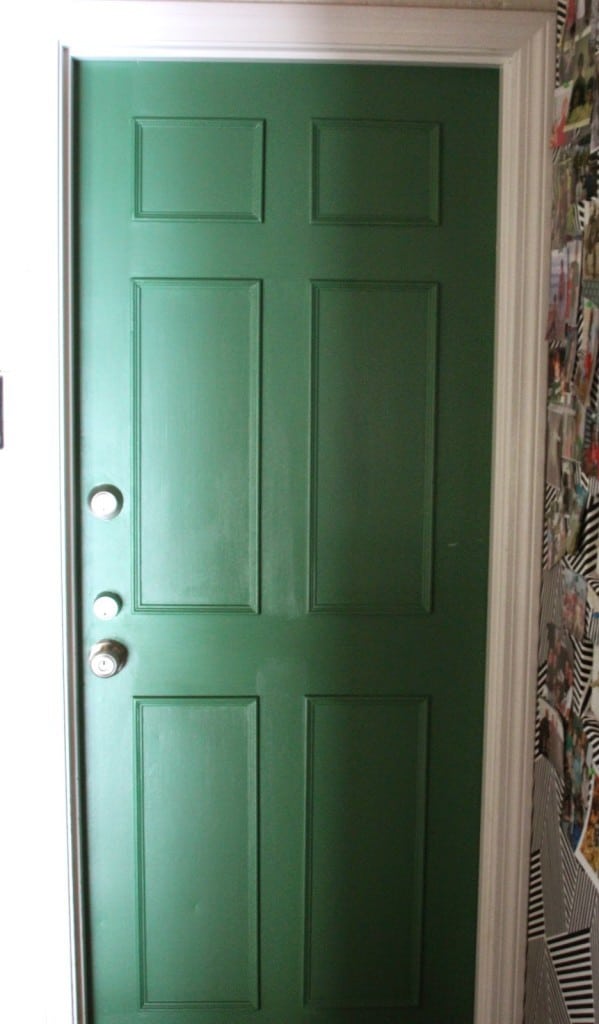
The door that you see below (from the day we had our house inspection) is actually a solid wood paneled door, but the previous owners had it covered with a sheet of metal to keep out the cold (something fairly common round these parts with our brutal winters).
I appreciate the added insulation from the freezing winter temperatures.
A few years back when I painted this mudroom area, I added some color to the sheet metal because, why not?
The entry door faces another paneled door to the mudroom,

and just for kicks, when I was zushing up our mudroom this time, I remembered Kris’ trimmed out closet doors in her daughter’s room and thought I’d add the paneled look back to the entry door to give it a more finished detail.
(So yes – it’s a paneled door, covered in sheet metal, then given faux paneling. 🙂 )
I used the placement of the paneling on the facing door to measure and draw lines on this one, then miter cut molding and attached the pieces with Liquid Nails.

If you don’t have a miter saw you can buy a miter box and use a hand saw like Kris did. The molding is easy to cut through (but there are a lot of cuts – 24 for this door!)

After letting the Liquid Nails dry, I used wood fill in any gaps at the corners, gave those spots a little sand, primed the unfinished wood, then painted.

It made a WORLD of difference and now our garage entry door feels like a nicer part of our house.
I am no longer horrified if a guest uses this entrance into our house.
Now there is just the matter of the hardware…..some nickel, some brass, some brass that has been spray painted nickel……details, details.
(And just to be honest here those details will probably NEVER be attended to…….I mean come on……my attention span to one project is not that long!)
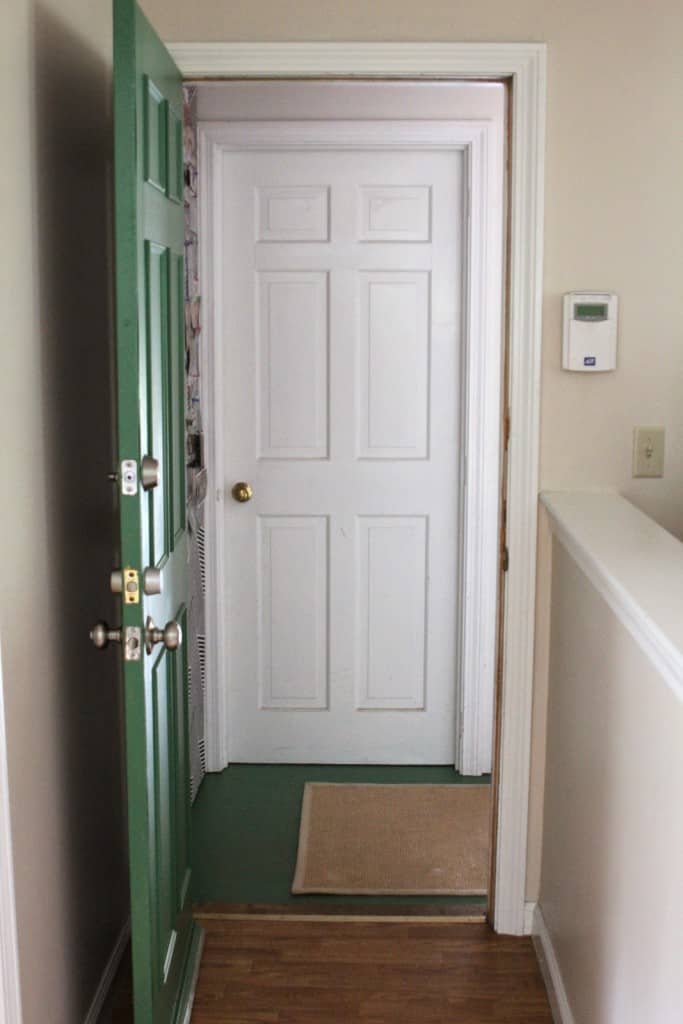
I love the pop of green in our family room when the door is open too.
Did you see Kris’ doors at Driven By Design last spring? They were part of her last One Room Challenge. A little molding completely transformed her daughter’s flat, hollow closet doors into a stylish and chic part of the room. Don’t you love the design? Check out Kris’ post for details!
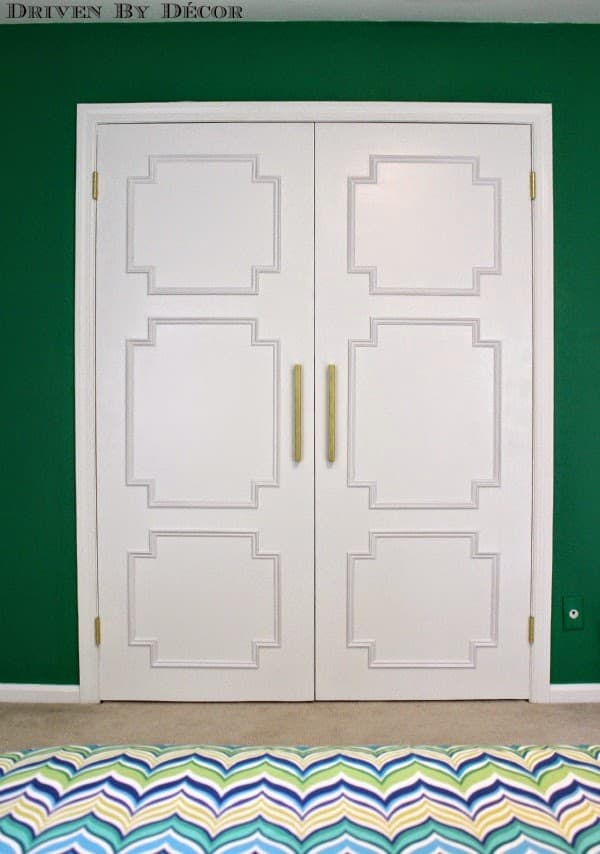
{photo shamelessly stolen from Driven By Decor}
Next up in my mudroom refreshing is the hideous ceiling that has insulation and wires hanging out. Stay tuned!
Thanks for visiting; I hope you are having a great day!!

Cassie @ Primitive & Proper says
gorgeous! i have several doors that need that kind of love and i have been LAZY.
Vel Criste says
Love it Lisa! Glad you added those trims!
kate@willowinteriors says
What a huge difference that trim makes!! And love the green!
Brandi says
Adding the trim made a big, beautiful difference. I love that shade of green too. Beautiful work, Lisa!
Simply LKJ says
Love how it turned out. Do magnets stick to it? That would be so fun to add seasonal sayings and such to the entry!
Dana Frieling says
Nice work. This little touch adds so much personality!
pam {simple details} says
What a fun way to add some pizzazz to your back entry – love the lively color and trim detail! You have me contemplating what doors I could spiff up!
Kris Jarrett says
Thanks for the sweet shout-out 🙂 Your door looks awesome – what a great paint color! It made such a huge difference!
Privet and Holly says
What a super transformation
of a metal garage door! And
I love that you chose such a
fresh and *HAPPY* color for
the door and the stairs! You
are truly amazing, Lisa!
xo Suzanne
Jennifer @ Dimples and Tangles says
LOVE the added trim. I did that to our pantry doors when we redid the kitchen and it makes all the difference! Enjoy your happy green every time you come and go!
tjaklitsch says
The doors look great! However, I believe the metal is added to make the door fireproof — a code requirement for doors between living space and garages (at least here n NY!)
Metal wouldn't do much as insulation . . . .
Love the make-over — keep up the good work!
Elizabeth @ The Little Black Door says
Looks like a million bucks. I love the color!
René says
I love it! Isn't it amazing what a little molding can do?
Melanie Robinson says
Lisa~ I am always amazed at your skills! The panels made such a difference in the garage door! Impressive, girl!! 🙂