
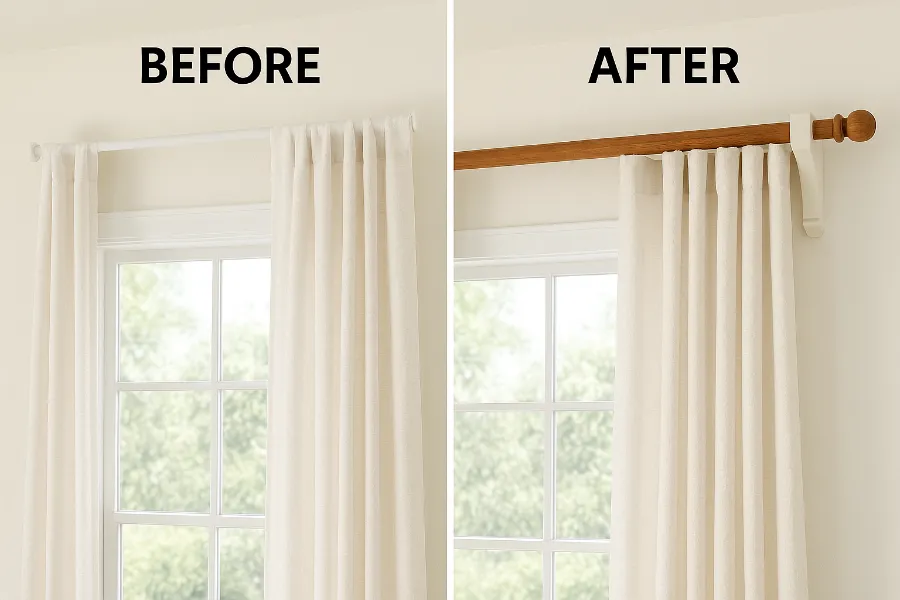
If you’ve ever shopped for curtain rods, you know the struggle. Something so simple can quickly become expensive, and even then, the store-bought options might not quite fit your window, your style, or your budget. That’s where DIY curtain rods come in! Making your own not only saves money but also lets you customize every detail—length, color, material, and style. Whether you want sleek modern metal, rustic farmhouse charm, or a creative touch that’s uniquely yours, there’s a DIY approach that works.
Let’s walk through why DIY curtain rods are worth the effort, what you’ll need, and the most creative and practical ways to make them. By the end, you’ll be ready to swap out generic rods for something you built yourself—and you might even wonder why you didn’t try it sooner.
Why DIY Curtain Rods Are Worth It
DIY curtain rods aren’t just about saving money (though you can easily spend $10–$20 on a homemade version instead of $50+ in stores). They give you:
- Full customization: Choose the exact length, color, and hardware to fit your window and décor.
- Durability: Many DIY rods use stronger materials than thin store-bought versions.
- Style flexibility: Rustic, industrial, modern, minimal—you pick the vibe.
- Satisfaction: There’s a real sense of pride when your window treatments are entirely your own creation.
And here’s the best part: most of the materials are available at your local hardware store, thrift shop, or even already sitting in your garage.
Materials and Tools You’ll Need
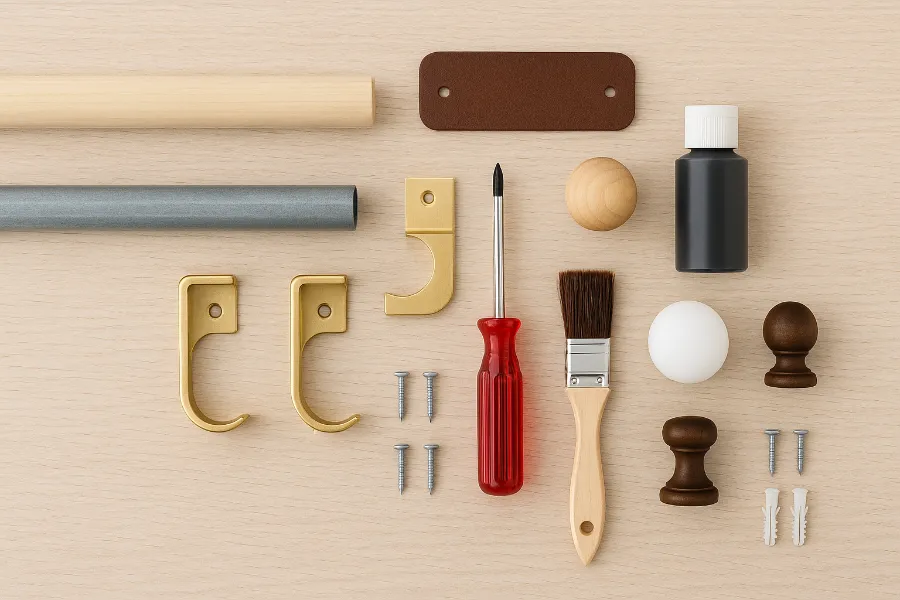
Before diving into specific styles, let’s cover the basics. Depending on the project, you’ll need some combination of the following:
- Rod base options:
- Wooden dowels
- Conduit pipes
- PVC pipes
- Copper or galvanized pipes
- Supports:
- Curtain brackets
- DIY leather straps
- Shelf brackets
- Finials (the decorative ends):
- Store-bought finials
- Ping pong balls
- Wine corks
- Wooden spheres
- Tools:
- Drill
- Screws & anchors
- Measuring tape
- Hacksaw (for cutting pipes)
- Paint or spray paint
With these basics, you can build dozens of different styles.
DIY Curtain Rod Styles and Tutorials
Wooden Dowel Curtain Rods
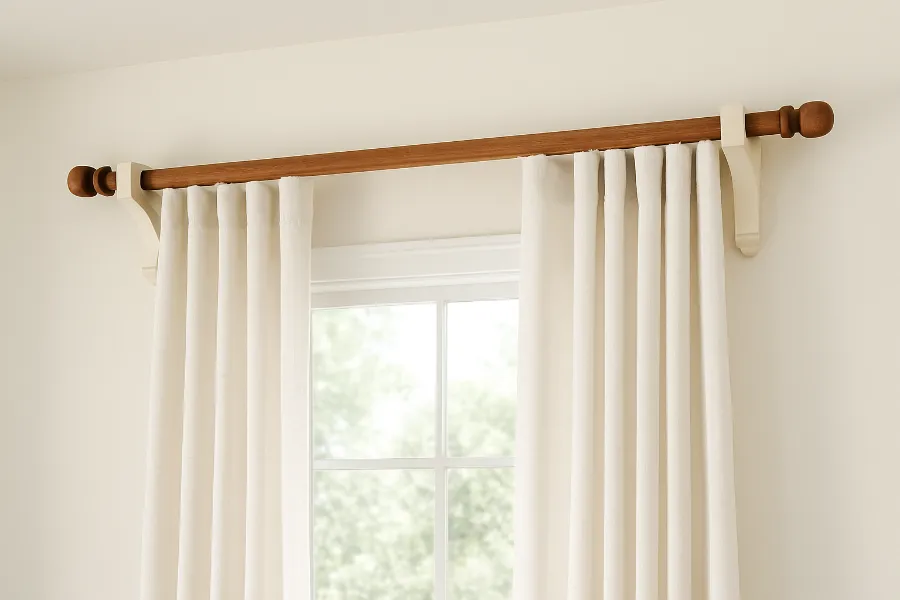
A classic choice that works in almost any room. Buy a wooden dowel (usually $3–$8 depending on length and thickness), cut it to size, and stain or paint it to match your décor. Add simple brackets and you’re done. For a farmhouse look, use a distressed finish; for modern spaces, go sleek black or crisp white.
Conduit Pipe Curtain Rods
Electrical conduit pipes are sturdy, affordable, and available in long lengths—perfect for wide windows or patio doors. Spray paint them black or bronze for an industrial look, or gold for glam. Pair with inexpensive pipe fittings as finials, and you’ll have a strong, stylish rod for under $15.
PVC Curtain Rods
Lightweight and super cheap, PVC pipes are great for large projects or outdoor areas. Paint them with spray paint made for plastics, add end caps, and you’ve got a budget-friendly option that looks far more expensive than it is.
Copper Pipe Curtain Rods
Copper pipes add instant warmth and sophistication. They’re perfect if you’re after a modern, chic aesthetic. Use copper caps as finials, and let the natural patina develop over time for added character.
Rustic Farmhouse Curtain Rods
For a cozy farmhouse vibe, try wood rods paired with chunky brackets or leather straps. Stain the wood with a weathered finish, or wrap the brackets with twine for added texture. This style works beautifully with linen or burlap curtains.
Extra-Long Curtain Rods
Have a big bay window or need to span an extra-wide wall? Use a conduit pipe or multiple dowels connected with a sleeve coupler. Just remember to add extra supports in the middle to keep it from sagging.
Creative Finials
Skip pricey store finials and get creative:
- Paint ping pong balls to match your rod.
- Insert wine corks for a rustic touch.
- Use wooden spheres, brass caps, or even old drawer knobs.
A small detail like this can completely change the feel of your curtain rod.
Leather Strap Supports
Instead of metal brackets, cut thick leather straps, loop them around the rod, and secure them to the wall with screws. This adds a soft, modern-boho touch and works especially well with wooden rods.
Bay Window Solutions
Bay windows can be tricky, but a flexible DIY approach solves it. Use smaller rods or pipes connected with elbow joints at the corners. This way, curtains glide around smoothly without gaps.
Outdoor Curtain Rods
For porches or patios, choose PVC or conduit rods since they handle weather better. Pair with outdoor brackets or hooks, and consider weather-resistant spray paint to extend their life.
Tips and Tricks for Installation
Even the best DIY curtain rods can flop without proper installation. Here’s how to get it right:
- Measure twice, cut once – Always measure the window width and add extra length (4–8 inches on each side) so curtains frame the window properly.
- Mind the weight – Heavy curtains need sturdier rods and more brackets. Add center supports for rods longer than 6 feet.
- Wall anchors are your friend – Especially if you’re not drilling into studs.
- Level up – Use a level before securing brackets to avoid saggy or uneven rods.
- Don’t fear spray paint – A coat of black, bronze, or gold spray paint instantly makes inexpensive materials look designer.
Bringing It All Together
At the end of the day, DIY curtain rods let you blend creativity with practicality. You’ll save money, get exactly the look you want, and add a personal touch to your space. From industrial conduit rods to chic copper pipes, rustic wooden dowels, or playful DIY finials, there’s a project for every style and skill level.
So grab your tools, head to the hardware store (or raid your garage), and start building. Once you see your curtains hanging beautifully on rods you made yourself, you’ll never go back to the overpriced store versions again.


")


")