

•Melt 1 cup of chocolate and 1 tablespoon shortening in the microwave for thirty second intervals, stirring between, until smooth.
•Using a spoon, “paint” the inside of a foil cupcake liner with the melted chocolate. Ideally the sides and bottom will have less than 1/8” coating, otherwise it is difficult to break apart with a spoon when eating.
•Allow the chocolate cups to dry for about an hour (or refrigerate to speed up the drying process), then peel the foil from the cups carefully.


•Melt ½ cup chocolate chips (shortening isn’t necessary for this) in the microwave at 30 second intervals until smooth.
•Fill an icing bag with the melted chocolate (see below!)


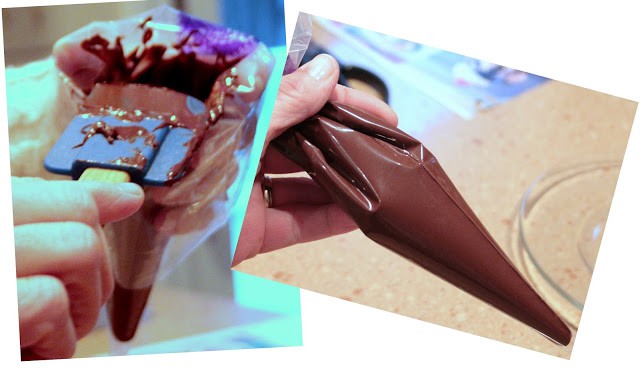
HOW TO FILL AN ICING BAG
Here’s how to fill an icing bag without getting icing or chocolate all over you, the bag and your kitchen!
•Hold the middle of the bag in one hand and fold a few inches of the top over your fingers.
•Using a flexible spatula, scoop up the chocolate and scrape it into the bag.
•Squeeze all the chocolate down toward the tip of the bag, like you would a tube of toothpaste, then twist the top portion closed.
•Snip off a tiny corner from the tip of the bag to squeeze chocolate out.


Val says
These would be such a special treat for love day!!
Lobster Meets Peach says
This will be so fun to do with the kiddos! Thank you for sharing!!!
Kathy C. says
So fun and delish!!
Andrea says
Great ideas. My kids would have so much fun with this.
Nancy says
What a great activity with your kids. Makes me crave some choco right now..thanks! Have a great week.
xo Nancy
Powellbrowerhome.com
Cassie @ Primitive & Proper says
chocolate cups= pure genius
pam {simple details} says
A sweet must for Valentines Day! Love the first photo with those SYL signature dots and great fonts!
Jennifer @ Dimples and Tangles says
What a talented assistant you have! I have never made any of these things with chocolate…adding it to the to-make list!